
floyoofficial
21.9k
Marketing
Photography
Production
Text2Image
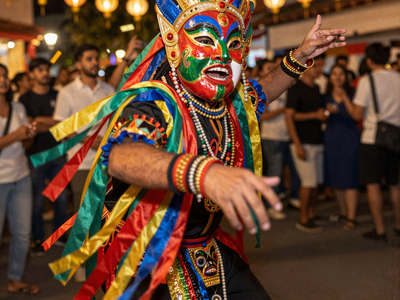
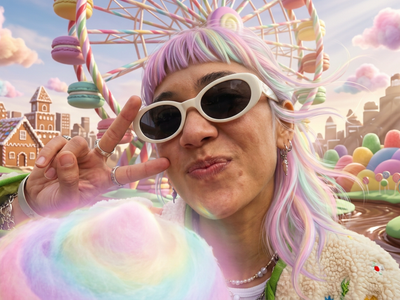
Z-Image Turbo
Fast Image Generation in Seconds
Z-Image Turbo: Fast Image Generation in Seconds
Fast Image Generation in Seconds
floyoofficial
7.0k
image to video
lora
Video Generation
wan 2.2
Generate high quality video from a start frame, as well as an optional end frame with this Wan2.2 14b Image to Video workflow!
Wan 2.2 14B: Image to Video + End Frame
Generate high quality video from a start frame, as well as an optional end frame with this Wan2.2 14b Image to Video workflow!
floyoofficial
6.8k
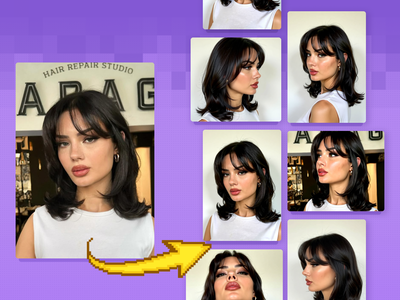
character consistency
Dataset
Image to Image
LoRA
Qwen Image Edit 2509
Create Character LoRA Dataset
Qwen Image Edit 2509: Build a LoRA Dataset
Create Character LoRA Dataset
floyoofficial
14.6k
API
gemini 3 pro
Image2Image
typography
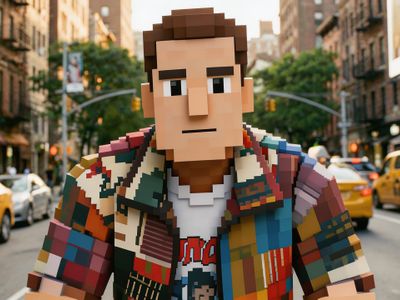
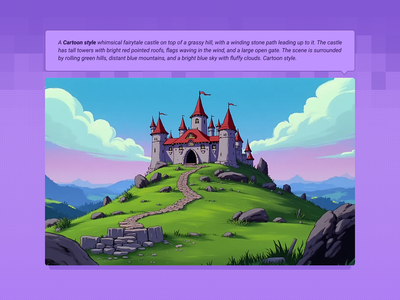
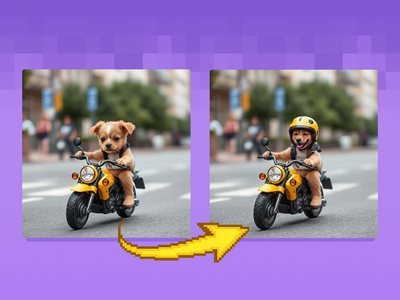
Google just released Nano Banana Pro, and honestly, it's a pretty big step up from the original Nano Banana. The main thing? It can actually put legible text in images now. Like, real text that you can read, not the garbled nonsense most AI models spit out.
Nano Banana Pro: Generate & Edit Images
Google just released Nano Banana Pro, and honestly, it's a pretty big step up from the original Nano Banana. The main thing? It can actually put legible text in images now. Like, real text that you can read, not the garbled nonsense most AI models spit out.

floyoofficial
4.6k
FusionX
Image to Video
Video Generation
Wan
Created by @vrgamedevgirl on Civitai, please support the original creator!
Wan 2.1 FusionX: Cinematic Image to Video
Created by @vrgamedevgirl on Civitai, please support the original creator!
floyoofficial
9.5k
Image to Image
Text to Image
Z-Image Turbo
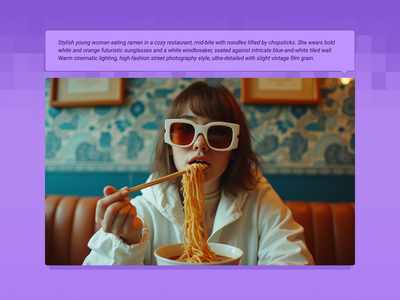
Workflow for text-to-image and image-to-image generation
Z-Image Turbo: Text or Image to Image
Workflow for text-to-image and image-to-image generation
floyoofficial
4.4k
API
Flux
LoRa Training
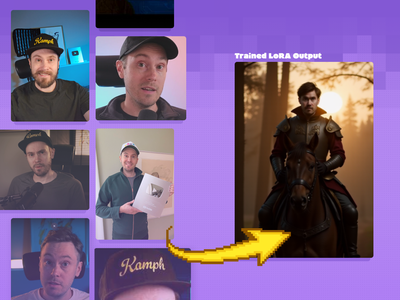
FLUX is great at generating images, but locking in a specific aesthetic or character is easier with a LoRA. Here's how to create your own.
Fast LoRA Training for Flux via Floyo API
FLUX is great at generating images, but locking in a specific aesthetic or character is easier with a LoRA. Here's how to create your own.
Wan 2.6 Reference to Video
floyoofficial
5.8k
API
Image2Image
image restoration
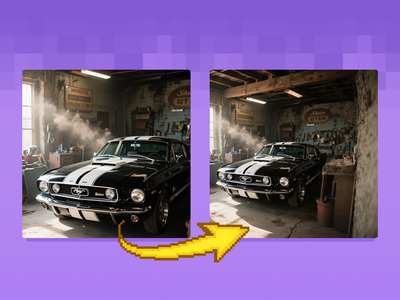
SeedVR2
SeedVR Upscale
super resolution
Upscale to Extreme Clarity
SeedVR2: Upscale Images to Extreme Clarity
Upscale to Extreme Clarity
floyoofficial
8.0k
grok imagine
image to video
video generation
Turn images into excellent video using the Grok Imagine
Grok Imagine: Image to Video with Audio
Turn images into excellent video using the Grok Imagine

LTX 2.3 Pro Image to Video
LTX 2.3
floyoofficial
2.5k
Flux Kontext
Lineart
Previz
Sketch to Image
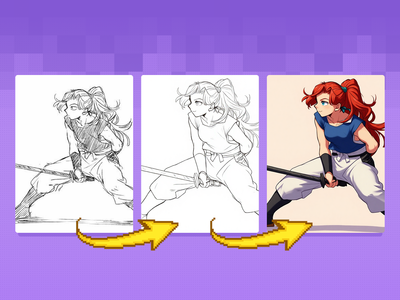
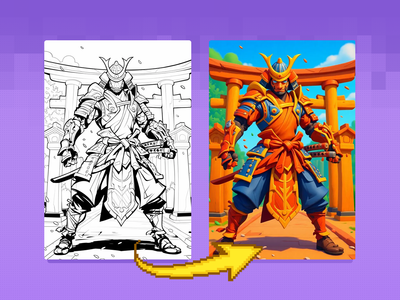
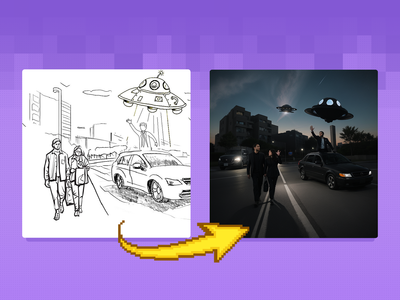
Quickly convert rough sketches into polished lineart and colorized concepts. Ideal for early storyboards, character designs, scene planning, and other visual explorations.
Flux Kontext Sketch to LineArt + Color Previz
Quickly convert rough sketches into polished lineart and colorized concepts. Ideal for early storyboards, character designs, scene planning, and other visual explorations.

Wan2.2 Animate Character
Wan 2.2

floyoofficial
1.1k
360
Image2Video
Wan2.1
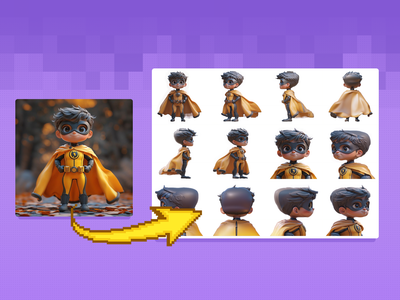
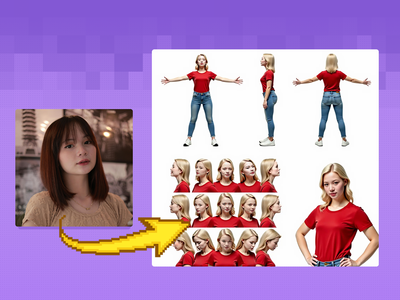
See an image of a character spin 360 degrees. Key Inputs Image reference: Use any JPG or PNG showing your subject clearly Width & height: Default resolution settings are noted: Default image resize resolution works best for portrait images, if the image is landscape change from 480x832 to 832x480 Prompt: Follow example format: The video shows (describe the subject), performs a r0t4tion 360 degrees rotation. Denoise: The amount of variance in the new image. Higher has more variance. File Format: H.264 and more
Image to Character Spin
See an image of a character spin 360 degrees. Key Inputs Image reference: Use any JPG or PNG showing your subject clearly Width & height: Default resolution settings are noted: Default image resize resolution works best for portrait images, if the image is landscape change from 480x832 to 832x480 Prompt: Follow example format: The video shows (describe the subject), performs a r0t4tion 360 degrees rotation. Denoise: The amount of variance in the new image. Higher has more variance. File Format: H.264 and more
Qwen Image Edit 2509: Face Swap
Face Swap and Inpainting
floyoofficial
6.2k
Controlnet
Depth
Image2Image
Photography
Portrait
Pose Control
Z-Image-Turbo
Image to Image
Z-Image Turbo: ControlNet Image to Image
Image to Image
floyoofficial
2.4k
Animation
Image to Video
Kling 2.6
motion transfer
Create an excellent for movement for your characters using Kling 2.6 Standard Motion Control
Kling 2.6 Motion Control: Animate Images
Create an excellent for movement for your characters using Kling 2.6 Standard Motion Control
floyoofficial
5.1k
Filmmaking
LTX 2
LTX 2 Fast
Open Source
Text2Video
Videography
A text video model using LTX 2
LTX-2 19B Fast: Text to Video + Audio
A text video model using LTX 2
floyoofficial
1.6k
Character Sheet
Controlnet
Flux
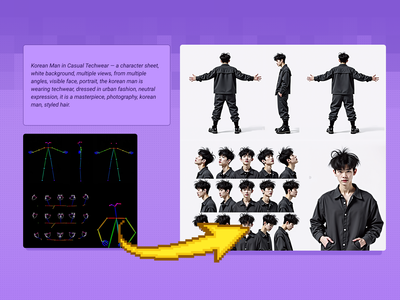
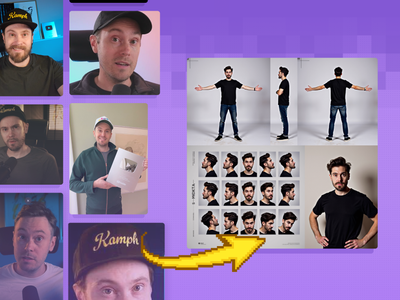
Create a character and a range of consistent outputs suitable for establishing character consistency, training a model, and ensuring consistency throughout multiple scenes. Key Inputs Image reference: Use the included pose sheet to show range of positions Prompt: as descriptive a prompt as possible
Flux Text to Character Sheet
Create a character and a range of consistent outputs suitable for establishing character consistency, training a model, and ensuring consistency throughout multiple scenes. Key Inputs Image reference: Use the included pose sheet to show range of positions Prompt: as descriptive a prompt as possible
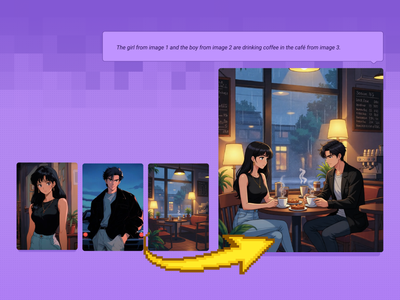
Qwen 2509: Combine Multiple Images Into One Scene

floyoofficial
3.7k
Outpainting
Video to Video
Wan
Wan VACE video outpainting invites you to break free from the limits of the frame and explore endless creative possibilities.
Wan2.1 and VACE for Video to Video Outpainting
Wan VACE video outpainting invites you to break free from the limits of the frame and explore endless creative possibilities.
ComfyUI Flux LoRA Trainer
Created by @Kijai on Github, please support the original creator!
Qwen Image Edit - Edit Image Easily
floyoofficial
1.7k
Flux
Kontext
Sketch to Image
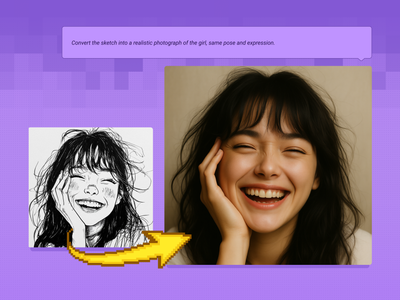
Bring your sketches to life in full color with Flux Kontext! Key Inputs Load Image – Upload the sketch you want to transform. Prompt – Describe the desired output style, such as: “Render this sketch as a realistic photo” or “Turn this sketch into a watercolor painting.”
Flux Kontext - Sketch to Image
Bring your sketches to life in full color with Flux Kontext! Key Inputs Load Image – Upload the sketch you want to transform. Prompt – Describe the desired output style, such as: “Render this sketch as a realistic photo” or “Turn this sketch into a watercolor painting.”
floyoofficial
4.6k
API
gemini flash image
Image2Image
Text2Image
typography
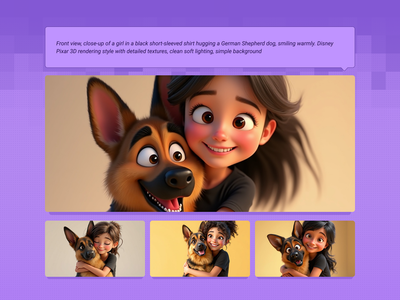
The top-ranked image model on Artificial Analysis and LM Arena. 4K output, text rendering, and subject consistency across 5 characters.
Nano Banana 2: Fast Image Generation & Editing
The top-ranked image model on Artificial Analysis and LM Arena. 4K output, text rendering, and subject consistency across 5 characters.
Flux Dev: Text to Image + Image Input
Animation
Filmmaking
Flux
Game Development
LoRA
Text to Image
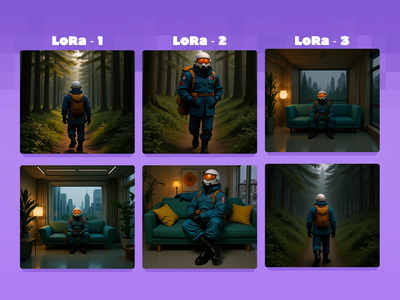
Test and compare multiple epochs of a character LoRA side by side with preset prompts When training a LoRA, you'll usually have a few checkpoints throughout the process to test. This workflow lets you load up to 4 LoRAs to test side by side, making it easier to determine which one is right for you! Key Inputs: LoRA Loaders: Load each LoRA epoch for the same character in up to 4 groups. Groups Bypasser: Enable/disable groups as needed. If you only have 2 epochs to test, disable the back 2 groups! Triggerword: Simply add the trigger word for your LoRA and it will auto-fill in the default prompts. Leave blank if you're using your own custom prompts that include the trigger word. LoRA Testing Prompts: Default prompts work well to get an idea of how your character will look in different situations, but feel free to replace them with your own prompts (max 4).
Flux Character LoRA Test and Compare
Test and compare multiple epochs of a character LoRA side by side with preset prompts When training a LoRA, you'll usually have a few checkpoints throughout the process to test. This workflow lets you load up to 4 LoRAs to test side by side, making it easier to determine which one is right for you! Key Inputs: LoRA Loaders: Load each LoRA epoch for the same character in up to 4 groups. Groups Bypasser: Enable/disable groups as needed. If you only have 2 epochs to test, disable the back 2 groups! Triggerword: Simply add the trigger word for your LoRA and it will auto-fill in the default prompts. Leave blank if you're using your own custom prompts that include the trigger word. LoRA Testing Prompts: Default prompts work well to get an idea of how your character will look in different situations, but feel free to replace them with your own prompts (max 4).
_1776927727959.webp?width=400&height=300&quality=80&resize=cover)
floyoofficial
1.6k
Animation
Filmmaking
Image2Video
LTX 2 Pro
Video Editing
video with audio
Image to Video using LTX 2 Pro API
LTX 2 Pro: Cinematic Image to Video
Image to Video using LTX 2 Pro API
API
Flux
Text to Image
Start with a prompt, and get a different render from a range of unique models at the same time.
Multi-Image Flux Ultra, Pro, Dev, Recraft+
Start with a prompt, and get a different render from a range of unique models at the same time.
_1758863167371.webp?width=400&height=300&quality=80&resize=cover)
floyoofficial
1.2k
Flux
Flux Kontext
Image2Image
kontext
panorama
Flux Kontext 360° Workflow - Seamless Panorama Generation Input: Simply upload an image in the "Load Image from Outputs" node Output: A 360° Panoramic image
Flux Kontext and HD360 LoRA for 360 Degree View
Flux Kontext 360° Workflow - Seamless Panorama Generation Input: Simply upload an image in the "Load Image from Outputs" node Output: A 360° Panoramic image
floyoofficial
3.5k
Controlnet
Flux
Video2Video
Wan2.1
Create a new video by restyling an existing video with a reference image.
Wan2.1 Fun Control and Flux for V2V Restyle
Create a new video by restyling an existing video with a reference image.
floyoofficial
8.4k
Animation
Film
Image2Video
VFX
Wan2.6
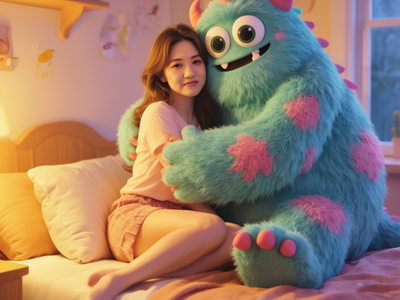
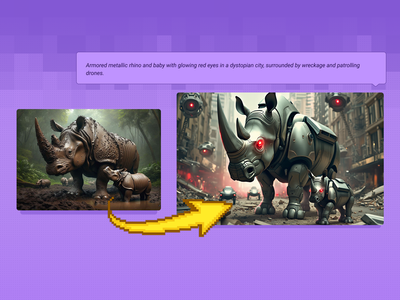
Turn a still into a multi-shot clip with audio using Wan 2.6 by Alibaba. Upload an image, describe the scene, hit run, and get a 720P video with synced sound.
Wan 2.6: Multi-Shot Image to Video
Turn a still into a multi-shot clip with audio using Wan 2.6 by Alibaba. Upload an image, describe the scene, hit run, and get a 720P video with synced sound.

Video to Video with Camera Control with Wan
Adjust the camera angle of an existing video, like magic.
floyoofficial
1.2k
API
Floyo API
Image to Video
Seedance 1.5 Pro
Draft mode lets you first experiment at a low cost by generating 480p draft videos
Seedance 1.5 Pro with Draft Mode
Draft mode lets you first experiment at a low cost by generating 480p draft videos
360° Character Turnaround & Sheet Workflow
floyoofficial
3.7k
Flux
Flux.2 Klein
Image2image
instruction editing
multi-image
Unified workflow: one model for text‑to‑image, image‑to‑image, and image editing
FLUX.2 Klein 9B: Edit Images by Prompt
Unified workflow: one model for text‑to‑image, image‑to‑image, and image editing
floyoofficial
1.1k
flux
flux kontext
kontext
sebastian kamph
Load an image reference and use the smart Flux Kontext model to ask for anything. The model understands natural language and looks at your input image. Example: Put this man on a tropical island. This man is sleeping in a bed.
Flux Kontext - Quick & Easy
Load an image reference and use the smart Flux Kontext model to ask for anything. The model understands natural language and looks at your input image. Example: Put this man on a tropical island. This man is sleeping in a bed.
floyoofficial
2.8k
Clothes Swap
Flux
Flux.2 Klein
Image Editing
Image to Image
virtual try-on
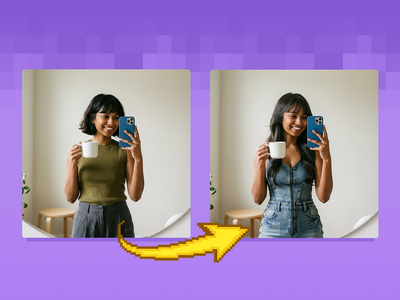
Replace clothes using the Flux.2 Klein 4B
FLUX.2 Klein 4B and LanPaint for Swap Clothes
Replace clothes using the Flux.2 Klein 4B
floyoofficial
1.3k
Flux
Image
UltimateSD
Upscale
A simple workflow to enlarge & add detail to an existing image. Key Inputs Image: Use any JPG or PNG Upscale by: The factor of magnification Denoise: The amount of variance in the new image. Higher has more variance.
Flux Image Upscaler with UltimateSD
A simple workflow to enlarge & add detail to an existing image. Key Inputs Image: Use any JPG or PNG Upscale by: The factor of magnification Denoise: The amount of variance in the new image. Higher has more variance.
FlashVSR Upscale Your Videos Instantly
floyoofficial
1.5k
Flux
Text2Image
Create original images using only text prompts, which can be simple or elaborate. Key Inputs Prompt: as descriptive a prompt as possible Width & height: Optimal resolution settings are noted
Flux Text to Image
Create original images using only text prompts, which can be simple or elaborate. Key Inputs Prompt: as descriptive a prompt as possible Width & height: Optimal resolution settings are noted

floyoofficial
2.3k
Recammaster
Video to Video
Wan
Adjust the camera angle of an existing video, like magic.
Wan2.1 and RecamMaster for V2V Camera Control
Adjust the camera angle of an existing video, like magic.
floyoofficial
1.7k
Image2Video
Start and end frame
Wan2.1
Used for image to video generation, defined by the first frame and end frame images.
Wan2.1 Start & End Frame Image to Video
Used for image to video generation, defined by the first frame and end frame images.
_1767601871879.png?width=400&height=300&quality=80&resize=cover)
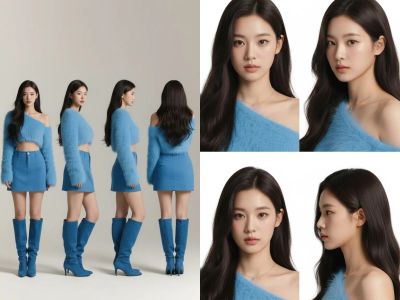
Character + Outfit → High-End Editorial Shoot
_1758870047277.webp?width=400&height=300&quality=80&resize=cover)
floyoofficial
3.1k
Animation
Filmmaking
Image to Video
Lipsync
Marketing
Multitalk
Wan2.1
Turn any portrait - artwork, photos, or digital characters - into speaking, expressive videos that sync perfectly with audio input. MultiTalk handles lip movements, facial expressions, and body motion automatically.
Wan2.1 FusionX and MultiTalk - Image to Video
Turn any portrait - artwork, photos, or digital characters - into speaking, expressive videos that sync perfectly with audio input. MultiTalk handles lip movements, facial expressions, and body motion automatically.
Image-to-Video with Reference Video (Prompt-Based Camera Rotation)
floyoofficial
4.5k
concept art
Fine-tuning
Text2Image
Z-Image
Z-image-base
Create sunning images using z-image base model (non distlled).
Z-Image Base: High-Detail Text to Image
Create sunning images using z-image base model (non distlled).
floyoofficial
3.5k
Image2Image
Image Editing
Seedream 5.0
Text2Image
ByteDance's latest image model. Text-to-image, image editing, and multi-reference composition in one workflow.
Seedream 5.0 Lite: Generate, Edit & Fuse Images
ByteDance's latest image model. Text-to-image, image editing, and multi-reference composition in one workflow.
Text to Image with Multi-LoRA
Create consistent images with multiple LoRA models.
Z-Image Turbo + DyPE + SeedVR2 2.5 + TTP 16k reso
Controlnet
Flux
Image
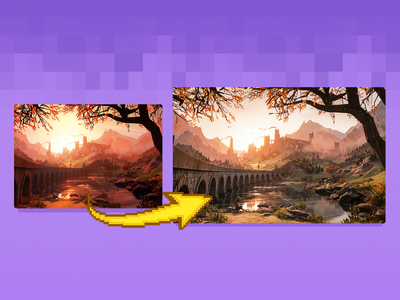
Transform your images into something completely new, yet retaining specific details and composition from your original using flexible controls. Key Inputs Image reference: Use any JPG or PNG showing your subject clearly Prompt: as descriptive a prompt as possible Denoise Strength: The amount of variance in the new image. Higher has more variance. Width & height: Try and match the aspect ratio of the original if possible.
Image to Image with Flux ControlNet
Transform your images into something completely new, yet retaining specific details and composition from your original using flexible controls. Key Inputs Image reference: Use any JPG or PNG showing your subject clearly Prompt: as descriptive a prompt as possible Denoise Strength: The amount of variance in the new image. Higher has more variance. Width & height: Try and match the aspect ratio of the original if possible.

VibeVoice: Single-Speaker Text to Speech
VibeVoice
floyoofficial
1.4k
Ace+
Fashion
Flux
Image to Image
Virtual Try-on
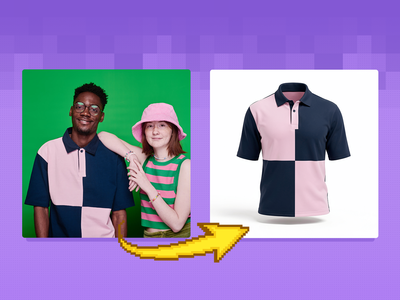
Virtual Outfit Try-On with Auto Segmentation Try virtual clothing on any subject using Flux Dev, Ace Plus, and Redux, with automatic segmentation. Great for concept previews, fashion mockups, or character styling. Key Inputs Outfit: Load the outfit image you want to apply. Make sure it's high quality — visible artifacts or distortions may carry over into the final result. Actor: Add the subject or character you want to dress. Ideally, use a clear, front-facing image. Human Parts Ultra: Choose which parts of the body the clothing should apply to. For example, for a long-sleeve shirt, select: torso, left arm, and right arm. This helps the model align the clothing properly during generation. Prompt: Default value works for most outfits, however you may try to adjust it to describe the desired outfit.
Flux Outfit Transfer
Virtual Outfit Try-On with Auto Segmentation Try virtual clothing on any subject using Flux Dev, Ace Plus, and Redux, with automatic segmentation. Great for concept previews, fashion mockups, or character styling. Key Inputs Outfit: Load the outfit image you want to apply. Make sure it's high quality — visible artifacts or distortions may carry over into the final result. Actor: Add the subject or character you want to dress. Ideally, use a clear, front-facing image. Human Parts Ultra: Choose which parts of the body the clothing should apply to. For example, for a long-sleeve shirt, select: torso, left arm, and right arm. This helps the model align the clothing properly during generation. Prompt: Default value works for most outfits, however you may try to adjust it to describe the desired outfit.
floyoofficial
1.3k
composite
Image to Image
portrait
product photography
qwen image edit 251
Reference Image
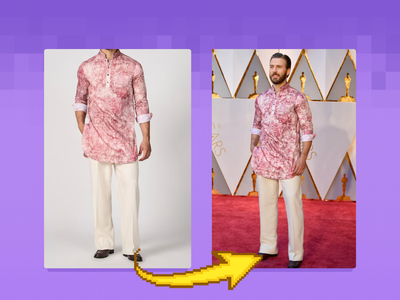
Drop a person into any background with the lighting you choose, using Qwen Image Edit 2511. Upload three images, hit run, and keep the identity intact.
Qwen Image Edit 2511: Composite a Photoshoot
Drop a person into any background with the lighting you choose, using Qwen Image Edit 2511. Upload three images, hit run, and keep the identity intact.
_1767784624270.png?width=400&height=300&quality=80&resize=cover)
API
Ecommerce
Image2Image
Nano Banana Pro
Product Ads
Create grids of different angles for your ecommerce products.
Nano Banana Pro for Multi Grid View of Product Ads
Create grids of different angles for your ecommerce products.
_1762434919692.gif?width=400&height=300&quality=80&resize=cover)
VEO3 Future of Video Creation
Flux 2 Text-to-Image Generation

floyoofficial
1.0k
3D View
Animation
Architecture
Filmmaking
Game Development
Hunyuan 3D
Hunyuan3D
Image to 3D
A simple workflow to create a detailed & textured 3D model from a reference image.
Image to 3D with Hunyuan3D
A simple workflow to create a detailed & textured 3D model from a reference image.
floyoofficial
1.1k
Flux
LoRa
Text2Image
Create an image from a trained AI model of something specific ( a specific figure, outfit, art style, product etc) to ensure specific details within.
Text to Image + LoRA model
Create an image from a trained AI model of something specific ( a specific figure, outfit, art style, product etc) to ensure specific details within.

floyoofficial
1.6k
API
Hunyuan
LORA Training
Hunyuan is great at generating videos, but locking in a specific aesthetic or character is easier with a LoRA.
LoRA Training Video with Hunyuan
Hunyuan is great at generating videos, but locking in a specific aesthetic or character is easier with a LoRA.
Character Sheet
Controlnet
Flux
Generate a character sheet using a prompt and a LoRA model of a particular person for more accurate renders. Key Inputs Load Image: Use any JPG or PNG of your pose sheet Prompt: as descriptive a prompt as possible Width & height: Optimal resolution settings are noted at 1280px x 1280px Denoise: The amount of variance in the new image. Higher has more variance. ControlNet Strength: The amount of adherence to the original image. Higher has more adherence. Start Percent: The point in the generation process where the control starts exerting influence. (Have it start later, to let AI imagine first.) End Percent: The point in the generation process where the control stops exerting influence. (Have it end sooner, to let AI finish it off with some variation.) Flux Guidance: How much influence the prompt has over the image. Higher has more guidance.
Text to Character Sheet with a reference LoRA
Generate a character sheet using a prompt and a LoRA model of a particular person for more accurate renders. Key Inputs Load Image: Use any JPG or PNG of your pose sheet Prompt: as descriptive a prompt as possible Width & height: Optimal resolution settings are noted at 1280px x 1280px Denoise: The amount of variance in the new image. Higher has more variance. ControlNet Strength: The amount of adherence to the original image. Higher has more adherence. Start Percent: The point in the generation process where the control starts exerting influence. (Have it start later, to let AI imagine first.) End Percent: The point in the generation process where the control stops exerting influence. (Have it end sooner, to let AI finish it off with some variation.) Flux Guidance: How much influence the prompt has over the image. Higher has more guidance.
floyoofficial
6.3k
FLUX
FLUX.2 Klein
Image2Image
LoRA
realism
Create realistic image but in an enhanced details using FLUX.2 Klein 9B and with LoRA
FLUX.2 Klein 9B: Realistic Photo Enhancer
Create realistic image but in an enhanced details using FLUX.2 Klein 9B and with LoRA
_1774195486846.webp?width=400&height=300&quality=80&resize=cover)
Kling 3.0 Pro for Image to Video
Turn images into a video using Kling 3.0 Pro
_1771834011124.gif?width=400&height=300&quality=80&resize=cover)
Influencer
Product
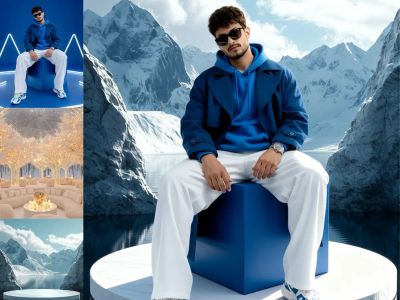
Build your AI influencer, stage the product moment, and animate the full promo in one workflow.
AI Influencer Ad Generator (Nano Banana + Wan 2.6)
Build your AI influencer, stage the product moment, and animate the full promo in one workflow.

AnimateDiff
Control Image
HotshotXL
SDXL
Video2Video
Breathe life into a character from an image reference using motion reference from a video. Key Inputs Image reference: Use any JPG or PNG showing your subject clearly and the style of your shot Load Video: Use any Mp4 that you would like to use for motion reference
Video to Video with Control Image
Breathe life into a character from an image reference using motion reference from a video. Key Inputs Image reference: Use any JPG or PNG showing your subject clearly and the style of your shot Load Video: Use any Mp4 that you would like to use for motion reference
AniSora 3.2 and Wan2.2: Best Practices for Generating Smooth Character 3D Spin
%20(1)_1775891000879.webp?width=400&height=300&quality=80&resize=cover)
floyoofficial
3.6k
seedance
seedance 2.0
text to video
video generation
Generate up to 15-second videos with native audio from a text prompt using ByteDance's Seedance 2.0. Pick your aspect ratio, resolution, and duration.
Seedance 2.0 - Text to Video
Generate up to 15-second videos with native audio from a text prompt using ByteDance's Seedance 2.0. Pick your aspect ratio, resolution, and duration.
Qwen Image Edit 2509: Change Camera Angle
Kling Omni One Video to Video Edit
animation
film production
image to video
video generation
wan
Turn any still image into a short 6-second video clip with Alibaba's Wan 2.7 model. Upload your photo, describe the motion you want, and run. 1080P output.
Wan 2.7 Image to Video
Turn any still image into a short 6-second video clip with Alibaba's Wan 2.7 model. Upload your photo, describe the motion you want, and run. 1080P output.
Character Sheet
Image to Image
SDXL
Generate a character sheet with multiple angles from a single input image as reference. Key Inputs Image reference: Use any JPG or PNG showing your subject clearly. If you're trying to create a full body output, a full body input must be provided.
Image to Character Sheet
Generate a character sheet with multiple angles from a single input image as reference. Key Inputs Image reference: Use any JPG or PNG showing your subject clearly. If you're trying to create a full body output, a full body input must be provided.
Wan2.2 Fun and RealismBoost LoRA for V2V

floyoofficial
2.0k
Image
Inpaint
LoRa
Change specific details on just a portion of the image for inpainting or Erase & Replace, adding a LoRA for extra control.
Image Inpainting with LoRA
Change specific details on just a portion of the image for inpainting or Erase & Replace, adding a LoRA for extra control.
HunyuanVideo Foley: Create a Lifelike Sound
floyoofficial
1.1k
character replacement
character swap
image to video
masking
Points Editor
vertical video
Wan2.2 Animate
WanAnimateToVideo
Vertical Video Character Face & Actor Swap (Wan 2.2 Animate)
Seedance I2V: Image to Video in Minutes

floyoofficial
2.0k
API
Controlnet
Floyo API
Image2Image
LoRA
Z-Image Turbo
Creating Accurate Variety of Images
Z-Image Turbo with Controlnet 2.1 and Qwen VLM
Creating Accurate Variety of Images
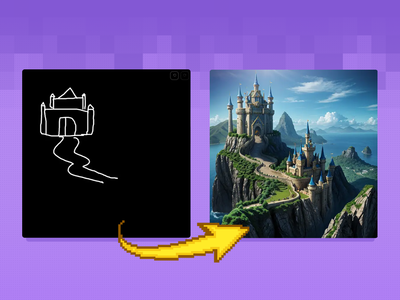
Controlnet
SD1.5
Turn your scribbles into a beautiful image with only a drawing tool and a text prompt. Key Inputs Scribble: Create your scribble with the painting and design tools Prompt: as descriptive a prompt as possible Width & height: Optimal resolution settings are noted ControlNet Strength: The amount of adherence to the original image. Higher has more adherence. Start Percent: The point in the generation process where the control starts exerting influence. (Have it start later, to let AI imagine first.) End Percent: The point in the generation process where the control stops exerting influence. (Have it end sooner, to let AI finish it off with some variation.)
Scribble to Image
Turn your scribbles into a beautiful image with only a drawing tool and a text prompt. Key Inputs Scribble: Create your scribble with the painting and design tools Prompt: as descriptive a prompt as possible Width & height: Optimal resolution settings are noted ControlNet Strength: The amount of adherence to the original image. Higher has more adherence. Start Percent: The point in the generation process where the control starts exerting influence. (Have it start later, to let AI imagine first.) End Percent: The point in the generation process where the control stops exerting influence. (Have it end sooner, to let AI finish it off with some variation.)
_1758870606082.webp?width=400&height=300&quality=80&resize=cover)
floyoofficial
1.9k
MMaudio
Video to Video
Generate synchronized audio with a given video input. It can be combined with video models to get videos with audio.
MMAudio: Video to Synced Audio
Generate synchronized audio with a given video input. It can be combined with video models to get videos with audio.
DyPe and Z-Image Turbo for High Quality Text to Image
_1774789046971.png?width=400&height=300&quality=80&resize=cover)
Block-wise Image Upscaling with Qwen
Block-wise Image Upscaling with Qwen
SeC Video Segmentation: Unleashing Adaptive, Semantic Object Tracking
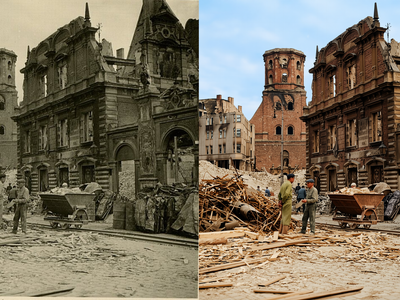
Qwen Image Edit 2511 Restore Damage Old Photograph
Restore Damage Old Photograph
Start/End Frame Multi-Video via Floyo API
Compare between Luma Dream Machine and Kling Pro 1.6 via Fal API

Flux.2 Klein Image Expansion / Outpaint
floyoofficial
1.4k
Anima2
character design
concept art
fantasy
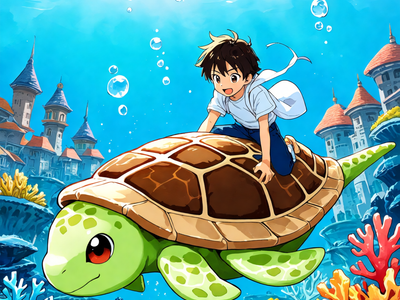
Text2Image
Generate images with Anima 2, a model built for anime and fantasy art. Write a prompt, set your resolution, and get stylized results in one run. Free to try.
Anima Preview 3 - Text to Image
Generate images with Anima 2, a model built for anime and fantasy art. Write a prompt, set your resolution, and get stylized results in one run. Free to try.
Veo 3.1 Image to Video - First Frame and Optional Last Frame
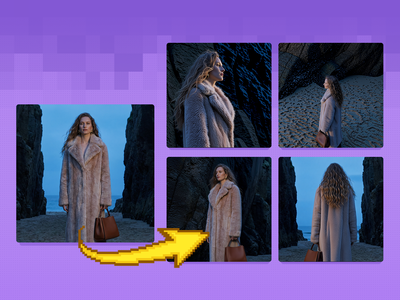
Image2Image
Image Edit
Qwen Image Edit 2511
Create different angle of the image using Qwen Image Edit 2511 and with special node
Camera Angle Control with QwenMultiAngle
Create different angle of the image using Qwen Image Edit 2511 and with special node
floyoofficial
4.5k
Flux
FLUX2 Klein
Photography
photorealism
Text2Image
Create a high quality image using 9B model of Flux 2 Klein
FLUX.2 Klein 9B: Text to Image
Create a high quality image using 9B model of Flux 2 Klein
Flux
Image
Inpaint
Change specific details on just a portion of the image, sometimes known as inpainting or Erase & Replace. Key Inputs Image reference: Use any JPG or PNG showing your subject clearly Masking tools: Right-click to reveal the masking tool option, and create a mask of the desired area to inpaint Prompt: as descriptive a prompt as possible to help guide what you would like replaced in the masked area
Image Inpainting
Change specific details on just a portion of the image, sometimes known as inpainting or Erase & Replace. Key Inputs Image reference: Use any JPG or PNG showing your subject clearly Masking tools: Right-click to reveal the masking tool option, and create a mask of the desired area to inpaint Prompt: as descriptive a prompt as possible to help guide what you would like replaced in the masked area
floyoofficial
5.1k
Flux
Flux.2 Klein
Image2Image
Inpainting
LanPaint
Inpainting image using Flux.2 Klein and LanPaint
FLUX.2 Klein 9B: Image Inpainting
Inpainting image using Flux.2 Klein and LanPaint
Qwen Image 2512 Text to Image
Text to image
Multiple Angle Lighting LoRA + 2511
Wan Alpha Create Transparent Videos
SeedVR2 and TTP Toolset 8k Image Upscale

Masking
Segmentation
Video
Use a video clip and visual markers to segment/create masks of the subject or the inverse. Key Inputs Load Video: Use any Mp4 that you would like to segment or create a mask from Select subject: Use 3 green selectors to identify your subject and one red selector to identify the space outside your subject Modify markers: Shift+Click to add markers, Shift+Right Click to remove markers
Video Masking with Sam2 Comparison
Use a video clip and visual markers to segment/create masks of the subject or the inverse. Key Inputs Load Video: Use any Mp4 that you would like to segment or create a mask from Select subject: Use 3 green selectors to identify your subject and one red selector to identify the space outside your subject Modify markers: Shift+Click to add markers, Shift+Right Click to remove markers
floyoofficial
6.7k
Image to Video
LTX2.3
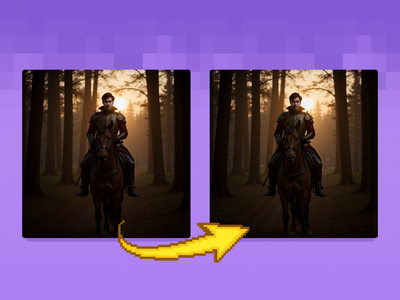
Turn a single portrait into vertical video with LTX 2.3. The VBVR LoRA holds face identity steady and gives motion the physical weight that I2V usually loses.
LTX 2.3 Face-Consistent Image to Video with VBVR
Turn a single portrait into vertical video with LTX 2.3. The VBVR LoRA holds face identity steady and gives motion the physical weight that I2V usually loses.
digital illustration
image to image
recraft
style transfer
text to image
Transform an existing image with Recraft V3. Upload a reference, write a prompt, set strength, and pick a style. Controls how much of the original survives.
Recraft V3 Image to Image - Style Transfer
Transform an existing image with Recraft V3. Upload a reference, write a prompt, set strength, and pick a style. Controls how much of the original survives.
floyoofficial
1.1k
Controlnet
SD1.5
Turn your sketches into full blown scenes. Key Inputs Image reference: Use any JPG or PNG showing your subject clearly Prompt: as descriptive a prompt as possible Width & height: In pixels ControlNet Strength: The amount of adherence to the original image. Higher has more adherence. Start Percent: The point in the generation process where the control starts exerting influence. (Have it start later, to let AI imagine first.) End Percent: The point in the generation process where the control stops exerting influence. (Have it end sooner, to let AI finish it off with some variation.)
Sketch to Image
Turn your sketches into full blown scenes. Key Inputs Image reference: Use any JPG or PNG showing your subject clearly Prompt: as descriptive a prompt as possible Width & height: In pixels ControlNet Strength: The amount of adherence to the original image. Higher has more adherence. Start Percent: The point in the generation process where the control starts exerting influence. (Have it start later, to let AI imagine first.) End Percent: The point in the generation process where the control stops exerting influence. (Have it end sooner, to let AI finish it off with some variation.)

Chatterbox Text to Speech
Text to speech workflow using Chatterbox
Wan2.2 and Bullet Time LoRA: Transform Static Shots into Product Spins
Flux
Image
Redux
Create variations of a given image, or restyle them. It can be used to refine, explore, or transform ideas and concepts. Key Inputs Image reference: Use any JPG or PNG showing your subject clearly Width & height: In pixels Prompt: as descriptive a prompt as possible Strength (step 5: value): Strength of redux model, play around with the value to increase or decrease the amount of variation
Image Redux with Flux
Create variations of a given image, or restyle them. It can be used to refine, explore, or transform ideas and concepts. Key Inputs Image reference: Use any JPG or PNG showing your subject clearly Width & height: In pixels Prompt: as descriptive a prompt as possible Strength (step 5: value): Strength of redux model, play around with the value to increase or decrease the amount of variation
fx-integration
image-to-image
qwen
reference-image
upscaling
video-conditioning
wan21-funcontrol
Vertical Video FX Inserter - Qwen + Wan 2.1 FunControl
floyoofficial
1.8k
character design
consistency
happy horse
image to video
reference to video
video generation
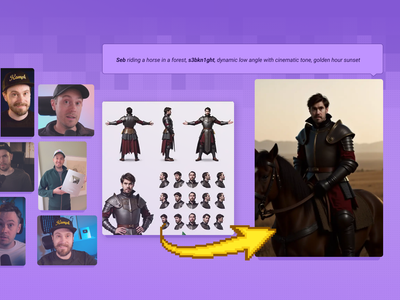
Turn up to 9 reference images plus a prompt into a 5-second video with Happy Horse 1.0. Keep characters, products, and style consistent across the shot.
Happy Horse 1.0 Reference to Video
Turn up to 9 reference images plus a prompt into a 5-second video with Happy Horse 1.0. Keep characters, products, and style consistent across the shot.
Qwen Image Edit 2511 Lightning - Multi-Image Edit
SAM3 for Video Masking using Text
Create a video masking using SAM3 and Text only.
Vertical Video FX Insterter / Element Pass with Seedream + Wan
Light Restoration LoRA + Qwen Image Edit 2509 Image to Image
_1764582642632.webp?width=400&height=300&quality=80&resize=cover)
Vertical Video Light & Mood Shift
Kling Omni One Image to Video
FlatLogColor LoRA and Qwen Image Edit 2509
Character Sheet
Face Swap
Flux
Image
Take a character sheet and use a reference image to replace all the faces with that new person. Key Inputs Load Image: Use any JPG or PNG showing your pose sheet Load New Face: Use any JPG or PNG showing your subject clearly that you would like to swap into the pose sheet. Prompt: as descriptive a prompt as possible Width & height: Optimal resolution settings are noted at 1024px x 1024px Keep Proportion: Enable keep_proportion if you want to keep the same size with input and output Denoise: The amount of variance in the new image. Higher has more variance.
Image to Image Character Sheet Face Swap with Ace+
Take a character sheet and use a reference image to replace all the faces with that new person. Key Inputs Load Image: Use any JPG or PNG showing your pose sheet Load New Face: Use any JPG or PNG showing your subject clearly that you would like to swap into the pose sheet. Prompt: as descriptive a prompt as possible Width & height: Optimal resolution settings are noted at 1024px x 1024px Keep Proportion: Enable keep_proportion if you want to keep the same size with input and output Denoise: The amount of variance in the new image. Higher has more variance.
FLUX
FLUX.2 Klein
Ghost Mannequin
Image2Image
SAM3
Create a ghost mannequin clothes using flux.2 klein, SAM3 and Ghost mannequin LoRA
FLUX.2 Klein 9B + SAM3 + GhostMannequin LoRA
Create a ghost mannequin clothes using flux.2 klein, SAM3 and Ghost mannequin LoRA
floyoofficial
1.3k
character design
consistency
film production
image to video
video generation
wan
Wan 2.7 Reference to Video with Motion Control
Wan 2.7 Reference to Video with Motion Control
Wan 2.7 Reference to Video with Motion Control

Clothing & Accessories Replacement
Animation
Filmmaking
Image2Video
Kling 2.6 Pro
Create stunning videos using Kling 2.6 Pro
Kling 2.6 Pro for Image to Video
Create stunning videos using Kling 2.6 Pro
Wan2.6 Text to Video
LoRa
Text2Video
Wan2.1
Generate a high-quality video from a text prompt and add in a LoRA for extra control over character or style consistency. Key Inputs Prompt: as descriptive a prompt as possible Load LoRA: Load your reference model here Width & height: Optimal resolution settings are noted File Format: H.264 and more
Text to Video and Wan with optional LoRA
Generate a high-quality video from a text prompt and add in a LoRA for extra control over character or style consistency. Key Inputs Prompt: as descriptive a prompt as possible Load LoRA: Load your reference model here Width & height: Optimal resolution settings are noted File Format: H.264 and more
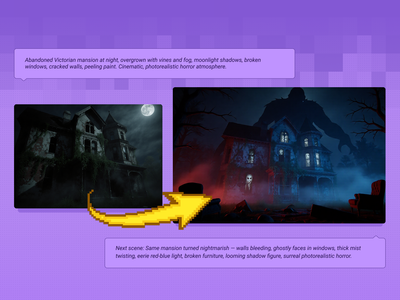
Qwen Image Edit 2509 + Flux Krea for Creating Next Scene
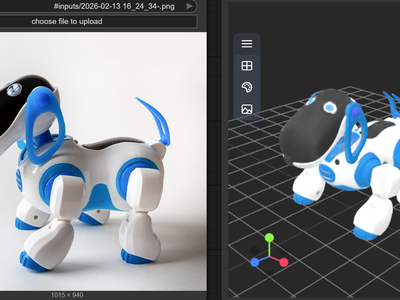
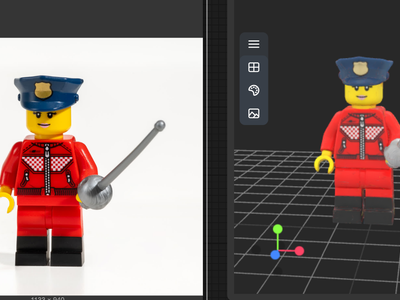
Tripo3D for Image to 3D
Create 3D model using Tripo3D with v2.5
_1761821508019.webp?width=400&height=300&quality=80&resize=cover)
Wan2.2 Fun Camera for Camera Control
floyoofficial
1.3k
3D
3D Model
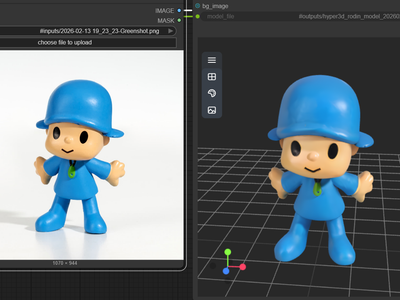
Hyper3D Rodin v2
Image to 3D
Rodin v2
Turn your images into 3D using Hyper3D Rodin v2
Hyper3D Rodin V2 for Image to 3D
Turn your images into 3D using Hyper3D Rodin v2
Nano Banana Pro: Edit Any Image
Wan2.1 InfiniteTalk Video to Video
SAM3 Image Segmentation
Chroma 1 Radiance Text to Image
Chroma 1

Animation
Filmography
Image2Video
LTX 2
Open Source
A workflow for ltx 2 image to video using distilled model
LTX 2 19B Fast for Image to Video
A workflow for ltx 2 image to video using distilled model
Qwen Image Edit – Multi-Angle Camera View
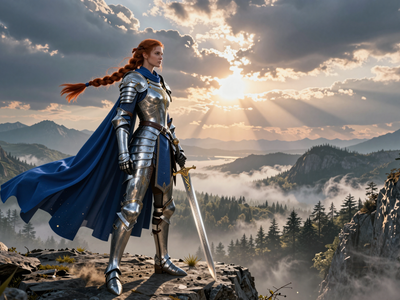
text2image
Wan2.1
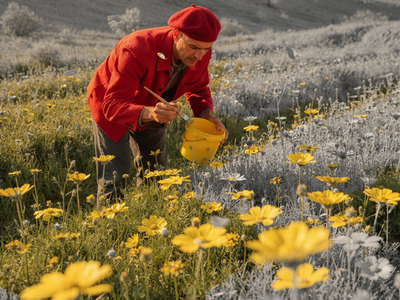
Created by @yanokusnir on Reddit, please support the original creator! https://www.reddit.com/r/StableDiffusion/comments/1lu7nxx/wan_21_txt2img_is_amazing/ If this is your workflow, please contact us at team@floyo.ai to claim it! Original post from the creator: Hello. This may not be news to some of you, but Wan 2.1 can generate beautiful cinematic images. I was wondering how Wan would work if I generated only one frame, so to use it as a txt2img model. I am honestly shocked by the results. All the attached images were generated in fullHD (1920x1080px) and on my RTX 4080 graphics card (16GB VRAM) it took about 42s per image. I used the GGUF model Q5_K_S, but I also tried Q3_K_S and the quality was still great. The only postprocessing I did was adding film grain. It adds the right vibe to the images and it wouldn't be as good without it. Last thing: For the first 5 images I used sampler euler with beta scheluder - the images are beautiful with vibrant colors. For the last three I used ddim_uniform as the scheluder and as you can see they are different, but I like the look even though it is not as striking. :) Enjoy.
Wan 2.1 Text2Image
Created by @yanokusnir on Reddit, please support the original creator! https://www.reddit.com/r/StableDiffusion/comments/1lu7nxx/wan_21_txt2img_is_amazing/ If this is your workflow, please contact us at team@floyo.ai to claim it! Original post from the creator: Hello. This may not be news to some of you, but Wan 2.1 can generate beautiful cinematic images. I was wondering how Wan would work if I generated only one frame, so to use it as a txt2img model. I am honestly shocked by the results. All the attached images were generated in fullHD (1920x1080px) and on my RTX 4080 graphics card (16GB VRAM) it took about 42s per image. I used the GGUF model Q5_K_S, but I also tried Q3_K_S and the quality was still great. The only postprocessing I did was adding film grain. It adds the right vibe to the images and it wouldn't be as good without it. Last thing: For the first 5 images I used sampler euler with beta scheluder - the images are beautiful with vibrant colors. For the last three I used ddim_uniform as the scheluder and as you can see they are different, but I like the look even though it is not as striking. :) Enjoy.
_1767112903535.webp?width=400&height=300&quality=80&resize=cover)
360 Degree Product Video Using Nano Banana Pro
Wan2.1 + WanMOVE for Animating Movement using Trajectory Path
Image2Video
LTX
Video
Used for image to video generation, including first frame, end frame, or other multiple key frames. Key Inputs Load Image (Start Frame): Use any JPG or PNG showing your subject clearly to start your video Load Image (End Frame): Use any JPG or PNG showing your subject clearly to act as the last part of your video. Make sure it's the same resolution as the load image. Width & height: Optimal resolution settings are noted. LTX maximum resolution is 768x512 Prompt: as descriptive a prompt as possible
Image to Video with Multiframe Control
Used for image to video generation, including first frame, end frame, or other multiple key frames. Key Inputs Load Image (Start Frame): Use any JPG or PNG showing your subject clearly to start your video Load Image (End Frame): Use any JPG or PNG showing your subject clearly to act as the last part of your video. Make sure it's the same resolution as the load image. Width & height: Optimal resolution settings are noted. LTX maximum resolution is 768x512 Prompt: as descriptive a prompt as possible
LTX 2.3 Audio to Video
Anything2Real 2601A

floyoofficial
1.2k
Vace
Video
Wan
Created by @davcha on Civitai, please support the original creator! https://civitai.com/models/1674121/simple-self-forcing-wan13bvace-workflow If this is your workflow, please contact us at team@floyo.ai to claim it! Original guide from creator: This is a very simple workflow to run Self-Forcing Wan 1.3B + Vace, it only uses a single custom node, which everyone making videos should have: Kosinkadink/ComfyUI-VideoHelperSuite. Everything else is pure comfy core. You'll need to download the model of your choice from here lym00/Wan2.1-T2V-1.3B-Self-Forcing-VACE · Hugging Face, and put it inside your /path/to/models/diffusion_models folder. This workflow can be used as a very good start for experimenting. You can refer to this [2503.07598] VACE: All-in-One Video Creation and Editing for how to use Vace. You don't need to read the paper of course, the information you are interested in is mostly at the top of page 7, which I reproduce in the following: Basically, in the WanVaceToVideo node, you have 3 optional inputs: control_video, control_masks, and reference_image. control_video and control_masks are a little bit misleading. You don't have to provide a full video. You can in fact provide a variety of things to obtain various effects. For example: if you provide a single image, it's basically more or less equivalent to image2video. if you provide a sequence of images separated by empty images: img1, black, black, black, img2, black, black, black, img3, etc... then it's equivalent to interpolating all these img, filling the blacks. A special case of this one to make it clear is if you have img1, black, black, ..., black, img2, then it's equivalent to start_img, end_img to video. control_masks control where Wan should paint. Basically if wherever the mask is 1, the original image will be kept. So you can for example pad and/or mask an input image, like this: and use that image and mask as control_video and control_mask, and you'll basically do a image2video inpaint and outpaint. If you input a video in control_video, then you can control where the changes should happen in the same way, using control_mask. You'll need to set one mask per frame in the video. if you input an image preprocessed with openpose or a depthmap, you can finely control the movement in the video output. reference_image node is basically an image that you feed to Wan+Vace that serves as a reference point. For example, if you put the image of someone's face here, there's a good chance you'll get a video with that person's face.
Simple Self-Forcing Wan1.3B+Vace workflow
Created by @davcha on Civitai, please support the original creator! https://civitai.com/models/1674121/simple-self-forcing-wan13bvace-workflow If this is your workflow, please contact us at team@floyo.ai to claim it! Original guide from creator: This is a very simple workflow to run Self-Forcing Wan 1.3B + Vace, it only uses a single custom node, which everyone making videos should have: Kosinkadink/ComfyUI-VideoHelperSuite. Everything else is pure comfy core. You'll need to download the model of your choice from here lym00/Wan2.1-T2V-1.3B-Self-Forcing-VACE · Hugging Face, and put it inside your /path/to/models/diffusion_models folder. This workflow can be used as a very good start for experimenting. You can refer to this [2503.07598] VACE: All-in-One Video Creation and Editing for how to use Vace. You don't need to read the paper of course, the information you are interested in is mostly at the top of page 7, which I reproduce in the following: Basically, in the WanVaceToVideo node, you have 3 optional inputs: control_video, control_masks, and reference_image. control_video and control_masks are a little bit misleading. You don't have to provide a full video. You can in fact provide a variety of things to obtain various effects. For example: if you provide a single image, it's basically more or less equivalent to image2video. if you provide a sequence of images separated by empty images: img1, black, black, black, img2, black, black, black, img3, etc... then it's equivalent to interpolating all these img, filling the blacks. A special case of this one to make it clear is if you have img1, black, black, ..., black, img2, then it's equivalent to start_img, end_img to video. control_masks control where Wan should paint. Basically if wherever the mask is 1, the original image will be kept. So you can for example pad and/or mask an input image, like this: and use that image and mask as control_video and control_mask, and you'll basically do a image2video inpaint and outpaint. If you input a video in control_video, then you can control where the changes should happen in the same way, using control_mask. You'll need to set one mask per frame in the video. if you input an image preprocessed with openpose or a depthmap, you can finely control the movement in the video output. reference_image node is basically an image that you feed to Wan+Vace that serves as a reference point. For example, if you put the image of someone's face here, there's a good chance you'll get a video with that person's face.
_1767704595216.png?width=400&height=300&quality=80&resize=cover)
Studio Relighting for Composited Products
InfiniteTalk - Lip Sync Any Video to Any Audio

API
Filmography
Fimmaking
Floyo API
Image2Video
LTX 2 Fast
Image to Video using LTX 2 Fast API
LTX 2 Fast API for Image to Video
Image to Video using LTX 2 Fast API
floyoofficial
2.0k
Camera Control
Image2Image
LoRA
Qwen
Qwen Image Edit 2509
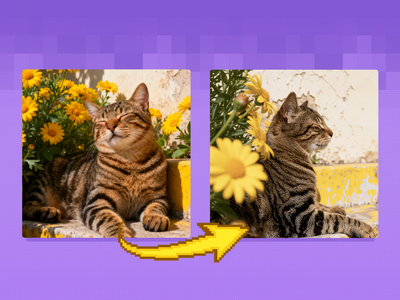
Re-render your subject from any camera angle with Qwen Image Edit 2509 and a Multi-Angle LoRA. Pan, tilt, rotate, wide-angle, or close-up. No trigger word.
Qwen Image Edit 2509 + Multi-Angle LoRA for Camera
Re-render your subject from any camera angle with Qwen Image Edit 2509 and a Multi-Angle LoRA. Pan, tilt, rotate, wide-angle, or close-up. No trigger word.
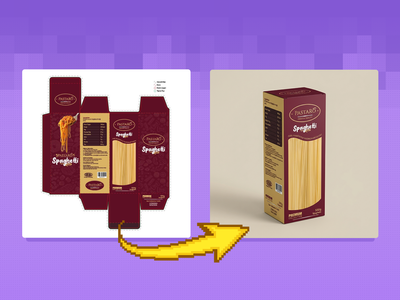
Create Photorealistic Packaging from Dielines
Qwen Image Edit 2509 and Grayscale to Color LoRA

VibeVoice Text to Speech Multi Speaker
Speech Multi Speaker

ElevenLabs Text to Speech
ElevenLabs Text to Speech
GPT Image 1.5
for Image Editing
_1766051317506.webp?width=400&height=300&quality=80&resize=cover)
Vertical Video Background & Scene Rebuild
Flux LoRA Trainer
_1778129692947.png?width=400&height=300&quality=80&resize=cover)
3D Print LoRA and Flux Kontext for Image to 3D
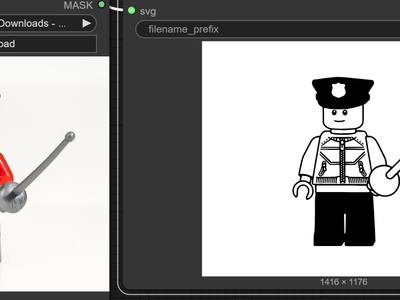
Image to SVG
Qwen Image Edit 2511
SVG
SVG Potracer
Create SVG image using Qwen Image Edit and SVG Potracer node
SVG Potracer + Qwen Image 2511 for Image to SVG
Create SVG image using Qwen Image Edit and SVG Potracer node
_1766997541061.png?width=400&height=300&quality=80&resize=cover)
Insert Products in Ecommerce Ads - NanoBanana Pro
floyoofficial
4.3k
API
background removal
E-commerce
Grok Imagine
Image Editing
Image to Image
Style Transfer
Edit images using Grok Imagine
Grok Imagine: Edit Images with a Text Prompt
Edit images using Grok Imagine
Grok Imagine for Text to Video
Create excellent videos using Grok Imagine for T2V
Ovi: Create a Talking Portrait

floyoofficial
1.3k
FantasyTalking
Image2Video
Lipsync
Wan2.1
Create high quality lipsync video from image inputs with Wan2.1 FantasyTalking Key Inputs Load Image: Select an image of a person with their face in clear view Load Audio: Choose audio file Frames: How many frames generated
Wan2.1 and FantasyTalking - Image2Video Lipsync
Create high quality lipsync video from image inputs with Wan2.1 FantasyTalking Key Inputs Load Image: Select an image of a person with their face in clear view Load Audio: Choose audio file Frames: How many frames generated
animation
film production
image to video
vfx
video generation
Turn any image into video with Seedance 2.0 by ByteDance. Built-in audio generation, start and end frame control, and clips up to 10 seconds
Seedance 2.0 - Image to Video
Turn any image into video with Seedance 2.0 by ByteDance. Built-in audio generation, start and end frame control, and clips up to 10 seconds
Meshy v6 for Image to 3D Model
Create a 3D model from Image using Meshy v6
_1762345216109.gif?width=400&height=300&quality=80&resize=cover)
Seedance Text to Video: Create Stunning video
3D
Chord
Game Design
PBR Material
Text to 3D
Ubisoft
Create a 3D Game Material Asset using Chord Model from Ubisoft
Chord for PBR Material Generation using Text to 3D
Create a 3D Game Material Asset using Chord Model from Ubisoft
Api
Hunyuan
Image to 3D
Turn any photo into a production-ready 3D model with Hunyuan 3D Pro. Get a GLB file, a thumbnail render, and an interactive turntable preview in under 60 seconds.
Hunyuan 3D Pro - Image to 3D Model
Turn any photo into a production-ready 3D model with Hunyuan 3D Pro. Get a GLB file, a thumbnail render, and an interactive turntable preview in under 60 seconds.
image to image
infinite style
qwen
Restyle any photo with text. Type a style, hit Run, get the same image as anime, watercolor, claymation, or any look in 4 seconds with Qwen Image Edit.
Qwen Image Edit - Infinite Image Styles
Restyle any photo with text. Type a style, hit Run, get the same image as anime, watercolor, claymation, or any look in 4 seconds with Qwen Image Edit.

floyoofficial
1.0k
3D
Animation
Architecture
Flux
Game Development
Hunyuan 3D
Image to 3D
Upscaling
Create a 3D model from a reference image with Flux Dev texture upscaling.
Image to 3D with Hunyuan3D w/ Texture Upscale
Create a 3D model from a reference image with Flux Dev texture upscaling.
anime
character design
concept art
seedvr
text to image
upscaling
z-anime
Generate anime and illustration art from text with Z-Anime, then upscale to 1080p with SeedVR. Compare the base render and the upscaled version side by side.
Z-Anime - Text to Image with SeedVR Upscale
Generate anime and illustration art from text with Z-Anime, then upscale to 1080p with SeedVR. Compare the base render and the upscaled version side by side.
_1774200945888.webp?width=400&height=300&quality=80&resize=cover)
Next-Level Motion from Images using MiniMax
Kling Master 2.0 Create Engaging Video Content
SRPO Next-Gen Text-to-Image

consistency
e-commerce
image to video
product photography
seedance 2.0
video generation
Animate jewelry from product photos with Seedance 2.0. Upload a start frame and up to 6 reference angles, describe the camera move, and get a 5-second clip.
Seedance 2.0 for Jewelry Scene Animator
Animate jewelry from product photos with Seedance 2.0. Upload a start frame and up to 6 reference angles, describe the camera move, and get a 5-second clip.

e-commerce
gpt image 2
image to image
inpainting
product photography
Edit images with OpenAI's GPT Image 2. Upload one or two images, write what you want changed, and the model rewrites the scene while keeping details intact.
GPT Image 2: Image Editing
Edit images with OpenAI's GPT Image 2. Upload one or two images, write what you want changed, and the model rewrites the scene while keeping details intact.

Qwen3 Thinking Prompt Enhancer
%20(1)_1774207669060.webp?width=400&height=300&quality=80&resize=cover)
floyoofficial
1.0k
animation
Ditto
lora
VACE
Video2Video
Wan
Upload any video, describe a new style, and Wan 2.1 rewrites every frame. Ditto keeps motion and structure intact across anime, Pixar, clay, and dozens more.
Wan 2.1 Vid2Vid Style Transfer with Ditto
Upload any video, describe a new style, and Wan 2.1 rewrites every frame. Ditto keeps motion and structure intact across anime, Pixar, clay, and dozens more.
Wan2.1 and ATI for Control Video Motion: Draw Your Path, Get Your Video
Image to Video with Seedance Pro API
🔥Create Stunning 10 Second 3D Spin Shots
_1758800553742.webp?width=400&height=300&quality=80&resize=cover)
Hunyuan
LoRa
Text2Video
Integrate a custom model with your text prompt to create a video with a consistent character, style or element. Key Inputs Prompt: as descriptive a prompt as possible. Make sure to include the trigger word from your LoRA below Load LoRA: Load your reference model here Width & height: resolution settings are noted in pixels Guidance strength (CFG): Higher numbers adhere more to the prompt Flow Shift: For temporal consistency, adjust to tweak video smoothness.
Text to Video + Hunyuan LoRA
Integrate a custom model with your text prompt to create a video with a consistent character, style or element. Key Inputs Prompt: as descriptive a prompt as possible. Make sure to include the trigger word from your LoRA below Load LoRA: Load your reference model here Width & height: resolution settings are noted in pixels Guidance strength (CFG): Higher numbers adhere more to the prompt Flow Shift: For temporal consistency, adjust to tweak video smoothness.
floyoofficial
1.0k
Flux
Image
Outpaint
Extend your images out for a wider field of view or just to see more of your subject. Expand compositions, change aspect ratios, or add creative elements while maintaining consistency in style, lighting, and detail while seamlessly blending with the existing artwork.
Flux Fill Dev Image Outpainting
Extend your images out for a wider field of view or just to see more of your subject. Expand compositions, change aspect ratios, or add creative elements while maintaining consistency in style, lighting, and detail while seamlessly blending with the existing artwork.
Flux
Image
LoRa
Upscale
Create a larger more detailed image along with an extra AI model for fine tuned guidance. Key Inputs Load Image: Use any JPG or PNG showing your subject clearly Load LoRA: Load your reference model here Prompt: as descriptive a prompt as possible Upscale by: The factor of magnification Denoise: The amount of variance in the new image. Higher has more variance.
Image Upscaler with LoRA
Create a larger more detailed image along with an extra AI model for fine tuned guidance. Key Inputs Load Image: Use any JPG or PNG showing your subject clearly Load LoRA: Load your reference model here Prompt: as descriptive a prompt as possible Upscale by: The factor of magnification Denoise: The amount of variance in the new image. Higher has more variance.
LTX 2.3 Pro Text to Video
Z-Image Turbo + Chord Image to PBR Material
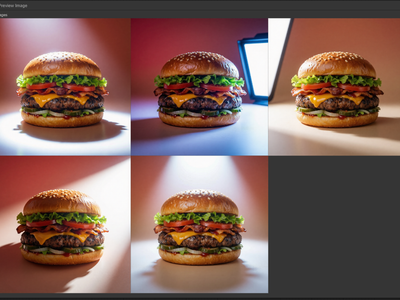
Image Edit
Qwen
Qwen Image Edit 2511
Relighting
Relighting images using Qwen multiangle light node
Qwen Multiangle Light with Qwen Image Edit 2511
Relighting images using Qwen multiangle light node
3d mesh
depth map
glb
image to 3d
microsoft
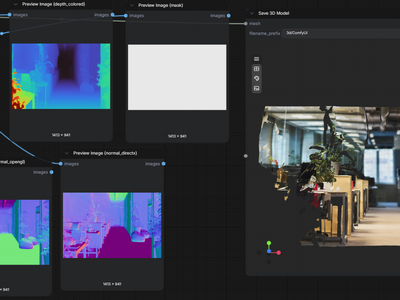
MoGe 2
normal map
panorama
Upload one photo and MoGe 2 by Microsoft Research converts it into a textured 3D mesh with depth maps, normal maps, and a downloadable GLB file. Hit run.
MoGe 2 for Perspective Image to 3D Mesh
Upload one photo and MoGe 2 by Microsoft Research converts it into a textured 3D mesh with depth maps, normal maps, and a downloadable GLB file. Hit run.

e-commerce
image editing
image to image
jewelry
nano banana 2
product photography
Upload a jewelry photo and Nano Banana 2 adds natural light reflections, specular highlights, and prismatic refractions to every gemstone and diamond. Hit run.
Adding Sparkles to the Jewelry with Nano Banana 2
Upload a jewelry photo and Nano Banana 2 adds natural light reflections, specular highlights, and prismatic refractions to every gemstone and diamond. Hit run.
_1783426180163.webp?width=400&height=300&quality=80&resize=cover)
API
Gemini
Prompt-Based Editing
video to video
A prompt-based video editing workflow that lets you edit an existing video with a plain-language instruction using Google's Gemini Omni Flash model.
Gemini Omni Flash: Video Editing
A prompt-based video editing workflow that lets you edit an existing video with a plain-language instruction using Google's Gemini Omni Flash model.
_1783417374872.gif?width=400&height=300&quality=80&resize=cover)
ai video
audio
gemini omni flash
image to video
Upload a starting image and describe the scene. Gemini Omni Flash by Google animates it into a 6-second video with native audio, cinematic motion, and synchronized sound effects.
Gemini Omni Flash · Image to Video
Upload a starting image and describe the scene. Gemini Omni Flash by Google animates it into a 6-second video with native audio, cinematic motion, and synchronized sound effects.
_1783415874459.gif?width=400&height=300&quality=80&resize=cover)
ai video
audio
gemini omni flash
text to video
Write a prompt describing a scene and Gemini Omni Flash by Google generates a video with native audio at up to 8 seconds in 16:9, ready to download as MP4.
Gemini Omni Flash · Text to Video
Write a prompt describing a scene and Gemini Omni Flash by Google generates a video with native audio at up to 8 seconds in 16:9, ready to download as MP4.
_1783410827677.png?width=400&height=300&quality=80&resize=cover)
image to image
multi-reference
Nano banana lite
Upload up to 14 reference images and describe the change you want. Nano Banana 2 Lite, Google's fastest Gemini image model, applies the edit in about 4 seconds and returns the result.
Nano Banana 2 Lite · Image Editing
Upload up to 14 reference images and describe the change you want. Nano Banana 2 Lite, Google's fastest Gemini image model, applies the edit in about 4 seconds and returns the result.
_1783406884076.png?width=400&height=300&quality=80&resize=cover)
API
Fast Generation
Text to Image
A single-node text-to-image workflow that generates images from a written prompt using Google's Nano Banana Lite model (served via fal.ai). You write a prompt, pick an aspect ratio, and hit run — a built-in system prompt automatically enriches simple descriptions with composition
Nano Banana Lite: Text to Image
A single-node text-to-image workflow that generates images from a written prompt using Google's Nano Banana Lite model (served via fal.ai). You write a prompt, pick an aspect ratio, and hit run — a built-in system prompt automatically enriches simple descriptions with composition
_1783405032028.png?width=400&height=300&quality=80&resize=cover)
API
NanoBanana
Text to image
This workflow generates images from a text prompt using Nano Banana 2 Lite, Google's fast image model served through fal.ai. A built-in system prompt automatically expands simple prompts into detailed, well-composed scenes while respecting explicit instructions on style, color, l
Nano Banana 2 Lite: Text to Image
This workflow generates images from a text prompt using Nano Banana 2 Lite, Google's fast image model served through fal.ai. A built-in system prompt automatically expands simple prompts into detailed, well-composed scenes while respecting explicit instructions on style, color, l
_1783323049263.png?width=400&height=300&quality=80&resize=cover)
lens turbo
microsoft lens
photorealistic
text to image
Write a prompt and Microsoft Lens Turbo generates a photorealistic image in 8 steps at 1280x720, using a 3.8B parameter model that matches the quality of models twice its size.
Microsoft Lens Turbo · Text to Image
Write a prompt and Microsoft Lens Turbo generates a photorealistic image in 8 steps at 1280x720, using a 3.8B parameter model that matches the quality of models twice its size.
_1783067283308.png?width=400&height=300&quality=80&resize=cover)
flux 2 max
image editing
image to image
multi-image
photorealistic
Upload an image to edit and up to eight reference images, describe the change, and FLUX.2 Max applies it with the highest editing consistency in the FLUX.2 family.
FLUX.2 Max Edit · Image to Image
Upload an image to edit and up to eight reference images, describe the change, and FLUX.2 Max applies it with the highest editing consistency in the FLUX.2 family.
_1783065533774.png?width=400&height=300&quality=80&resize=cover)
flux 2 max
photorealistic
text rendering
text to image
Write a prompt and FLUX.2 Max by Black Forest Labs generates the highest-quality image in the FLUX.2 family, with photorealistic detail, accurate text rendering, and strong prompt adherence.
FLUX.2 Max · Text to Image
Write a prompt and FLUX.2 Max by Black Forest Labs generates the highest-quality image in the FLUX.2 family, with photorealistic detail, accurate text rendering, and strong prompt adherence.
%20(1)_1782997033756.png?width=400&height=300&quality=80&resize=cover)
ai music generator
comfyui
instrumental music
sound effects
stability ai
stable audio 3
text to audio
Describe the track or sound you want and Stable Audio 3 Medium, Stability AI's open text-to-audio model, generates it. Write a prompt, set a length, and hit run.
Stable Audio 3 for Text to Music
Describe the track or sound you want and Stable Audio 3 Medium, Stability AI's open text-to-audio model, generates it. Write a prompt, set a length, and hit run.
character animation
character replacement
motion transfer
scail 2
video to video
wan 2.1
Transfer the motion from any video onto your own character with SCAIL 2, Z.ai's end-to-end character animation model built on Wan 2.1. Upload a video and a character photo, then hit run.
Wan2.1 + SCAIL-2 for Character Motion Transfer
Transfer the motion from any video onto your own character with SCAIL 2, Z.ai's end-to-end character animation model built on Wan 2.1. Upload a video and a character photo, then hit run.

image generation
krea 2
krea 2 turbo
krea ai
lora styles
open source
text to image
Turn a text prompt into a finished image with Krea 2 Turbo, Krea AI's fast open-source image model. Type what you want to see, hit run, and get a result in seconds.
Krea 2 for Text to Image
Turn a text prompt into a finished image with Krea 2 Turbo, Krea AI's fast open-source image model. Type what you want to see, hit run, and get a result in seconds.
_1783317569459.png?width=400&height=300&quality=80&resize=cover)
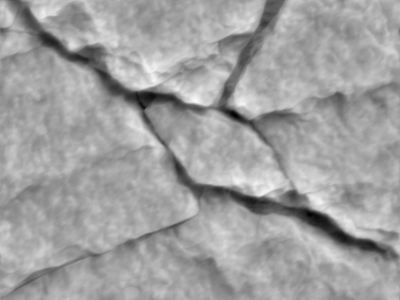
albedo
material
normal map
pbr
texture
Upload a seamless texture and this workflow extracts a full PBR material set including albedo, normal, metallic, roughness, ambient occlusion, and height maps using Marigold and Lotus models.
Texture to PBR · Image to Material
Upload a seamless texture and this workflow extracts a full PBR material set including albedo, normal, metallic, roughness, ambient occlusion, and height maps using Marigold and Lotus models.
_1782470627803.webp?width=400&height=300&quality=80&resize=cover)
ai video
audio
happy horse 1.1
image to video
Upload a starting image and describe the motion you want. Happy Horse 1.1 animates it into a cinematic video with synchronized audio, dialogue, and lip-sync at up to 1080p.
Happy Horse 1.1 · Image to Video
Upload a starting image and describe the motion you want. Happy Horse 1.1 animates it into a cinematic video with synchronized audio, dialogue, and lip-sync at up to 1080p.
_1782467465059.webp?width=400&height=300&quality=80&resize=cover)
alibaba
dialogue
happy horse 1.1
text to video
Describe a scene in plain language and Happy Horse 1.1 generates a cinematic video with synchronized audio, dialogue, and lip-sync at up to 1080p.
Happy Horse 1.1 · Text to Video
Describe a scene in plain language and Happy Horse 1.1 generates a cinematic video with synchronized audio, dialogue, and lip-sync at up to 1080p.
background removal
concept art
image to image
qwen
Qwen Image Layered
vfx
Upload one image and Qwen Image Layered pulls it apart into a clean foreground layer and a background layer you can edit, swap, or composite on their own.
Qwen Image Layered for Image Deconstruction
Upload one image and Qwen Image Layered pulls it apart into a clean foreground layer and a background layer you can edit, swap, or composite on their own.
e-commerce
image to video
nano banana
product photography
seedance
video generation
Animate jewelry shots with Seedance 2.0 while Nano Banana 2 adds natural sparkle, so the camera orbits the piece and light catches every facet as it turns.
Jewelry Animator and Sparkle with Seedance 2.0
Animate jewelry shots with Seedance 2.0 while Nano Banana 2 adds natural sparkle, so the camera orbits the piece and light catches every facet as it turns.
Text To Image
Z-Image
Z-Image Turbo at 10 steps with the SDA LoRA on top, so different seeds give different poses, angles, and compositions instead of variants of one image.
Z-Image Turbo Text-to-Image + SDA Diversity LoRA
Z-Image Turbo at 10 steps with the SDA LoRA on top, so different seeds give different poses, angles, and compositions instead of variants of one image.
_1779814564020.webp?width=400&height=300&quality=80&resize=cover)
Inpainting
Video to Video
Remove objects from video with VOID's two-pass model. Type what to erase, SAM3 builds the mask, then VOID fills the holes coherently across every frame.
VOID Video Inpainting + SAM3 Text Masking
Remove objects from video with VOID's two-pass model. Type what to erase, SAM3 builds the mask, then VOID fills the holes coherently across every frame.
_1779447402825.webp?width=400&height=300&quality=80&resize=cover)
Film Production
Image to Video
ltx2.3
Animate a still image with LTX 2.3 22B while a Cameraman IC-LoRA copies the camera motion from a reference video. Audio is generated in the same pass.
LTX 2.3 + IC-LoRA Cameraman: Image to Video
Animate a still image with LTX 2.3 22B while a Cameraman IC-LoRA copies the camera motion from a reference video. Audio is generated in the same pass.

Flux
Image to Image
Inpainting
Paint a mask over the part of your product image you want to change, drop in a reference design, and Flux 2 Klein redraws only that region in four steps.
Partial Modification Reference Image using Flux.2
Paint a mask over the part of your product image you want to change, drop in a reference design, and Flux 2 Klein redraws only that region in four steps.
Image to Image
PBR texture
Turn any reference image into a tileable wood texture with full PBR maps: basecolor, normal, roughness, metalness, and height. Built for Unreal and Blender.
Seamless PBR Texture Workflow
Turn any reference image into a tileable wood texture with full PBR maps: basecolor, normal, roughness, metalness, and height. Built for Unreal and Blender.
API
Hunyuan
Text to 3D
Generate a textured 3D model from a text prompt with Hunyuan 3D Pro. Describe an object, hit Run, and get a GLB file plus interactive 3D viewer in under 60 seconds.
Hunyuan 3D Pro - Text to 3D Model
Generate a textured 3D model from a text prompt with Hunyuan 3D Pro. Describe an object, hit Run, and get a GLB file plus interactive 3D viewer in under 60 seconds.
Qwen Image - Text to 360° HDRI Panorama
Nano Banana Pro - Game Art Restyling
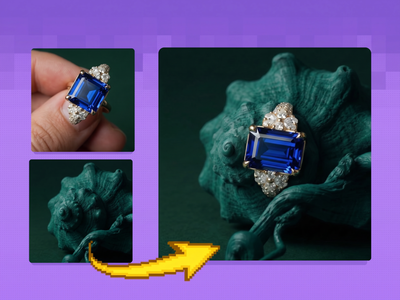
e-commerce
image to image
nano banana 2
product photography
Drop a ring photo and a background into the same workflow. Nano Banana 2 composites the jewelry into the scene seven ways so you can cherry-pick the best take.
Jewelry Scene Compositor with Nano Banana 2
Drop a ring photo and a background into the same workflow. Nano Banana 2 composites the jewelry into the scene seven ways so you can cherry-pick the best take.
_1778243880760.png?width=400&height=300&quality=80&resize=cover)
concept art
e-commerce
image to image
nano banana 2
product photography
style transfer
Upload three reference images and Nano Banana 2 generates a new jewelry environment that matches their color, lighting, and visual style. Mood board to scene.
Jewelry Environment Creator with Nano Banana 2
Upload three reference images and Nano Banana 2 generates a new jewelry environment that matches their color, lighting, and visual style. Mood board to scene.
consistency
film production
happy horse
image to video
product photography
video generation
Animate a still image with Happy Horse 1.0. Upload a frame, describe the motion you want, get a 5-second clip with stable physics and consistent details.
Happy Horse 1.0 - Image to Video
Animate a still image with Happy Horse 1.0. Upload a frame, describe the motion you want, get a 5-second clip with stable physics and consistent details.
Image to Talking Video - LTX 2.3 + ElevenLabs UGC
Graphic Design Recomposer - Reframe Ads
image to text
llm
open source
qwen
text generation
vlm
Run Qwen 3.5 9B in ComfyUI as a text-only LLM or as a vision language model. Attach an image or a video, write your prompt, and get text back.
Qwen 3.5 9B for Open Source LLM and VLM
Run Qwen 3.5 9B in ComfyUI as a text-only LLM or as a vision language model. Attach an image or a video, write your prompt, and get text back.
Kling V3 Pro Motion Control
flux
flux 2 klein
image to image
style transfer
Edit images with Flux 2 Klein 9B in 4 steps. KV Cache speeds every run by reusing attention work across steps. Upload an image, describe the edit, hit Run.
Flux 2 Klein 9B + KV Cache for Image Editing
Edit images with Flux 2 Klein 9B in 4 steps. KV Cache speeds every run by reusing attention work across steps. Upload an image, describe the edit, hit Run.

animation
concept art
film production
image to video
pixverse
pixverse c1
Animate a reference image into cinematic video with PixVerse C1. Pick your duration up to 15 seconds, resolution up to 1080p, and optional native audio.
PixVerse C1 - Image to Video
Animate a reference image into cinematic video with PixVerse C1. Pick your duration up to 15 seconds, resolution up to 1080p, and optional native audio.
film production
pixverse
pixverse c1
text to video
vfx
video generation
Generate cinematic video from text with PixVerse C1. Up to 1080p, up to 15 seconds, with optional native audio synchronized in the same generation pass.
PixVerse C1 - Text to Video
Generate cinematic video from text with PixVerse C1. Up to 1080p, up to 15 seconds, with optional native audio synchronized in the same generation pass.
flux
flux 2 klein
image to image
inpainting
outpainting
panorama
Edit 360 panoramas with Flux 2 Klein 9B. Select a region, describe the change, and the edit gets composited back into your full panoramic image. No warping.
Flux 2 Klein 9B Panorama Inpainting
Edit 360 panoramas with Flux 2 Klein 9B. Select a region, describe the change, and the edit gets composited back into your full panoramic image. No warping.
flux
flux 2 klein
image to image
lora
outpainting
panorama
Turn any image into a full 360 equirectangular panorama with Klein 9B and a 360 ERP outpaint LoRA. Cut flat camera shots at any angle from the result.
Flux 2 Klein 9B + 360 Panorama ERP LoRA
Turn any image into a full 360 equirectangular panorama with Klein 9B and a 360 ERP outpaint LoRA. Cut flat camera shots at any angle from the result.
_1776068409140.webp?width=400&height=300&quality=80&resize=cover)
Seedance 2.0 Fast Reference-to-Video
_1776066683092.webp?width=400&height=300&quality=80&resize=cover)
Seedance 2.0 Reference-to-Video
concept art
lora
portrait
SDA
text to image
z-image turbo
Generate images with Z-Image Turbo while the SDA diversity LoRA stops every seed from producing the same pose and composition. 8 steps, 2x upscale to 2048.
Z-Image Turbo + SDA LoRA for Diverse Text to Image
Generate images with Z-Image Turbo while the SDA diversity LoRA stops every seed from producing the same pose and composition. 8 steps, 2x upscale to 2048.
background removal
film production
vfx
video generation
Upload green screen footage and get a clean alpha matte plus composite preview. Corridor Key's neural network handles hair, motion blur, and transparency.
Corridor Key Green Screen Keying for Video
Upload green screen footage and get a clean alpha matte plus composite preview. Corridor Key's neural network handles hair, motion blur, and transparency.
_1775699601810.png?width=400&height=300&quality=80&resize=cover)
concept art
e-commerce
image to image
portrait
style transfer
text to image
wan
Upload an image, describe what you want changed, and Wan 2.7 Pro rewrites it. Style transfers, scene edits, and generation with thinking mode built in.
Wan 2.7 Pro Unified Image Editing
Upload an image, describe what you want changed, and Wan 2.7 Pro rewrites it. Style transfers, scene edits, and generation with thinking mode built in.
Alibaba
Audio
Text to Video
Wan 2.7
Generate video from a text prompt using Alibaba's Wan 2.7 model. Set your resolution, aspect ratio, and duration, then hit Run. Audio input supported.
Wan 2.7 - Text to Video
Generate video from a text prompt using Alibaba's Wan 2.7 model. Set your resolution, aspect ratio, and duration, then hit Run. Audio input supported.
_1775022984504.png?width=400&height=300&quality=80&resize=cover)
bitdance
T2V
text to image
Generate photorealistic images from text prompts using BitDance 14B, a 14-billion parameter autoregressive model that predicts up to 64 visual tokens per step.
BitDance 14B - Text to Image
Generate photorealistic images from text prompts using BitDance 14B, a 14-billion parameter autoregressive model that predicts up to 64 visual tokens per step.

Captioning
LLM
Prompt Generator
Qwen3VL
VLM
Upload an image or video and get a detailed text description from Qwen3-VL. Choose your model size, pick a preset prompt, or write your own. Runs in your browser.
Qwen3-VL Image and Video Captioning
Upload an image or video and get a detailed text description from Qwen3-VL. Choose your model size, pick a preset prompt, or write your own. Runs in your browser.

audio
speech to text
srt
STT
subtitles
transcription
whisper
Upload any audio file and Whisper transcribes it into text with word-level and segment-level SRT subtitle files. Auto language detection included.
Whisper Speech-to-Text and SRT Subtitle Generator
Upload any audio file and Whisper transcribes it into text with word-level and segment-level SRT subtitle files. Auto language detection included.
subtitling
vid2vid
video generation
Upload a video and get it back with burned-in subtitles. Whisper transcribes the audio, then the text gets placed frame-by-frame with word-level timing.
Auto Subtitles with Whisper - Video to Video
Upload a video and get it back with burned-in subtitles. Whisper transcribes the audio, then the text gets placed frame-by-frame with word-level timing.
_1774874350635.png?width=400&height=300&quality=80&resize=cover)
Z-Image Turbo Inpainting
Z-Image Turbo Inpainting

audio
Audio2Audio
Chatterbox
tts
TTS Audio Suite
voice conversion
Convert any voice to match a target speaker using ChatterBox TTS. Upload source and narrator audio, run it, get back a converted MP3. No voice training needed.
Voice Changer using TTS Audio Suite (ChatterBox)
Convert any voice to match a target speaker using ChatterBox TTS. Upload source and narrator audio, run it, get back a converted MP3. No voice training needed.
animation
character design
image to video
kling
video generation
Apply motion from a reference video to a still image with Kling 3.0 Pro.
Kling 3.0 Pro Motion Control
Apply motion from a reference video to a still image with Kling 3.0 Pro.
%20(3)_1774349172672.webp?width=400&height=300&quality=80&resize=cover)
image to video
ltx 2
text to video
video generation
Add seconds to an existing video with LTX 2.3. Upload a clip, set the duration and mode
LTX 2.3 - Extend Video
Add seconds to an existing video with LTX 2.3. Upload a clip, set the duration and mode
API
FloyoAPI
Recraft
Text2Image
Generate images with Recraft V3 from a text prompt. Choose a preset size or custom dimensions, pick a style, and run.
Recraft V3 Text to Image
Generate images with Recraft V3 from a text prompt. Choose a preset size or custom dimensions, pick a style, and run.
%20(2)_1774290976171.webp?width=400&height=300&quality=80&resize=cover)
API
Floyo API
Kling
MotionControl
Transfer movements from a reference video to any character image.
Kling 3.0 Standard Motion Control
Transfer movements from a reference video to any character image.
Flux
Image to image
Opensource
Style transfer
Transfer makeup from a reference photo onto a portrait using FireRed Image Edit 1.1. Upload a face and a makeup reference, and the model applies the look while keeping pose and facial features intact.
FireRed Image Edit - Makeup Transfer
Transfer makeup from a reference photo onto a portrait using FireRed Image Edit 1.1. Upload a face and a makeup reference, and the model applies the look while keeping pose and facial features intact.
LTX 2.3 Image to Video with Two-Pass Upscaling
Kling O3 Video to Video — Standard Reference
Capybara for Image Editing
Edit your cool images using Capybara
LongCat for Text to Image
Create cool images using the LongCat
floyoofficial
5.3k
FLUX
Flux.2 Klein
Image2Image
Image Editing
LoRA
Edit images with consistency of the subject or things using Flux.2 Klein 9B and a LoRA
FLUX.2 Klein 9B + Consistency LoRA
Edit images with consistency of the subject or things using Flux.2 Klein 9B and a LoRA
FLUX.2 Klein 9B + Virtual Tryon LoRA
Try a clothes using Flux.2 Klein 9B and tryon LoRA from

Audio2Audio
SoproTTS
Text to Speech
TTS
Turn your text to excellent speech using SoproTTS
Sopro for Text to Speech
Turn your text to excellent speech using SoproTTS

SopranoTTS for Text to Speech
Turn speech using Soprano TTS
LTX 2.0 – Prompting & Dynamic Camera Movement

AILab
Audio to Text
Speech to Text
STT
Transcribe
Create a text from speech using Whisper STT
Whisper STT
Create a text from speech using Whisper STT
_1777893762411.png?width=400&height=300&quality=80&resize=cover)
ACE-Step 1.5 for Music Generation
Create stunning music using ACE Step 1.5
floyoofficial
1.7k
Image Editing
Qwen
Qwen Image Edit 2511
VNCCS Utils
Create different position of person using VNCCS custom node and Qwen Image Edit 2511
Qwen Image Edit 2511 and VNCCS Utils - Visual Pose
Create different position of person using VNCCS custom node and Qwen Image Edit 2511
Z-Image Base - Text to Image w/ LoRA
Run Z-Image Base with a custom LoRA
Vidu Q3 for Image to Video
Turn to images to real life
floyoofficial
1.4k
Image2Image
Image Editing
Seedream 4.5
Text2Image
typography
An all purpose Seedream 4.5 for image generation
Seedream 4.5 Unified for Image Generation
An all purpose Seedream 4.5 for image generation

Minimax Speech 2.8 HD for Text to Speech
Create realistic speech using Minimax speech 2.8
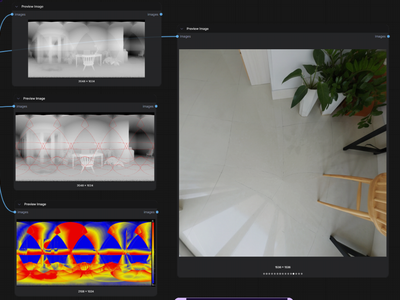
3d
apple
concept art
depth estimation
depth map
panorama
sharp
vfx
Upload a 360 panorama and get a full panoramic depth map using Apple's SHARP model. Multi-view estimation, stitched back into equirectangular format. Hit run.
Panorama to Panorama Depth and Normal Map
Upload a 360 panorama and get a full panoramic depth map using Apple's SHARP model. Multi-view estimation, stitched back into equirectangular format. Hit run.
SAM3 for Video Masking using Points
Create a video masking using SAM3 and Points only.
Grok Imagine: Fast Text to Image
Create cool images using Grok Imagine
API
Image2Image
Image Editing
Qwen Image Max Edit
Editing images using the flagship model of Qwen Image Max Edit
Qwen Image Max Edit for Editing Images
Editing images using the flagship model of Qwen Image Max Edit
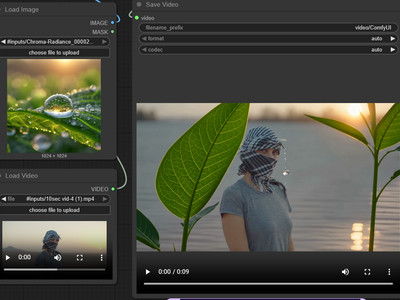
Floyo API
Image2Video
PixVerse
You can swap object,, character and background using PixVerse
Pixverse Swap for Image to Video Swap
You can swap object,, character and background using PixVerse
Kandinsky for Text to Video
Creating excellent videos using Kandinsky
3D Products with Logo - Wan2.6 Image to Video
_1768981819654.webp?width=400&height=300&quality=80&resize=cover)
Static Watermark Remover
GPT-Image 1.5
Image2Image
Image2Video
Kling 2.6
Text2Image
VLM
Create a high quality demo for your products using Kling 2.6 Image to Video
Create Product Demo from Concept to Video
Create a high quality demo for your products using Kling 2.6 Image to Video

Insert Product into Existing Ad
Image2Video
Kling Omni One
Next Scene LoRA
Qwen Image Edit 2511
Reference2Video
Creating a reshoot for a character
Character Reshoot using Qwen Edit 2511 + Kling O1
Creating a reshoot for a character
Flimography
LTX 2 Pro
Open Source
Text2Video
Videography
An open source LTX 2 Pro for Text to Video
LTX 2 19B Pro for Text to Video
An open source LTX 2 Pro for Text to Video
Video Detailer using LTX 2 Vid2Vid
It can enhance the detail of the video
Camera Control
Image2Vid
Qwen Image Edit 2511
Vid2Vid
Wan2.6
Using witness cameras to recreate additional shots that were not captured by principal photography
Camera Angle Creation using Image2Vid
Using witness cameras to recreate additional shots that were not captured by principal photography

ChatterBox
Higgs
Text to Speech
TTS
VibeVoice
A workflow of TTS Audio Suite which can to use different type of audio models.
Multi Model for Voice Convesion and Text to Speech
A workflow of TTS Audio Suite which can to use different type of audio models.
LTX 2 Retake Video for Video Editing
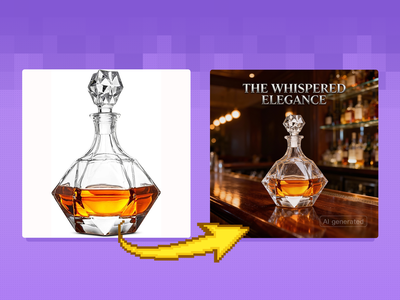
Create Cinematic Poster & Ad from Your Product
LTX 2 Fast API for Text to Video
Text to video using LTX 2 Fast API
Wan2.1 + SCAIL for Animating Images for Movement
_1766992060792.png?width=400&height=300&quality=80&resize=cover)
Change Product Shots with NanoBanana Pro
joy caption fine controls
Vertical Video Prop & Object Replacement Using Seedream + Wan 2.2
Veo 3.1 Image to Video
Kling Omni 1 Reference to Video
Kling 2.5 Image to Video
_1764579820037.webp?width=400&height=300&quality=80&resize=cover)
Vertical Video Scene Extension & Coverage Generator using Seedream +Wan
_1764570564795.webp?width=400&height=300&quality=80&resize=cover)
Vertical Video Scene Extension & Coverage Generator
%20(2)_1774208003255.webp?width=400&height=300&quality=80&resize=cover)
floyoofficial
1.1k
API
Floyo API
Topaz
Video2Video
Video Upscale
Upload a video, pick your enhancement model and quality level, and Topaz Video AI sharpens, denoises, and upscales it. Audio is preserved. Output is H265 MP4.
Topaz Video Upscaler for Sharper Results
Upload a video, pick your enhancement model and quality level, and Topaz Video AI sharpens, denoises, and upscales it. Audio is preserved. Output is H265 MP4.
Realistic Product or Props Replacement
_1762437195803.gif?width=400&height=300&quality=80&resize=cover)
MiniMax Text-to-Video will Bring Your Creative Concepts to Life with Realistic Motion
_1763538074182.webp?width=400&height=300&quality=80&resize=cover)
Boost Your Creative Video: Comprehensive Solutions
Craft Stunning Edits Instantly with Nano Banana Edit
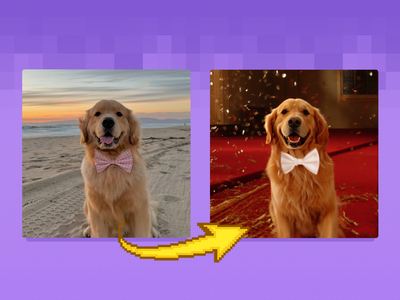
Modify the Image using InstantX Union ControlNet
_1769947817081.jpg?width=400&height=300&quality=80&resize=cover)
Kling 3.0 for Video Generation
Coming soon page for Kling 3.0
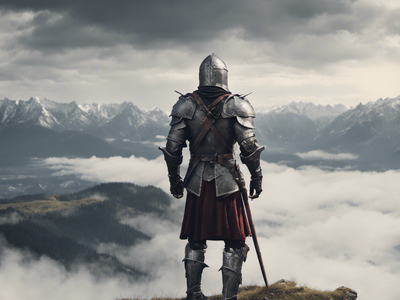
API
Bedrock
Nova Canvas
SDXL
Text to Image
Titan
Generate and compare images between 3 different models powered by Amazon Bedrock. Key Inputs Prompt: as descriptive a prompt as possible Models SDXL: Solid all-around performer with strong prompt adherence and wide style range Titan: Versatile model with built-in editing features and customization flexibility Nova Canvas: Quick iterations with creative flair, ideal for brainstorming and concept exploration
Amazon Bedrock - Text to Multi-Image with SDXL, Titan and Nova Canvas
Generate and compare images between 3 different models powered by Amazon Bedrock. Key Inputs Prompt: as descriptive a prompt as possible Models SDXL: Solid all-around performer with strong prompt adherence and wide style range Titan: Versatile model with built-in editing features and customization flexibility Nova Canvas: Quick iterations with creative flair, ideal for brainstorming and concept exploration

Isometric Miniatures from a Selfie
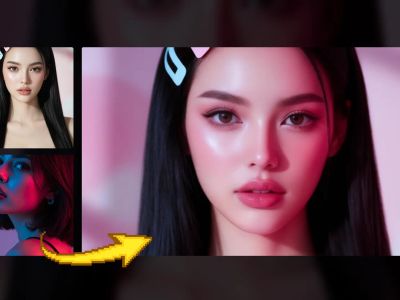
Qwen Image Edit – Portrait Light Migration
Flux
Flux.2 Klein
Image Outpainting
Outpaint image using Flux 2 Klein 4B using LanPaint and Outpaint LoRA
FLUX.2 Klein 4B for Image Outpainting
Outpaint image using Flux 2 Klein 4B using LanPaint and Outpaint LoRA
floyoofficial
1.0k
Flux
Flux.2 Klein 4B
Image2Image
Create sprite sheet for game characters in using flux 2 Klein 4B
FLUX.2 Klein 4B for Text to Sprite Sheet
Create sprite sheet for game characters in using flux 2 Klein 4B
Qwen Thinking Prompt Refiner
Qwen Image Max
Text2Image
Create a high quality using the flagship model of Qwen Image
Qwen Image Max for Text to Image
Create a high quality using the flagship model of Qwen Image
SAM2
Segment Anything 2
video2video
Video Mask
Create a video mark frame by frame using Segment Anything 2
Segment Anything 2 for Creating Video Mask
Create a video mark frame by frame using Segment Anything 2

Kling 3.0 Pro for Text to Video
Create videos using Kling 3.0
Vidu Q3 for Text to Video
Create good videos with Vidu Q3
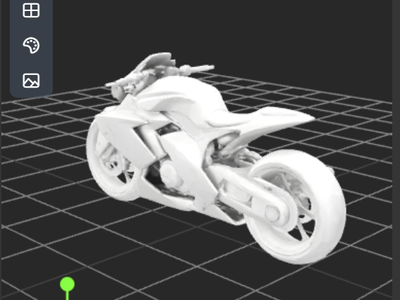
Meshy v6 Text to 3D Model
Create a 3D using Meshy v6 text to model
Kling 3.0 Standard for Text to Video
Create videos using Kling 3.0 Standard
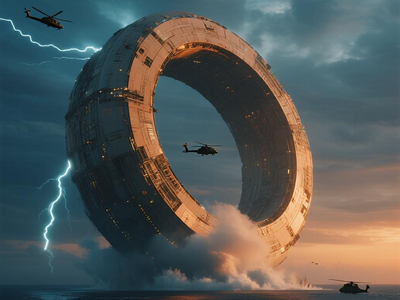
Dreamina 3.1 Text to Image
ComfySketch for Creating Images
Draw cool images using comfysketch
Kling 3.0 Standard for Image to Video
Animate the images using Kling 3.0 Standard
%20(2400%20x%201080%20px)%20(2430%20x%201080%20px)%20(10)_1771484497818.png?width=400&height=300&quality=80&resize=cover)
Single Image to Multiple Consistent Shots
Flux. 2 Klein INPAINT Segment Edit Accurate Image

floyoofficial
1.1k
Image Editing
LoRA
Qwen Image Edit 2511
Style Transfer
Create new images from your lineart drawing or sketch using the style transfer LoRA and Qwen Image Edit 2511
Qwen Image Edit 2511 + Style Transfer LoRA
Create new images from your lineart drawing or sketch using the style transfer LoRA and Qwen Image Edit 2511
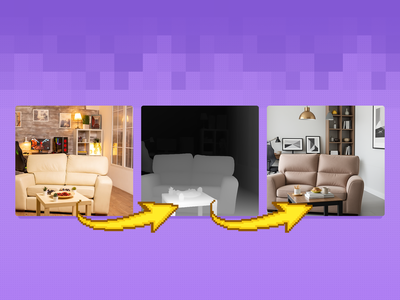
Fun Controlnet Union 2602
Image2Image
Image Editing
Qwen
Qwen Image 2512
Transform your mages using the Qwen Image 2512 and with Fun Controlnet Union 2602
Qwen Image 2512 + Fun Controlnet Union 2602
Transform your mages using the Qwen Image 2512 and with Fun Controlnet Union 2602
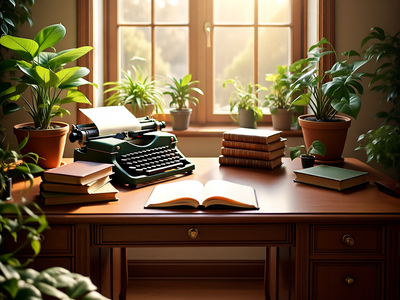
Capybara for Text to Image
Create unique images using Capybara

API
audio generation
expressive tts
text to speech
voice synthesis
Expressive Text to Speech
Fish Audio S2 TTS - Expressive Text to Speech
Expressive Text to Speech
custom style
fine-tune
ideogram v4
lora training
Upload your training images and this workflow fine-tunes a LoRA adapter on Ideogram V4, returning a download link for the trained LoRA file and config, ready to use in generation workflows.
Ideogram V4 LoRA Trainer · LoRA Training
Upload your training images and this workflow fine-tunes a LoRA adapter on Ideogram V4, returning a download link for the trained LoRA file and config, ready to use in generation workflows.
Krea Wan 14B Video to Video

Qwen 3.5 Plus for Multimodal LLM and VLM
Analyze your images or videos using you Qwen 3.5 Plus
Kling Image to Video with Reference Control
Kling O3 Pro - Image to Video
_1782473642860.webp?width=400&height=300&quality=80&resize=cover)
ai video
character consistency
happy horse 1.1
reference to video
Upload up to nine reference images of characters, objects, or scenes, and Happy Horse 1.1 generates a cinematic video that preserves their identity, style, and detail with synchronized audio.
Happy Horse 1.1 · Reference to Video
Upload up to nine reference images of characters, objects, or scenes, and Happy Horse 1.1 generates a cinematic video that preserves their identity, style, and detail with synchronized audio.
Kling O3 Pro - Video to Video Edit
API
Video2Video
Edit your video with Kling O3 Pro. Upload a clip, describe what to change, set duration and aspect ratio. Audio is preserved by default.
Kling O3 Pro - Video to Video Reference
Edit your video with Kling O3 Pro. Upload a clip, describe what to change, set duration and aspect ratio. Audio is preserved by default.
Kling O3 Video to Video — Standard Edit
Kling O3 Pro Text to Video

Kling O3 Standard Image to Video with Reference
_1763991450209.png?width=400&height=300&quality=80&resize=cover)
Image Transformation using Anime2Reality LoRA

Kling O3 Pro Image to Video with Reference

Audio2Audio
Audio Editing
Step Audio EditX
Voice Cloning
Upload a voice sample, transcribe it automatically with Whisper, then use Step-Audio EditX to clone that voice speaking your custom script. No trigger word needed.
Step Audio EditX for Voice Cloning
Upload a voice sample, transcribe it automatically with Whisper, then use Step-Audio EditX to clone that voice speaking your custom script. No trigger word needed.

Audio2Audio
Step Audio EditX
Voice Editing
Edit existing voice recordings with Step-Audio EditX. Change emotion, dialect, or style. Whisper transcribes your audio so you describe the edit, not the source.
Step Audio EditX for Voice Editing
Edit existing voice recordings with Step-Audio EditX. Change emotion, dialect, or style. Whisper transcribes your audio so you describe the edit, not the source.

Fish Speech Voice Cloning TTS with Emotion Tags
Emotion Tags

Audio Separation
Video to Audio
Upload a video, strip the audio, and split it into four clean stems (Bass, Drums, Other, and Vocals), then save your chosen stem as an MP3. No model required.
Audio Separation for Video to Audio
Upload a video, strip the audio, and split it into four clean stems (Bass, Drums, Other, and Vocals), then save your chosen stem as an MP3. No model required.
_1764320932433.webp?width=400&height=300&quality=80&resize=cover)
image-to-image
Lipsync
reference-image
seedream
upscaling
Video-conditioning
wan2.1_funControl
Vertical Video Lighting & Mood Shift Using Seedream + Wan
_1774416566203.webp?width=400&height=300&quality=80&resize=cover)
image to video
ltx 2
retake
vid2vid
video generation
Re-generate a specific segment of an existing video with LTX 2.3.
LTX 2.3 - Retake Video
Re-generate a specific segment of an existing video with LTX 2.3.
character design
character sheet
FaceAnalysis
Image2Image
Image Dataset
InsightFace
lora
lora training
Upload a reference face, point to your dataset, and InsightFace filters out images that don't match. Cosine, L2 Norm, and Euclidean distance all supported.
InsightFace for Filtering Character LoRA Dataset
Upload a reference face, point to your dataset, and InsightFace filters out images that don't match. Cosine, L2 Norm, and Euclidean distance all supported.
background removal
film production
vfx
vid2vid
video generation
Remove any subject from video with MatAnyone2. Auto-detects by text, tracks frame by frame, and outputs a green screen, matte, and side-by-side comparison.
MatAnyone2 V2V with Auto Segmentation
Remove any subject from video with MatAnyone2. Auto-detects by text, tracks frame by frame, and outputs a green screen, matte, and side-by-side comparison.
Wan 2.2 T2V Workflow with UnifiedReward Flex LoRA
Wan 2.2 T2V Workflow with UnifiedReward Flex LoRA
_1774777336819.png?width=400&height=300&quality=80&resize=cover)
Grok
image-to-image
multi-style
prompt-based editing
Multi-Style Image Transformation Workflow (One Input → Multiple Outputs)
Multi-Style Image Transformation Workflow
Multi-Style Image Transformation Workflow (One Input → Multiple Outputs)
_1774783037628.png?width=400&height=300&quality=80&resize=cover)
image-to-image
Nano banana
Omnipotent
Upload up to 3 reference images for a face, clothing, and scene, then describe what you want. Nano Banana 2 combines all three into one composed output.
Omnipotent Image 2.0 – Multi-Image Scene Composer
Upload up to 3 reference images for a face, clothing, and scene, then describe what you want. Nano Banana 2 combines all three into one composed output.
_1774791423297.png?width=400&height=300&quality=80&resize=cover)
Z-Image Turbo - 2K Upscaler
Z-Image Turbo - 2K Upscaler
concept art
image to video
prompt relay
rogala
text overlay
vfx
video generation
Turn a photo into a multi-scene video with synced audio and burnt-in text using LTX 2.3 and Prompt Relay. Upload an image, script your beats, hit run.
LTX 2.3 + Rogala for Prompt Relay and Overlay Txt
Turn a photo into a multi-scene video with synced audio and burnt-in text using LTX 2.3 and Prompt Relay. Upload an image, script your beats, hit run.
animation
character design
concept art
lumina
portrait
text to image
Generate high-quality anime images with NetaYume Lumina, a fine-tuned model built on Lumina Image 2.0. Describe a scene, hit run, get detailed anime art.
NetaYume Lumina Text to Image
Generate high-quality anime images with NetaYume Lumina, a fine-tuned model built on Lumina Image 2.0. Describe a scene, hit run, get detailed anime art.
_1782833857439.png?width=400&height=300&quality=80&resize=cover)
custom style
fine-tune
ideogram v4
lora
text to image
Paste the URL of a trained Ideogram V4 LoRA and write a prompt. The workflow generates images with your custom subject, style, or identity applied, using up to three LoRAs at once.
Ideogram V4 + LoRA · Text to Image
Paste the URL of a trained Ideogram V4 LoRA and write a prompt. The workflow generates images with your custom subject, style, or identity applied, using up to three LoRAs at once.

Text to Speech
TTS
WhatDreamCost
Whisper
Speech calculator and TTS using Whisper and WhatDreamCost
TTS and Speech Length Calculator
Speech calculator and TTS using Whisper and WhatDreamCost
color grading
darkroom
film emulation
image to image
style transfer
Apply 111 color and 50 B&W film stocks to any image with physics-based grain, halation, print simulation, and cross-processing. No AI models needed.
Darkroom Film Stock Emulation for Image Editing
Apply 111 color and 50 B&W film stocks to any image with physics-based grain, halation, print simulation, and cross-processing. No AI models needed.
e-commerce
image to image
portrait
product photography
style transfer
Camera raw editing inside ComfyUI. White balance, exposure, HSL, clarity, vibrance, sharpening, noise reduction, and skin tone tools with before/after previews.
DarkRoom Camera Raw Tools for Image Editing
Camera raw editing inside ComfyUI. White balance, exposure, HSL, clarity, vibrance, sharpening, noise reduction, and skin tone tools with before/after previews.
_1782815066892.png?width=400&height=300&quality=80&resize=cover)
ideogram v4
text rendering
text to image
typography
Write a prompt and Ideogram V4 generates a design-grade image with the most accurate text rendering of any open-weight model, at up to native 2K resolution.
Ideogram V4 · Text to Image
Write a prompt and Ideogram V4 generates a design-grade image with the most accurate text rendering of any open-weight model, at up to native 2K resolution.
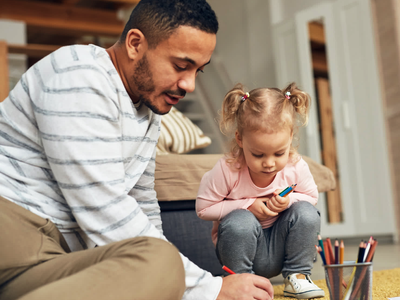
color grading
darkroom
image to image
style transfer
Nine color grading tools with 70+ presets for tone curves, lift/gamma/gain, log wheels, hue remapping, and saturation control. Instant results, no AI model.
DarkRoom Color Grading Toolkit for Image Editing
Nine color grading tools with 70+ presets for tone curves, lift/gamma/gain, log wheels, hue remapping, and saturation control. Instant results, no AI model.
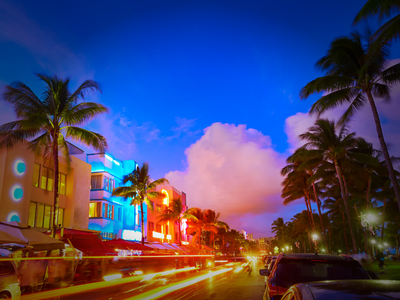
chromatic aberration
darkroom
image editing
image to image
lens correction
vignette
Apply chromatic aberration, vignette, barrel distortion, perspective correction, and full lens profiles from 102 real lenses to any image. No model needed.
DarkRoom Lens & Optics Tools for Image Editing
Apply chromatic aberration, vignette, barrel distortion, perspective correction, and full lens profiles from 102 real lenses to any image. No model needed.
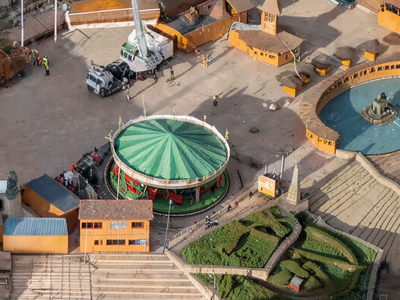
concept art
e-commerce
flux
flux 2 klein
image to image
lora
portrait
Highlight any area of your image in red and Flux 2 Klein 4B zooms into it, generating a full-resolution close-up with new detail. Six steps, fast results.
Flux 2 Klein 4B + Red Zoom LoRA for Image Zoom
Highlight any area of your image in red and Flux 2 Klein 4B zooms into it, generating a full-resolution close-up with new detail. Six steps, fast results.
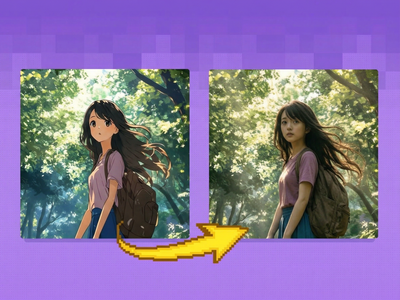
concept art
e-commerce
image to image
product photography
style transfer
wan
Edit and transform images with Wan 2.7. Upload a photo, describe what you want changed, and get results at original resolution with before/after comparison.
Wan 2.7 Image Unified Editing
Edit and transform images with Wan 2.7. Upload a photo, describe what you want changed, and get results at original resolution with before/after comparison.
_1782818117647.png?width=400&height=300&quality=80&resize=cover)
ideogram v4
image editing
image to image
Upload an image and describe the change you want. Ideogram V4 transforms it while preserving your composition, with the strength slider controlling how far the result moves from the original.
Ideogram V4 · Image to Image
Upload an image and describe the change you want. Ideogram V4 transforms it while preserving your composition, with the strength slider controlling how far the result moves from the original.

ASR
Audio to Text
qwen
STT
Upload an audio file and Qwen3 ASR 1.7B transcribes it to text. Supports 52 languages, auto-detects the language, and handles noisy audio. No setup needed.
Qwen3 ASR 1.7B - Speech to Text
Upload an audio file and Qwen3 ASR 1.7B transcribes it to text. Supports 52 languages, auto-detects the language, and handles noisy audio. No setup needed.
audio transcription
qwen
speech to text
SRT
subtitle generation
Transcribe any audio file to text and timed SRT subtitles using Qwen3's speech recognition engine. Upload your audio, get broadcast-ready captions back.
Qwen3 ASR via TTS Audio Suite for SRT Builder
Transcribe any audio file to text and timed SRT subtitles using Qwen3's speech recognition engine. Upload your audio, get broadcast-ready captions back.
seedance 2.0
text to video
video generation
Generate video with native audio from a text prompt using Seedance 2.0 Fast. Describe a scene, pick a duration and aspect ratio, get a clip with synced sound.
Seedance 2.0 Fast - Text to Video
Generate video with native audio from a text prompt using Seedance 2.0 Fast. Describe a scene, pick a duration and aspect ratio, get a clip with synced sound.
image to video
seedance 2.0
video generation
Animate any image into video with ByteDance's Seedance 2.0 Fast. Built-in audio generation, start and end frame control, and multiple aspect ratios. No setup needed.
Seedance 2.0 Fast - Image to Video with Audio
Animate any image into video with ByteDance's Seedance 2.0 Fast. Built-in audio generation, start and end frame control, and multiple aspect ratios. No setup needed.
character design
consistency
film production
image to video
video generation
wan
Wan 2.7 Multi-Reference Image to Video
Wan 2.7 Multi-Reference Image to Video
Wan 2.7 Multi-Reference Image to Video

IndexTTS2 Voice Cloning with Emotion Control
Emotion Control

accessibility
amateur radio
audio processing
chatterbox tts
morse code
text to speech
transcription
Upload Morse code audio, decode it to readable text, and convert to natural speech using ChatterboxTTS. Perfect for amateur radio transcription and accessibility.
Morse Code to Speech
Upload Morse code audio, decode it to readable text, and convert to natural speech using ChatterboxTTS. Perfect for amateur radio transcription and accessibility.
Flux
text to video
Generate high-end furniture and interior design images with FLUX and multiple LoRAs. Perfect for product catalogs, showrooms, and design visualization.
FLUX Luxury Furniture Generator with LoRA Enhancem
Generate high-end furniture and interior design images with FLUX and multiple LoRAs. Perfect for product catalogs, showrooms, and design visualization.

Audio to Audio
voice clone
Clone any voice and change the emotional delivery. Upload audio, type new text, adjust emotions, and get speech with different feelings using the same voice.
Change Emotion using IndexTTS2
Clone any voice and change the emotional delivery. Upload audio, type new text, adjust emotions, and get speech with different feelings using the same voice.
_1776233014021.png?width=400&height=300&quality=80&resize=cover)
e-commerce
QR Code
text to image
Type a URL or any text and get three scannable codes at once: a standard QR code, an Aztec barcode, and a branded creative QR with your logo in the center.
Orion 4D QR Code Generator from Text or URL
Type a URL or any text and get three scannable codes at once: a standard QR code, an Aztec barcode, and a branded creative QR with your logo in the center.

audio
audio encryption
comfyui utility
encryption
modem
orion4d
text to audio
Encode text into audio signals using three modem methods (AFSK, OFDM, Spectral), then decode and verify integrity. Built with Orion4D nodes in ComfyUI.
Audio to Modem Encryption using Orion4D Secret
Encode text into audio signals using three modem methods (AFSK, OFDM, Spectral), then decode and verify integrity. Built with Orion4D nodes in ComfyUI.

audio
audio encryption
image to image
spectrogram
Turn any image into audio by encoding it as a spectrogram. Upload a picture, set your frequency range, and get an MP3 that shows your image when visualized.
Audio to Spectogram using Orion4D Secret
Turn any image into audio by encoding it as a spectrogram. Upload a picture, set your frequency range, and get an MP3 that shows your image when visualized.

audio
audio watermarking
content tracking
provenance
steganography
Upload any audio file, write the text to hide, and get back two watermarked copies. Steganography packs more data. Frequency encoding survives MP3 compression.
Audio Watermarking using Orion 4D Secret
Upload any audio file, write the text to hide, and get back two watermarked copies. Steganography packs more data. Frequency encoding survives MP3 compression.

Cipher
Text
Encode plain text into cipher characters and decode it back. Paste a message, pick a cipher style, and get a disguised version only the matching decoder reads.
Text Manipulator
Encode plain text into cipher characters and decode it back. Paste a message, pick a cipher style, and get a disguised version only the matching decoder reads.
_1777893876118.png?width=400&height=300&quality=80&resize=cover)
instrumental
minimax music 2.6
music generation
song generation
soundtrack
text to music
Text-to-music with Minimax Music 2.6. Generate songs with vocals and backing from a style prompt and lyrics, or toggle instrumental mode for score only.
Minimax Music 2.6 - Text to Music
Text-to-music with Minimax Music 2.6. Generate songs with vocals and backing from a style prompt and lyrics, or toggle instrumental mode for score only.

character design
consistency
film production
image to video
pixverse
pixverse c1
video generation
Upload up to 7 reference images, tag each one, and generate a video that composes your characters, objects, and backgrounds into one scene with Pixverse C1.
Pixverse C1 Reference to Video
Upload up to 7 reference images, tag each one, and generate a video that composes your characters, objects, and backgrounds into one scene with Pixverse C1.
animation
film production
image to video
pixverse
transition
video generation
Upload a start image and end image, describe the motion, and Pixverse C1 generates a video transition between them. Set duration, resolution, and audio.
Pixverse C1 Transition
Upload a start image and end image, describe the motion, and Pixverse C1 generates a video transition between them. Set duration, resolution, and audio.
cinematic
film production
moonvalley marey
text to video
video generation
Generate cinematic 5 or 10 second 1080p video clips from a text prompt with Moonvalley Marey, a commercially-safe model trained only on licensed footage.
Moonvalley Marey - Text to Video
Generate cinematic 5 or 10 second 1080p video clips from a text prompt with Moonvalley Marey, a commercially-safe model trained only on licensed footage.
film production
image to video
marey
moonvalley
vfx
video generation
Turn an image into cinematic 1080p video with Marey, Moonvalley's video model trained on licensed footage. 5s or 10s clips at 24fps, safe for commercial work.
Moonvalley Marey Image to Video
Turn an image into cinematic 1080p video with Marey, Moonvalley's video model trained on licensed footage. 5s or 10s clips at 24fps, safe for commercial work.
Moonvalley Marey Motion Transfer - Video to Video
Moonvalley Marey Pose Transfer - Video to Video
concept art
consistency
image to image
longcat-image-edit
portrait
style transfer
Upload one image, write an instruction, and LongCat-Image-Edit rewrites the parts you describe while keeping the rest identical. Bilingual prompts, 8 steps.
LongCat-Image-Edit - Instruction Image Editing
Upload one image, write an instruction, and LongCat-Image-Edit rewrites the parts you describe while keeping the rest identical. Bilingual prompts, 8 steps.
_1777893963929.png?width=400&height=300&quality=80&resize=cover)
ace-step
ace-step 1.5 XL
audio generation
instrumental
lyrics
music generation
text to music
Generate full songs with ACE-Step 1.5 XL Base. Write a style prompt, add structured lyrics like [Intro] [Verse] [Chorus], pick BPM and key, get an MP3.
ACE-Step 1.5 XL - Text to Music
Generate full songs with ACE-Step 1.5 XL Base. Write a style prompt, add structured lyrics like [Intro] [Verse] [Chorus], pick BPM and key, get an MP3.
Nano Banana Pro Storyboard: 1 Image to 5 Shots
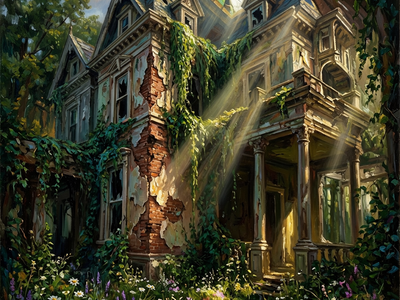
concept art
ernie image
prompt enhancement
text to image
Generate images with Baidu's ERNIE Image model. Write a short prompt and let the built-in AI enhancer expand it into rich detail. Toggle the enhancer on or off.
ERNIE Image - Text to Image
Generate images with Baidu's ERNIE Image model. Write a short prompt and let the built-in AI enhancer expand it into rich detail. Toggle the enhancer on or off.
Dissolve image lighting Kontext V2
asr
audio
qwen
speech to text
subtitles
transcription
Upload audio and Qwen3's ASR engine returns the transcript, word-level timing for SRT subtitles, and an optional translation to English. Language auto-detected.
Qwen3 ASR: Transcribe Audio
Upload audio and Qwen3's ASR engine returns the transcript, word-level timing for SRT subtitles, and an optional translation to English. Language auto-detected.
3d generation
glb export
image to 3d
pbr materials
textured mesh
trellis 2
Upload an image and Trellis 2 builds a textured 3D mesh with PBR materials. Outputs GLB ready for Blender, Unity, or Unreal in about a minute on an H100.
Trellis 2 Image to 3D
Upload an image and Trellis 2 builds a textured 3D mesh with PBR materials. Outputs GLB ready for Blender, Unity, or Unreal in about a minute on an H100.

audio generation
film production
longcat
text to speech
voice cloning
voiceover
Clone any voice from a short audio sample with LongCat AudioDiT 3.5B. Upload a reference clip, type what you want it to say, and get speech in that voice.
LongCat AudioDiT for Voice Clone
Clone any voice from a short audio sample with LongCat AudioDiT 3.5B. Upload a reference clip, type what you want it to say, and get speech in that voice.

audiodit
audio generation
longcat
text to speech
tts
Turn text into spoken audio with LongCat AudioDiT 3.5B, Meituan's open-source diffusion TTS model. Clean voice quality in English and Chinese, no setup.
LongCat AudioDiT for TTS
Turn text into spoken audio with LongCat AudioDiT 3.5B, Meituan's open-source diffusion TTS model. Clean voice quality in English and Chinese, no setup.
Product Placement in Video

audiodit
dialogue
longcat
multi-speaker
text to speech
voice cloning
Clone two voices from short audio samples and generate dialogue between them with LongCat AudioDiT 3.5B. Upload your references, write your script, hit run.
LongCat AudioDiT for Multi Speaker TTS
Clone two voices from short audio samples and generate dialogue between them with LongCat AudioDiT 3.5B. Upload your references, write your script, hit run.

LongCat AudioDiT 3.5B - TTS, Voice Clone, Multi-Sp
animation
film production
happy horse
text to video
video generation
Generate cinematic video with synchronized audio from a text prompt using Alibaba's Happy Horse 1.0. Pick resolution, aspect ratio, and clip length up to 15s.
Happy Horse 1.0 - Text to Video
Generate cinematic video with synchronized audio from a text prompt using Alibaba's Happy Horse 1.0. Pick resolution, aspect ratio, and clip length up to 15s.
LTX2.3
Vid2Vid
Convert SDR video to 16-bit linear HDR with LTX-2.3 and the HDR IC-LoRA. Get EXR frames ready for color grading pipelines, plus a tone-mapped SDR preview.
LTX-2.3 IC-LoRA HDR for SDR to HDR Video
Convert SDR video to 16-bit linear HDR with LTX-2.3 and the HDR IC-LoRA. Get EXR frames ready for color grading pipelines, plus a tone-mapped SDR preview.
consistency
film production
happy horse
style transfer
vid2vid
video generation
Edit any video with Happy Horse 1.0 by uploading up to 5 reference images. Swap backgrounds, change subjects, or shift style. Original motion stays intact.
Happy Horse 1.0 Video Editing
Edit any video with Happy Horse 1.0 by uploading up to 5 reference images. Swap backgrounds, change subjects, or shift style. Original motion stays intact.

camera angle control
camera motion
film production
seedance 2.0
vfx
vid2vid
video generation
Take any video and re-shoot it with a new camera move. Seedance 2.0 keeps your scene intact and pulls the camera motion from a reference clip you upload.
Seedance 2.0 for Camera Angle and Motion Control
Take any video and re-shoot it with a new camera move. Seedance 2.0 keeps your scene intact and pulls the camera motion from a reference clip you upload.
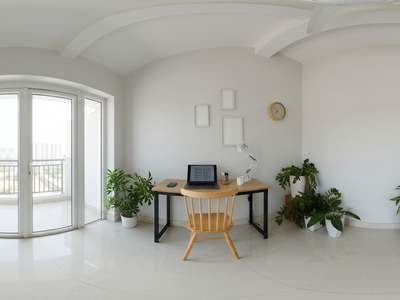
360
concept art
image to image
nano banana
panorama
vfx
Turn any photo into a 360 equirectangular panorama with Nano Banana 2. Upload an image, hit run, and get a 2:1 wrap ready for VR scenes and skyboxes.
Nano Banana 2 for Image to 360 Panorama
Turn any photo into a 360 equirectangular panorama with Nano Banana 2. Upload an image, hit run, and get a 2:1 wrap ready for VR scenes and skyboxes.
_1781095044969.png?width=400&height=300&quality=80&resize=cover)
character design
concept art
consistency
flux 2 klein
image to image
portrait
Edit a photo of a person with Klein 9B while an identity transfer enhancer keeps their face and likeness locked, so they still look like themselves after.
Flux.2 Klein Enhancer for Identity Transfer
Edit a photo of a person with Klein 9B while an identity transfer enhancer keeps their face and likeness locked, so they still look like themselves after.
4k
concept art
portrait
qwen
text to image
upscaling
Generate with Qwen Image 2512 and let NVIDIA PiD decode straight to 4K. One prompt, one run, a 4096px image with no separate upscale pass needed.
Qwen Image 2512 and NVIDIA PiD Text to 4k Image
Generate with Qwen Image 2512 and let NVIDIA PiD decode straight to 4K. One prompt, one run, a 4096px image with no separate upscale pass needed.
4k
concept art
flux
image to image
product photography
upscaling
Upload any image and NVIDIA PiD rebuilds it at 4K in four diffusion steps. No tiling, no separate upscale model. Add a caption for guidance, or leave it blank.
NVIDIA PiD for 4k Image Upscale
Upload any image and NVIDIA PiD rebuilds it at 4K in four diffusion steps. No tiling, no separate upscale model. Add a caption for guidance, or leave it blank.

Image to Image
SAM 3.1
Segmentation
Video to Video
Segment and track any object in images and video with SAM 3.1, Meta's concept segmentation model. Type what you want, hit run, and get clean masks back.
SAM3.1 for Image and Video Segmentation
Segment and track any object in images and video with SAM 3.1, Meta's concept segmentation model. Type what you want, hit run, and get clean masks back.
Bernini-R
Image Editing
Image Generation
Multi-Model
R2V
Video Editing
Video Generation
Edit or generate video with Bernini, ByteDance's open-source unified video model. Upload a clip, add reference images, describe the change, and run it.
Bernini-R - Generation & Edit for Image and Videos
Edit or generate video with Bernini, ByteDance's open-source unified video model. Upload a clip, add reference images, describe the change, and run it.
_1782111515139.png?width=400&height=300&quality=80&resize=cover)
anime
anime-turbo
illustration
restyle
Turn a photo or sketch into an anime illustration with Anima Base v1.0 plus the Turbo LoRA. Upload an image, describe the look you want, and hit run.
Anima Turbo: Restyle Any Photo Into Anime Art
Turn a photo or sketch into an anime illustration with Anima Base v1.0 plus the Turbo LoRA. Upload an image, describe the look you want, and hit run.

audio
gemini
gemini 3.1 flash tts
multi-speaker
text to speech
tts
voiceover
Turn any script into natural spoken audio with Gemini 3.1 Flash TTS, Google's text-to-speech model. Type your text, pick a voice, describe the tone, and hit run.
Gemini 3.1 Flash TTS for Text to Speech:
Turn any script into natural spoken audio with Gemini 3.1 Flash TTS, Google's text-to-speech model. Type your text, pick a voice, describe the tone, and hit run.
_1767292063423.webp?width=400&height=300&quality=80&resize=cover)
Create a Fashion Shoot - NanoBanana + Kling

dramabox
expressive speech
opensource
resemble ai
text to speech
Turn a scene-style prompt into a performed audio clip with DramaBox, Resemble AI's expressive open-source TTS model. Describe your speaker and delivery, optionally clone a voice, and hit run.
DramaBox: Direct a Voice Performance
Turn a scene-style prompt into a performed audio clip with DramaBox, Resemble AI's expressive open-source TTS model. Describe your speaker and delivery, optionally clone a voice, and hit run.

gemma 4
google deepmind
image to text
multimodal llm
opensource
vision language
Upload an image, ask a question or give an instruction, and get a written answer from Gemma 4 E4B, Google DeepMind's open-weights multimodal model. Add audio to transcribe or analyze it alongside the image.
Gemma 4 E4B: Ask Anything About an Image
Upload an image, ask a question or give an instruction, and get a written answer from Gemma 4 E4B, Google DeepMind's open-weights multimodal model. Add audio to transcribe or analyze it alongside the image.
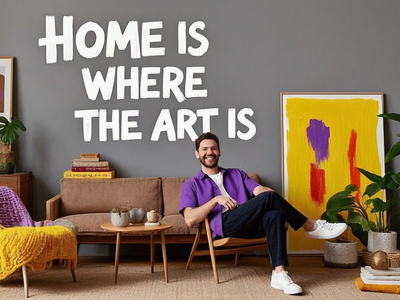
Ovis Text to Image
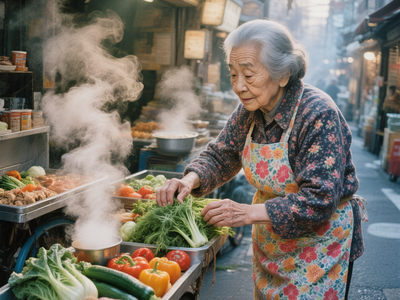
HunyuanImage 3.0 Text to Image
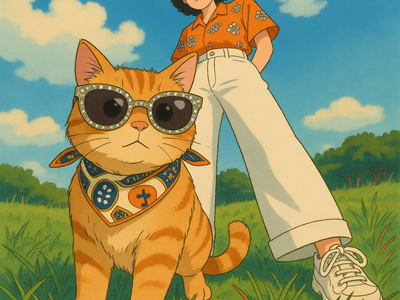
Kling Omni One Image Edit
360 video
audio video
equirectangular
immersive
panorama
text to video
vr
Describe a scene and LTX-2.3 by Lightricks generates a 360 video with synchronized sound that you can look around inside. Type a prompt and hit run.
LTX 2.3 for Text to 360 VR Video Panorama
Describe a scene and LTX-2.3 by Lightricks generates a 360 video with synchronized sound that you can look around inside. Type a prompt and hit run.
GPT Image 1.5 Text to Image
API
Filmmaking
Floyo API
LTX 2 Pro
Text to Video
Videography
Text to video using LTX 2 Pro API
LTX 2 Pro API for Text to Video
Text to video using LTX 2 Pro API
HunyuanVideo 1.5 for Image to Video
_1768210693794.png?width=400&height=300&quality=80&resize=cover)
Ecommerce
NanoBanana
Reference Image
Upload the outfit image to generate fashion billboard
Generate Fashion Billboard Using Outfit Image
Upload the outfit image to generate fashion billboard
Image2Image
Image2Video
Kling Omni One Video Edit
Qwen Image Edit 2511
Editing the character in the video without losing quality using video to video workflow
Change in the Character using Image2Vid
Editing the character in the video without losing quality using video to video workflow
floyoofficial
1.5k
4k Upscale
Image2Image
Image Edit
Image Upscale
Qwen Image Edit 2511
Upscale to 2k to 4k
Upscaling Images to 4k using Qwen Image Edit 2511
Upscale to 2k to 4k
Create Magazine Cover & Package Design
_1782392938384.png?width=400&height=300&quality=80&resize=cover)
birefnet
microscope
object isolation
rmbg
Drop in a microscope photo and BiRefNet finds the main subject, cuts it out, places it on a clean background, then upscales and sharpens it. Upload an image and hit run.
BiRefNet for Microscope Auto Segmentation
Drop in a microscope photo and BiRefNet finds the main subject, cuts it out, places it on a clean background, then upscales and sharpens it. Upload an image and hit run.
_1783321634939.png?width=400&height=300&quality=80&resize=cover)
3d to image
gaussian splat
ply
qwen image edit
restoration
splat cleanup
Upload a screenshot from a 3D Gaussian Splat viewer and Qwen Image Edit 2511 with a specialized Gaussian restoration LoRA repairs blank areas, removes splat artifacts, and outputs a clean photorealistic image in 4 steps.
Gaussian Splat to Image · Image to Image
Upload a screenshot from a 3D Gaussian Splat viewer and Qwen Image Edit 2511 with a specialized Gaussian restoration LoRA repairs blank areas, removes splat artifacts, and outputs a clean photorealistic image in 4 steps.