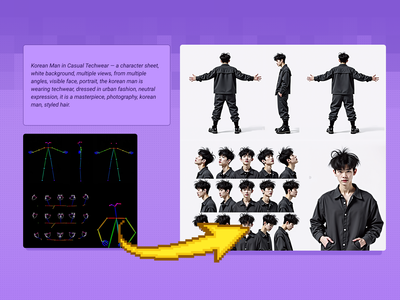
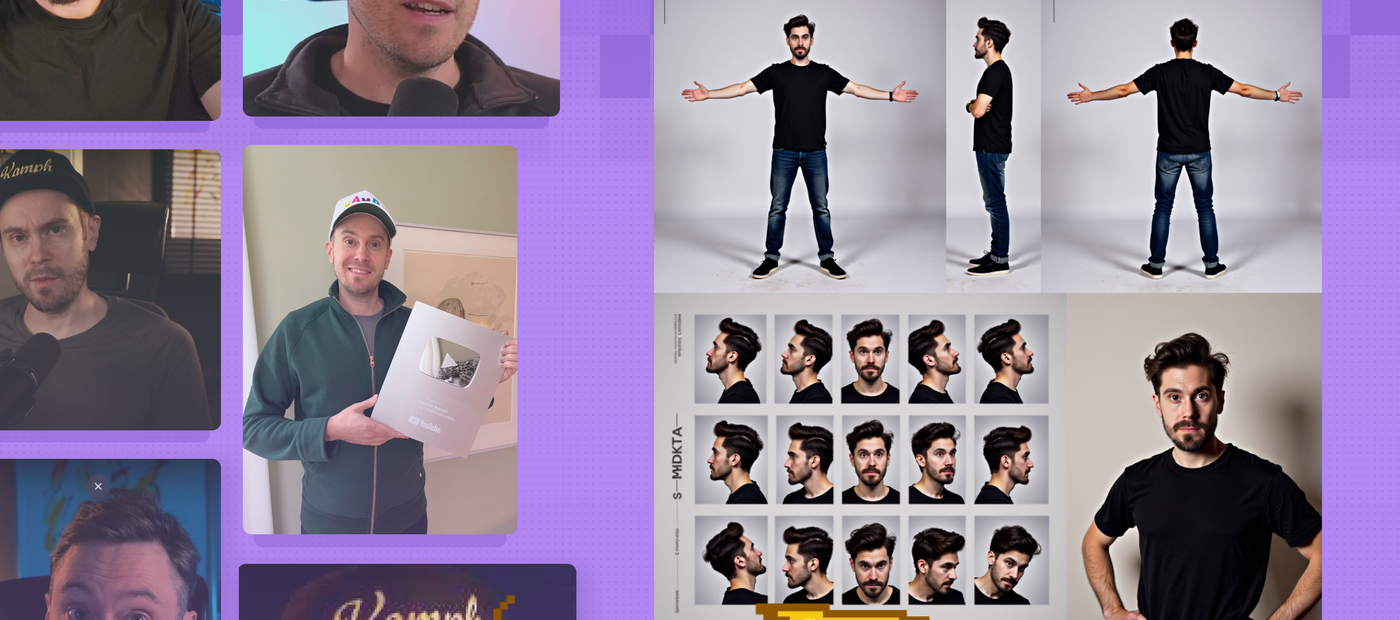
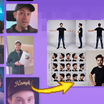
Text to Character Sheet with a reference LoRA
Generate a character sheet using a prompt and a LoRA model of a particular person for more accurate renders. Key Inputs Load Image: Use any JPG or PNG of your pose sheet Prompt: as descriptive a prompt as possible Width & height: Optimal resolution settings are noted at 1280px x 1280px Denoise: The amount of variance in the new image. Higher has more variance. ControlNet Strength: The amount of adherence to the original image. Higher has more adherence. Start Percent: The point in the generation process where the control starts exerting influence. (Have it start later, to let AI imagine first.) End Percent: The point in the generation process where the control stops exerting influence. (Have it end sooner, to let AI finish it off with some variation.) Flux Guidance: How much influence the prompt has over the image. Higher has more guidance.
Character Sheet
Controlnet
Flux
5
560
Nodes & Models
KSamplerSelect
VAELoader
DualCLIPLoader
t5xxl_fp8_e4m3fn.safetensors
clip_l.safetensors
RandomNoise
Fast Groups Muter (rgthree)
Label (rgthree)
UNETLoader
flux1-dev-fp8.safetensors
LoadImage
ControlNetLoader
FLUX.1/flux_shakker_labs_union_pro-fp8_e4m3fn.safetensors
UpscaleModelLoader
4x-UltraSharp.pth
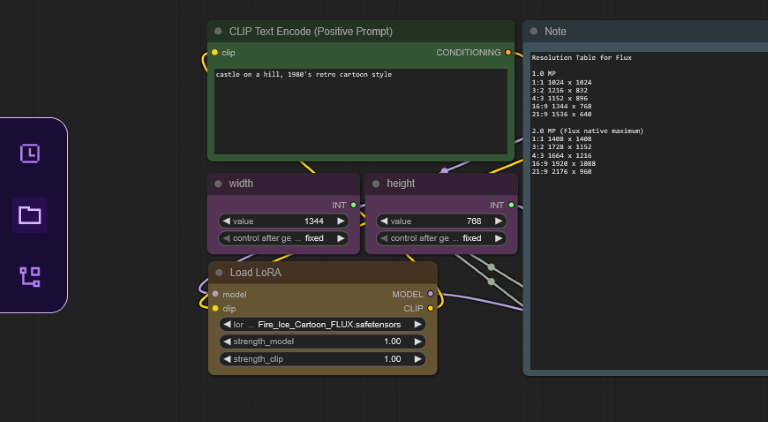
CLIPTextEncode
EmptySD3LatentImage
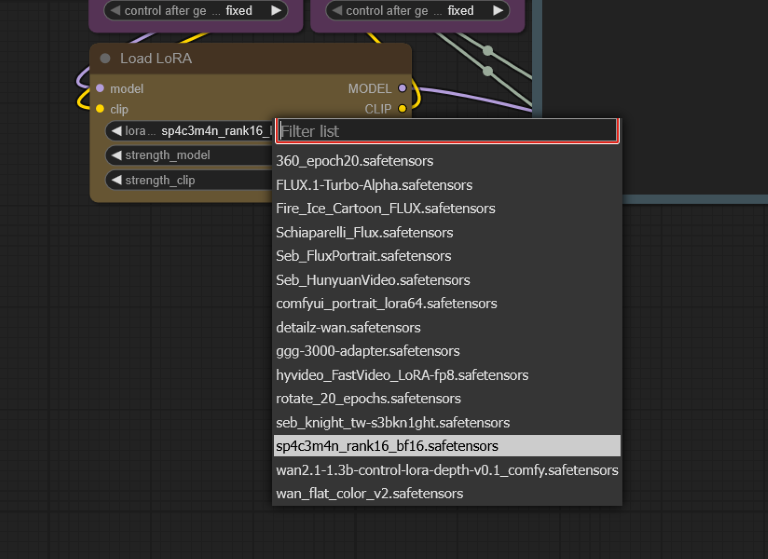
LoraLoaderModelOnly
Seb_FluxPortrait.safetensors
ControlNetApplySD3
ModelSamplingFlux
FluxGuidance
BasicScheduler
BasicGuider
SamplerCustomAdvanced
VAEDecode
PreviewImage
ImageScale
SaveImage
ImageCrop
Reroute
CoreMLDetailerHookProvider
ToBasicPipe
ToDetailerPipe
FromBasicPipe_v2
FaceDetailerPipe
UltralyticsDetectorProvider
UltimateSDUpscale
Generate a character sheet using a prompt and a LoRA model of a particular person for more accurate renders.
Key Inputs
Load Image: Use any JPG or PNG of your pose sheet
Prompt: as descriptive a prompt as possible
Width & height: Optimal resolution settings are noted at 1280px x 1280px
Denoise: The amount of variance in the new image. Higher has more variance.
ControlNet Strength: The amount of adherence to the original image. Higher has more adherence.
Start Percent: The point in the generation process where the control starts exerting influence. (Have it start later, to let AI imagine first.)
End Percent: The point in the generation process where the control stops exerting influence. (Have it end sooner, to let AI finish it off with some variation.)
Flux Guidance: How much influence the prompt has over the image. Higher has more guidance.
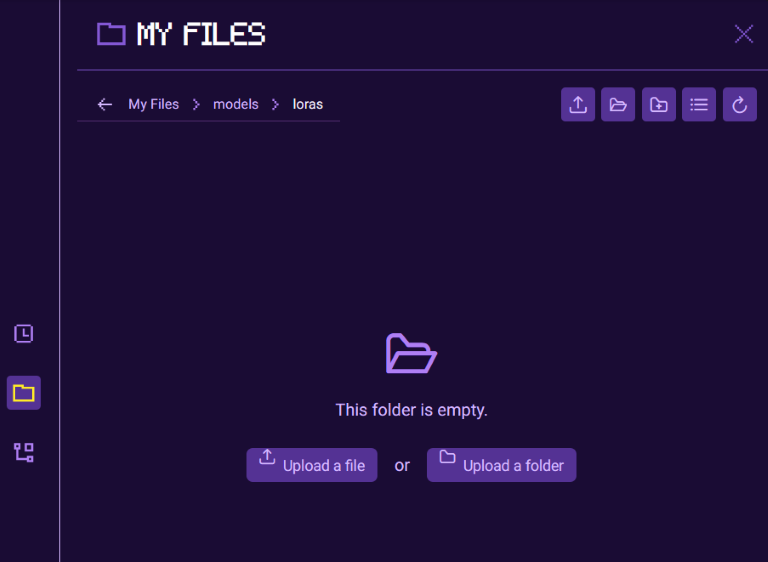
Uploading LoRAs to Floyo
Launch App or Run Workflow
On the left side of the canvas, click the middle file button
In "My Files" navigate to models/loras, select "Upload a File" and choose a LoRA file
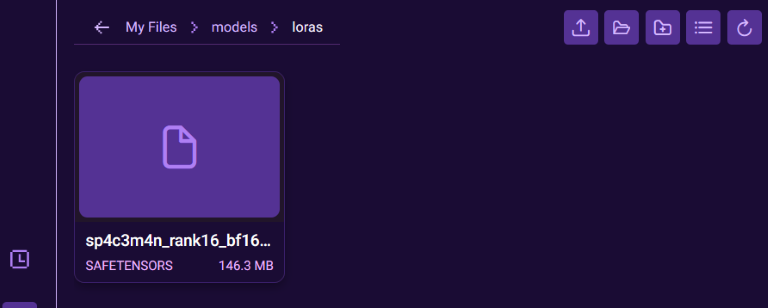
Once your LoRA is uploaded, close the file browser and refresh your ComfyUI canvas by pressing "R", this will update all model lists
Select your LoRA in the Load LoRA node
Read more