FLUX.2 Klein 9B: Image Inpainting
Inpainting image using Flux.2 Klein and LanPaint
Flux
Flux.2 Klein
Image2Image
Inpainting
LanPaint
4
5.1k


ABOUT THE WORKFLOW
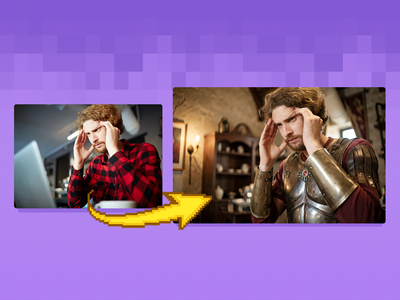
Image Inpainting Mask an area of an image, describe what goes there, and the model fills only that spot. That's it.
Open weights, so you only pay for generation time. All models pre-loaded on Floyo.
Model
FLUX.2 [klein] 9B. Black Forest Labs' fast open-weight image model.
LanPaint sampler. Fills the masked area and blends it with the rest of the image, with no separate inpaint model needed.
HOW IT WORKS
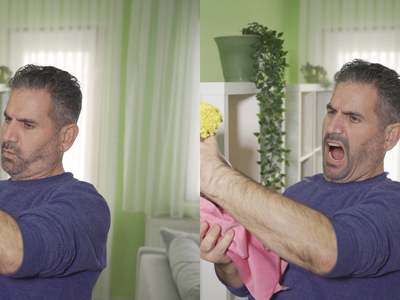
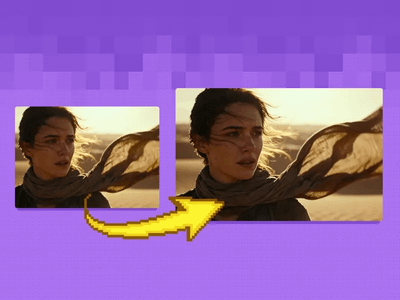
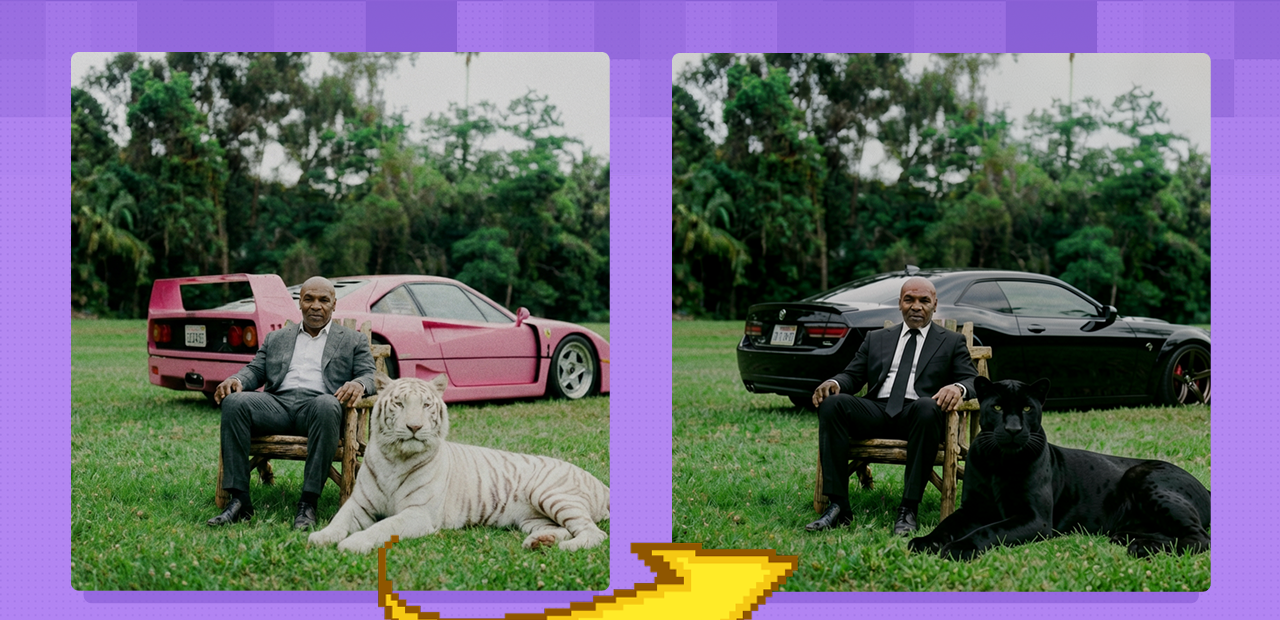
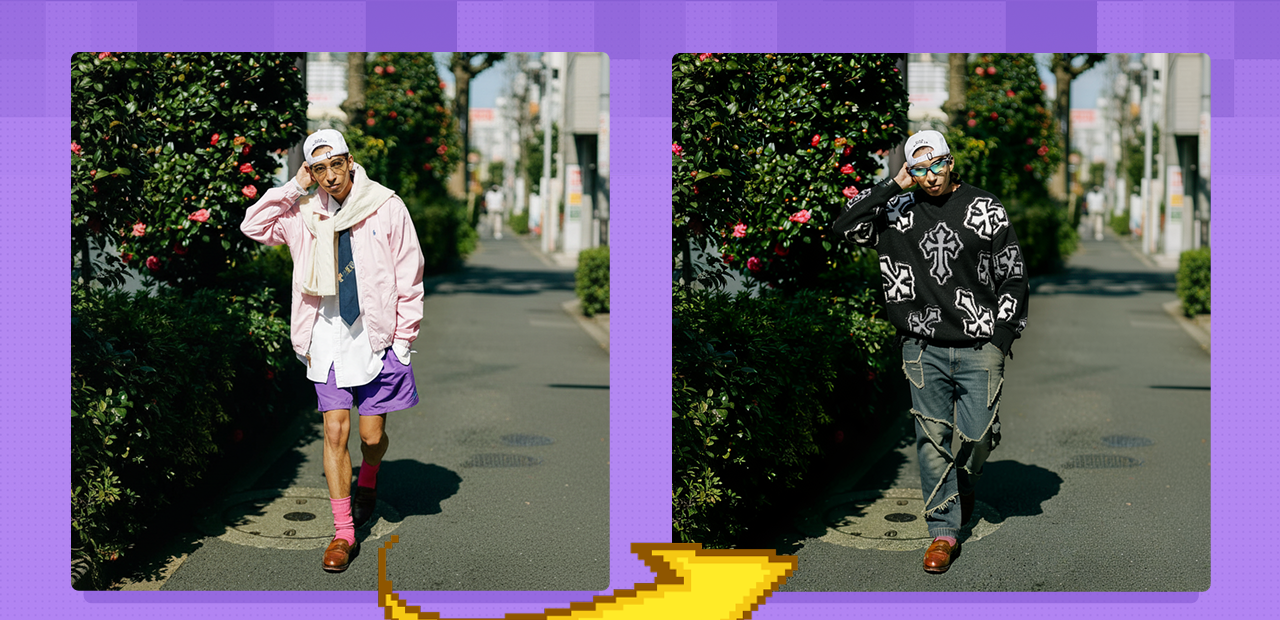
Step 1. Upload and mask your image Load your image and paint a mask over the area you want to change. Everything outside the mask stays as it is. Works great with: object swaps · removals · additions · background fixes
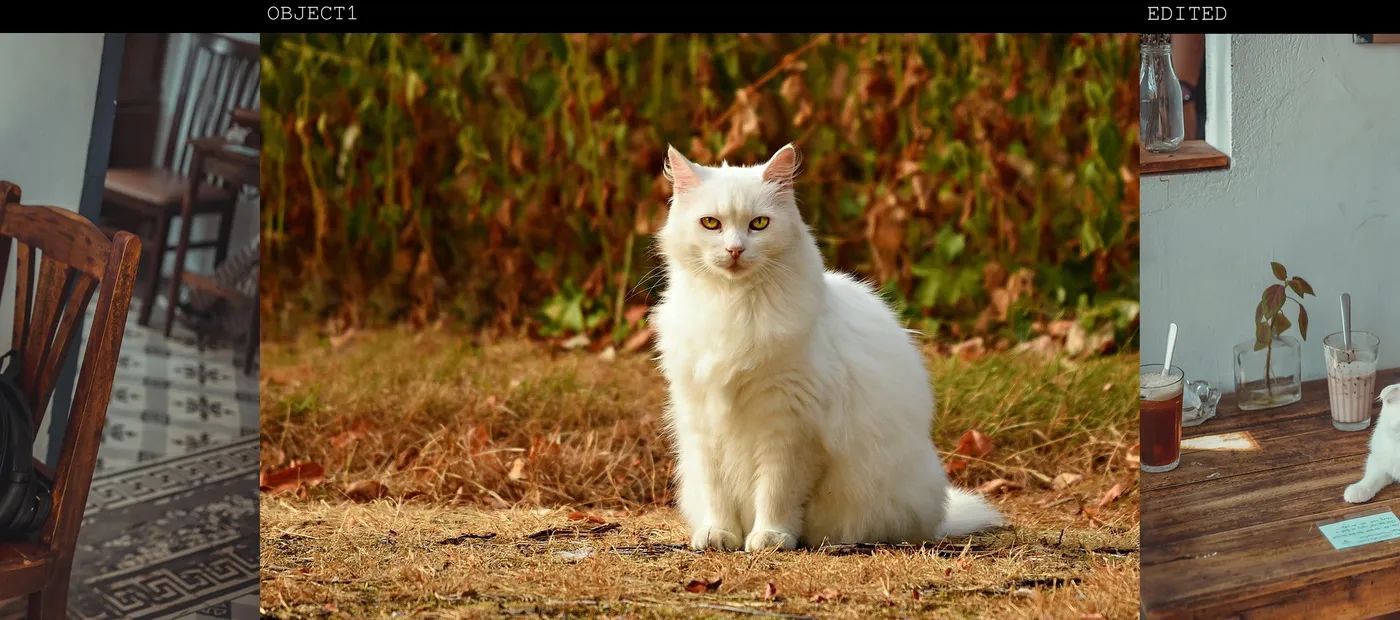
Step 2. Add a reference (optional) Load a second image to pull a specific object into the masked area, like "replace the book in image 1 with the cat in image 2."
Step 3. Describe the change Say what should fill the masked area. Skip the reference for a text-only fill, or name image 2 to place the object you loaded.
Step 4. Hit run and download The model fills only the masked area and keeps the rest of the image intact, then shows the result next to the original. Preview it in the workflow, then download. Ready for: Photoshop · Figma · Canva · any editor
First time? Leave every setting as-is. The defaults (1MP · 4 steps · guidance 4 · LanPaint on) are the right starting point for almost everyone.
RECOMMENDED SETTINGS
Quick-start guide. Find the goal that matches yours and copy the settings.
Standard inpaint (most people) ★ Start here — 1MP · 4 steps · guidance 4 · LanPaint on. The right starting point for almost everyone.
Replace an object with a reference — Load the object as a second image and name it in the prompt, like "the cat in image 2." The model places it inside the masked area.
Remove something — Mask it and prompt for what should be behind it, like "empty wooden table." The model fills the gap with the surrounding context.
Add something new — Mask the spot and describe what to add. A clean mask edge helps the new element blend in.
The fill is not blending well — Keep the mask slightly larger than the object so the model has room to blend the edges.
Follow the prompt more closely — Raise the guidance toward 5 to 6. Higher sticks closer to your wording, though too high can look harsh.
Reproduce a result you liked — Lock the seed to the number that produced it.
Prompt: Describe what belongs in the masked area, and reference a second image by number when you have one. Keep the rest of the scene out of the prompt so the model leaves it untouched.
USE CASES
🔄 Object Replacement Swap one object for another, optionally pulled from a reference image.
🧹 Object Removal Mask and remove an unwanted element, filling in the background behind it.
➕ Add Elements Paint in a new object or detail that was not there before.
🛠️ Photo Fixes Patch blemishes, gaps, or distractions in a specific area without touching the rest.
WHAT WORKS BEST / WHAT TO AVOID
✅ Works great
A clean mask over the target area
A clear reference image for replacements
Short prompts describing the fill
Edits limited to one region
⚠️ May produce softer results
Sloppy or overly tight masks
Large masked areas in one pass
Vague prompts about the fill
Low-resolution reference objects
LEARN
📹 Videos
ComfyUI 101 Free Course ft. Sebastian Kamph
Floyo 101 for Team Collaboration
✨ Quick links
FAQ
What is image inpainting? Inpainting is editing only a selected part of an image while leaving everything else unchanged. You paint a mask over an area, and the model regenerates only that region, so you can replace, remove, or add an object in one spot without affecting the rest of the picture.
How does this workflow use a reference image? You load your main image and mask the area to change, then optionally load a second image holding an object you want placed there. In the prompt you point to it by number, like "replace the book in image 1 with the white cat from image 2," and the model fills the masked area with that object. Without a reference, it fills the mask from your text alone.
What is LanPaint? LanPaint is the inpainting sampler this workflow uses. It fills the masked region and blends it with the surrounding pixels so the edit sits naturally in the image, and it works without a dedicated inpainting checkpoint. That keeps the workflow simple while still producing clean, well-blended fills.
What settings should I use? Use 1MP output, 4 steps, and a guidance of 4 with the euler sampler, and leave LanPaint on. Raise the guidance toward 5 or 6 to follow the prompt more strictly, and keep your mask slightly larger than the target so the model has room to blend the edges.
How is this different from the Klein 9B prompt-editing workflow? The prompt-editing workflow changes the whole image from a text instruction. This inpainting workflow changes only the area you mask and leaves the rest pixel-for-pixel intact, and it can pull a specific object from a reference image. Use inpainting when you want a precise, local edit rather than a full-image change.
Can I use the results commercially? Be careful here. FLUX.2 Klein 9B is released under the FLUX Non-Commercial License, and only the smaller 4B Klein models are Apache 2.0, so commercial use of the 9B model requires a separate license from Black Forest Labs at bfl.ai/licensing. Review the license before using it commercially.
How to run FLUX.2 Klein 9B online? You can run FLUX.2 Klein 9B online through Floyo. No installation, no setup, no GPU to rent. Open the workflow in your browser, mask your image, write a prompt, and hit run. Free to try.
WHY FLOYO?
Floyo is the only platform with team collaboration for ComfyUI in the browser. You run workflows with no install. You share run history, assets, and models across your team. You pay only when you generate. Floyo supports open-source and closed-source models.
A designer runs an inpaint and likes the result. A teammate opens that exact run from shared history and keeps going. No file handoffs. No version confusion.
For studios and enterprise teams, Floyo adds private workspaces, pooled resources, and a team usage dashboard. Other ComfyUI cloud tools run for one person at a time. Floyo runs for the whole team, with transparent per-generation costs.
Ready to try it? Upload an image, mask an area, and run it. The settings are already set.
Questions? Watch the free course or check the FAQ above.
Read more