Flux Text to Image
Create original images using only text prompts, which can be simple or elaborate. Key Inputs Prompt: as descriptive a prompt as possible Width & height: Optimal resolution settings are noted
Flux
Text2Image
7
1.6k


Nodes & Models
KSamplerSelect
RandomNoise
UNETLoader
flux1-dev-fp8.safetensors
VAELoader
ae.safetensors
DualCLIPLoader
clip_l.safetensors
t5xxl_fp16.safetensors
Note
EmptySD3LatentImage
ModelSamplingFlux
CLIPTextEncode
BasicScheduler
FluxGuidance
BasicGuider
SamplerCustomAdvanced
VAEDecode
SaveImage
Write a prompt and Flux Dev generates an image from it. This is the standard Flux Dev text-to-image workflow: fp8 quantized for speed, running 20 steps with the euler sampler and a simple scheduler. The resolution table built into the workflow covers every common aspect ratio from 1:1 to 21:9 at both 1MP and 2MP output sizes.
Flux Dev is a 12B parameter rectified flow transformer from Black Forest Labs. It understands complex, descriptive prompts well and renders compositional scenes, text, and lighting with more accuracy than earlier diffusion models.
How do you generate images with Flux Dev?
Write a detailed, descriptive prompt, set your resolution, and run. Flux Dev follows long natural-language descriptions accurately. Describe the subject, scene, lighting, mood, and camera angle. The default prompt is a good template: specific environment, specific lighting conditions, specific atmospheric detail.
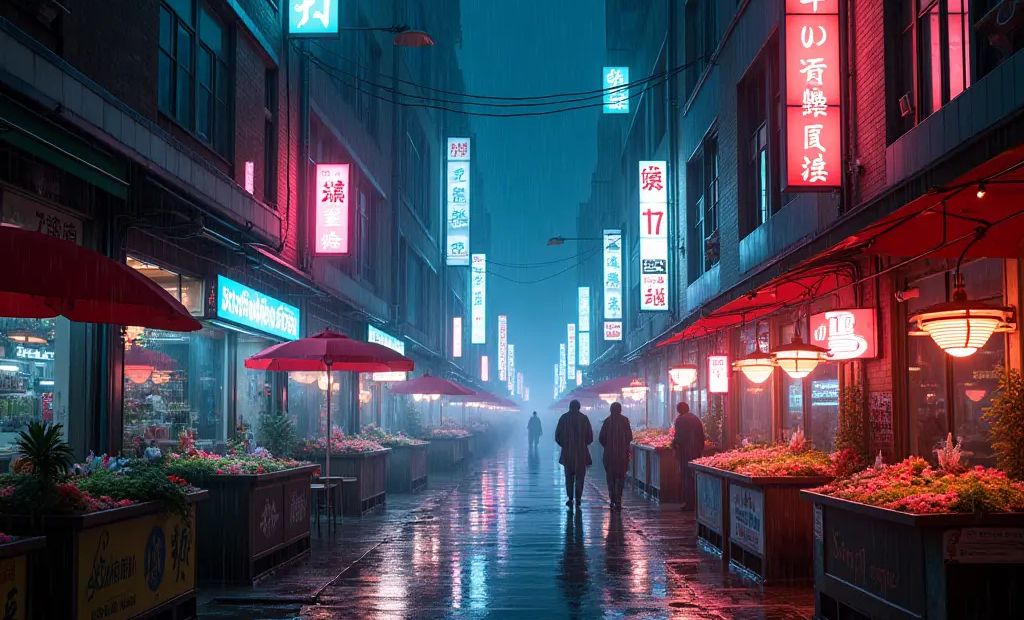
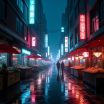
Prompt (CLIPTextEncode) Describe what you want to see in specific, concrete terms. The default prompt demonstrates the right approach: "Cyberpunk photo of a city at night. The city is lit up by neon street signs from various vendors and stalls. It's raining and the lights are reflected in the pools of water." That's subject, environment, lighting, and atmospheric detail, all specified.
Flux Dev uses a dual-encoder setup (CLIP-L + T5-XXL), which gives it strong language understanding for complex, long-form descriptions. You don't need to use tag-based prompting. Write full sentences and describe exactly what you want: lighting direction, color palette, materials, camera distance, and focal details all translate.
There is no negative prompt node in this workflow. Flux Dev's architecture doesn't use classifier-free guidance in the traditional sense. The FluxGuidance node controls distillation guidance independently. Describe elements you want to avoid by their absence positively in the prompt rather than using a negative field.
Width / Height (PrimitiveNode, defaults: 1024 x 1024) Change the width and height PrimitiveNodes to set output resolution. The builder included a complete resolution table in the workflow note:
1MP outputs (use as default):
1:1: 1024 x 1024
3:2: 1216 x 832
4:3: 1152 x 896
16:9: 1344 x 768
21:9: 1536 x 640
2MP outputs (Flux maximum):
1:1: 1408 x 1408
3:2: 1728 x 1152
4:3: 1664 x 1216
16:9: 1920 x 1088
21:9: 2176 x 960
Start at 1MP for most work. 2MP outputs take roughly twice as long and use significantly more VRAM. Generate at 1MP and upscale in post (SeedVR2 or similar) for large-format output needs.
Guidance (FluxGuidance, default: 3.5) Controls how strongly the model follows your prompt. 3.5 is the standard Flux Dev setting for high prompt adherence. Lower values (2.0 to 3.0) give the model more interpretive latitude. Outputs are more varied and sometimes more aesthetically interesting but less literally accurate to your description. Higher values (4.0 to 5.0) tighten adherence further but can introduce over-sharpening or compositional rigidity.
For photorealistic outputs, 3.5 is the tested sweet spot. For artistic or painterly styles where you want the model to interpret loosely, try 2.5.
Steps (BasicScheduler, default: 20) 20 steps at the simple scheduler produces clean, fully-resolved outputs. For draft iterations and prompt testing, 10 to 12 steps gives you the composition and general structure with softer fine detail. Go up to 25 to 30 for complex scenes where fine detail matters, though returns diminish above 25.
Scheduler (BasicScheduler, default: simple) Simple is the correct scheduler pairing for Flux Dev. Leave this unchanged.
Sampler (KSamplerSelect, default: euler) Euler is the correct sampler for Flux Dev. Leave unchanged.
Shift parameters (ModelSamplingFlux, defaults: max_shift 1.15 / base_shift 0.5) These control the noise schedule shift for Flux's rectified flow architecture. The defaults (1.15 / 0.5) are tuned for 1MP generation. At 2MP, the model benefits from slightly increased shift values. The defaults will still work but may slightly underperform. Leave at defaults for 1MP. For 2MP, try max_shift 1.5 / base_shift 0.5 if you notice soft or inconsistent outputs.
Seed (RandomNoise, default: randomize) Randomized by default. Fix the seed to compare guidance, step, or prompt variations while controlling for generation randomness.
Models loaded
flux1-dev-fp8.safetensors: Flux Dev, fp8 quantized for VRAM efficiency
CLIP: clip_l.safetensors + t5xxl_fp16.safetensors (DualCLIPLoader, flux mode)
VAE: ae.safetensors
The fp8 quantized model runs comfortably on 16GB VRAM at 1MP. Full fp16/bf16 Flux Dev requires significantly more VRAM and is slower. fp8 is the practical choice for most setups.
What is Flux Dev text to image good for?
It's for generating high-quality images where prompt control and compositional accuracy matter. Flux Dev follows complex scene descriptions well and renders text, logos, and detailed environments more reliably than earlier diffusion models. Start here for concept art, product photography, architectural visualization, and any scene with specific compositional requirements.
Compositional complexity is where Flux Dev stands out. Prompts with multiple subjects, specific spatial relationships, and layered environmental detail translate to output more accurately than with SD-era models. "A woman standing at the left of the frame, a market stall behind her, rain on the cobblestones in the foreground, neon signage reflected in puddles": that kind of multi-element scene description works, and the model honors the composition.
Text rendering is meaningfully better than most diffusion models. Signs, labels, and short text strings in scenes stay mostly legible, not perfect, but reliable enough for concept work. For exact text accuracy on production materials, Seedream 4.0 or 5.0 Lite is the stronger choice.
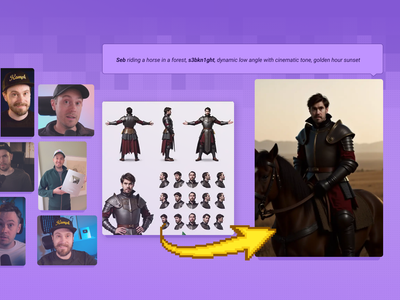
For consistent character identity across multiple generations, Flux Dev's base performance is limited. The community notes that specific faces and fine details don't persist reliably between generations without a trained LoRA. For character consistency workflows, a dedicated character LoRA or a reference-based workflow (Flux Kontext) gives more predictable results.
VRAM considerations: the fp8 model here runs on 16GB VRAM at 1MP. The full 32B parameter Flux model (Flux 1.1 Ultra, fp16) requires dual high-VRAM GPUs and is impractical for most local setups. The fp8 quantized Flux Dev in this workflow is the right balance of quality and hardware accessibility.
FAQ
How detailed should my Flux Dev prompt be?
More detail generally helps. Describe the subject, the environment, the lighting direction, the color palette, the mood, and the camera angle. Flux Dev's T5-XXL encoder handles long, natural-language descriptions well. The default prompt ("Cyberpunk photo of a city at night... raining and the lights are reflected in pools of water") is a good benchmark for the level of specificity that produces strong results.
Why is there no negative prompt in this workflow?
Flux Dev uses a guidance architecture where FluxGuidance controls the distillation signal directly. The model doesn't process negative prompts through the standard CFG mechanism. For elements you want to avoid, describe their absence in the positive prompt: "clear sky" instead of "negative: clouds," "smooth skin" instead of "negative: wrinkles."
What resolution should I generate at?
Start at 1MP (1024x1024 for 1:1, or the matching aspect ratio from the table). 1MP generates fast and produces fully resolved outputs. Move to 2MP only when you need the extra resolution for print or large-format display. It takes roughly twice as long and uses significantly more VRAM. For large output sizes, generating at 1MP and upscaling with SeedVR2 is often faster than generating at 2MP directly.
How does Flux Dev compare to Flux Kontext?
Flux Dev is a text-to-image model: it generates from a prompt with no image input. Flux Kontext is an image editing model that takes a reference image and a prompt and modifies the existing image. For starting from scratch, use Flux Dev. For editing an existing image or combining multiple references, use Flux Kontext.
How do I run Flux Dev text to image online?
You can run this workflow online through Floyo. No installation, no setup. Open the workflow in your browser, write your prompt, and hit run. Free to try.
Read more
0
Reply