Insert Product into Existing Ad
Ecommerce
NanoBanana
Reference Image
1
235


Nodes & Models
NanoBananaProUnified_floyo
PrimitiveStringMultiline
WorkflowGraphics
Note
LoadImage
GetImageSize
RegexReplace
ResizeAndPadImage
ImageBatch
SaveImage
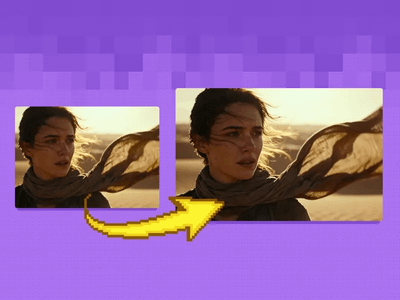
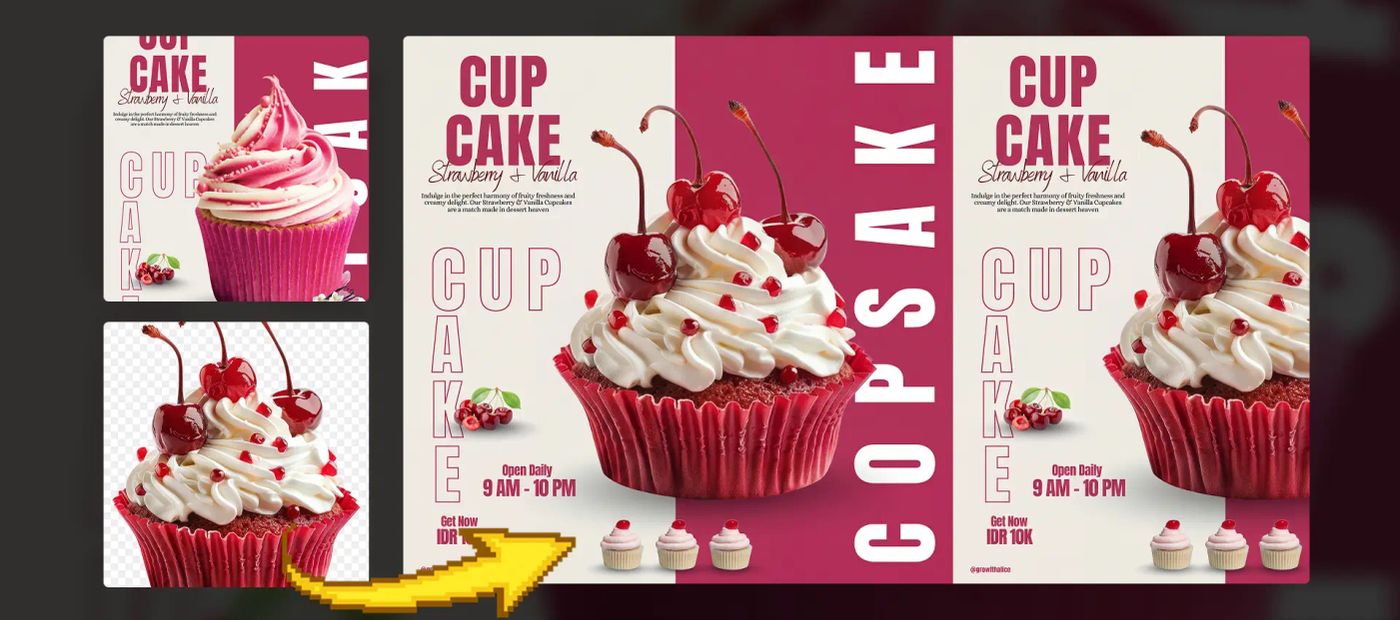
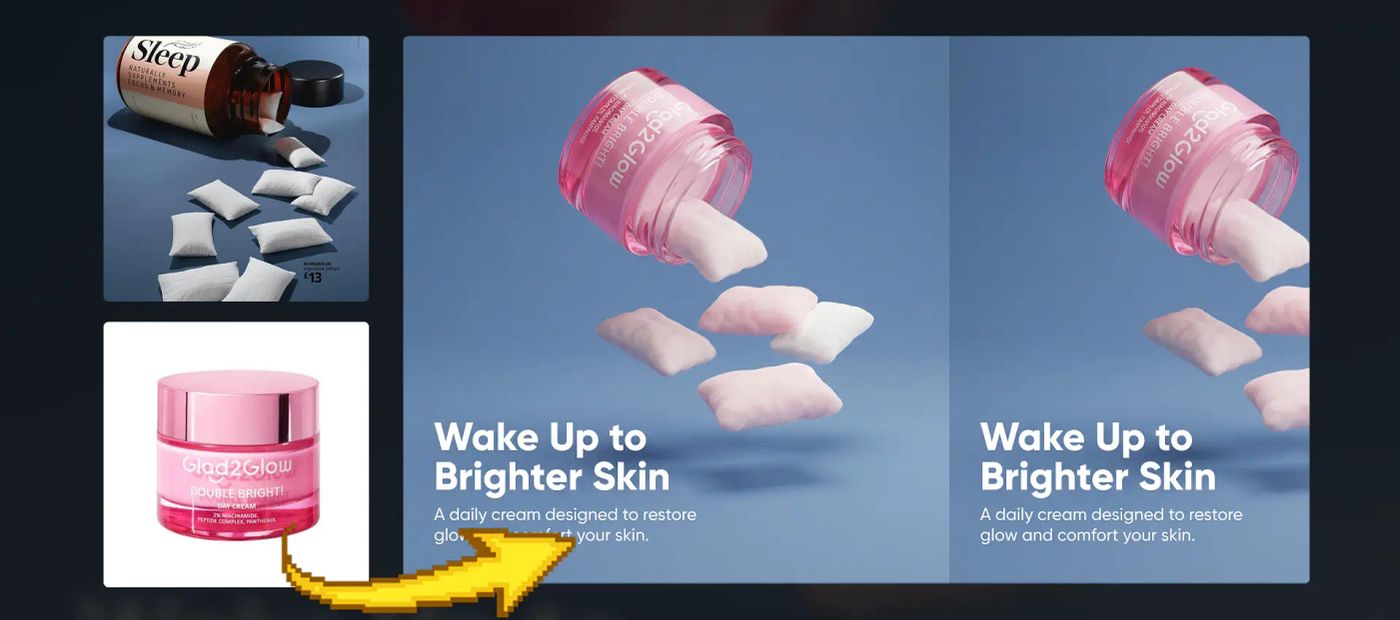
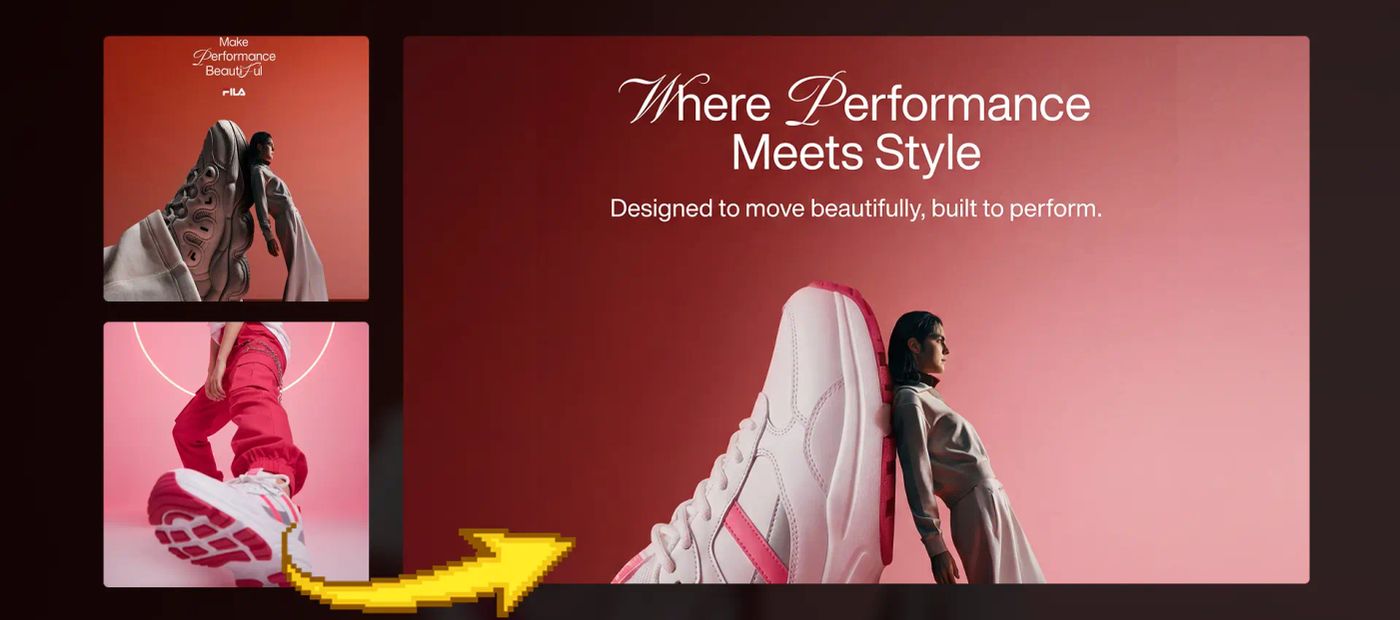
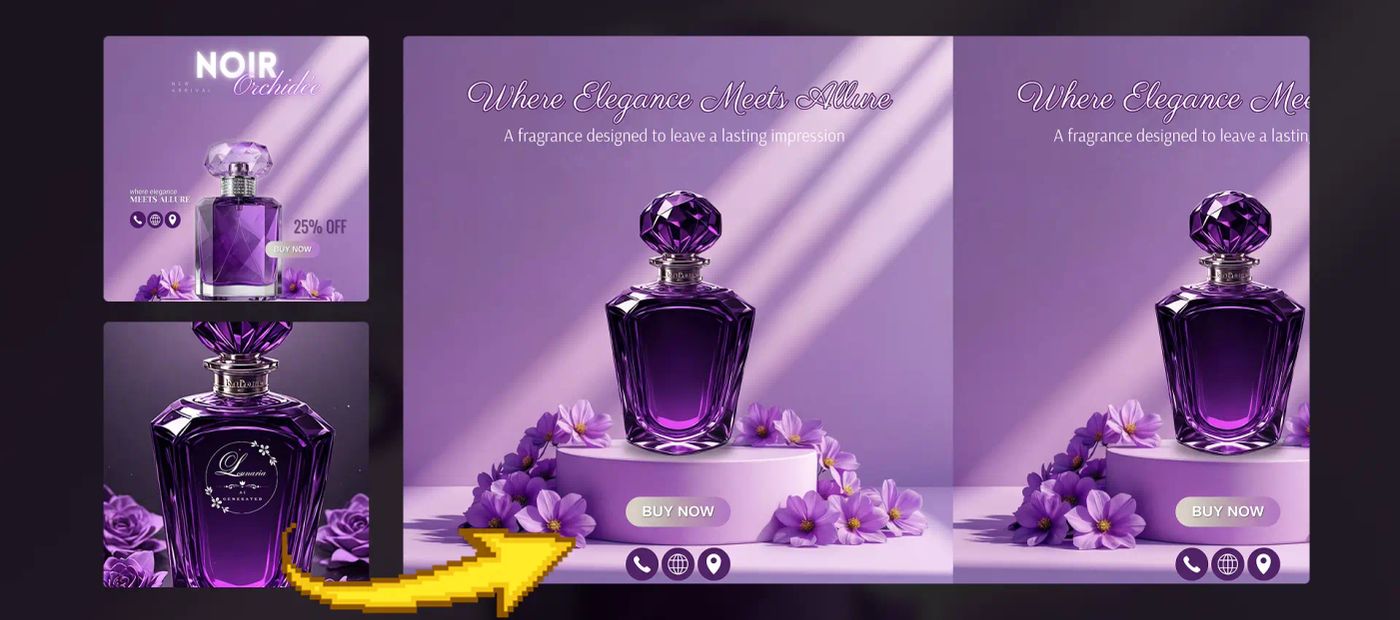
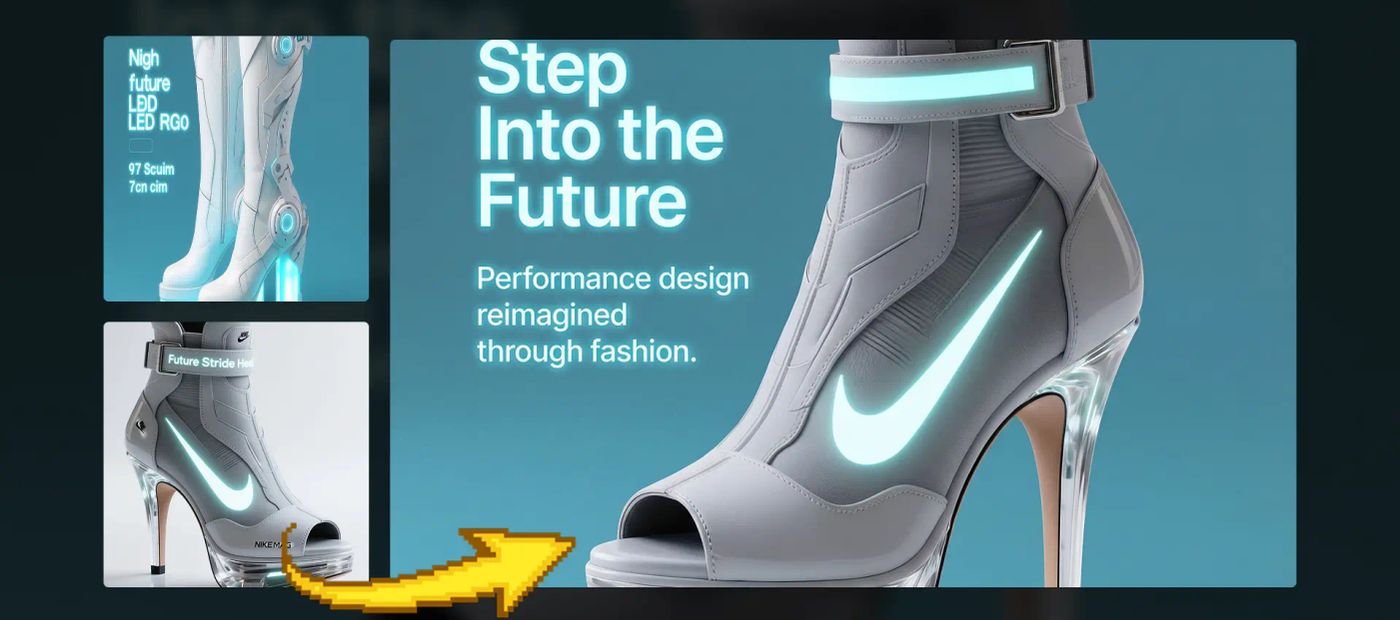
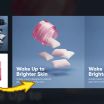
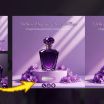
Insert Product into Existing Ad — Workflow Overview
This workflow allows you to seamlessly insert a new product into an existing advertisement while preserving the original ad’s creative direction. It keeps the layout, composition, lighting, typography style, and overall visual hierarchy intact, ensuring the final output looks like a professionally redesigned campaign—not an edited image.
No manual design work, no layout rebuilding, and no re-shoots required.
How It Works (Step-by-Step)
1. Load the Reference Ad (Layout & Style Source)
Upload an existing advertisement that will act as the visual blueprint.
This reference defines:
Composition and framing
Typography placement and scale
Lighting direction and shadows
Color mood and design language
Think of this as locking the ad’s creative DNA.
2. Load the New Product Image
Upload the product you want to feature in the ad.
For best results, use a clean product image with clear shape, texture, and lighting.
This image supplies the subject that will be integrated into the reference layout.
3. Define the Product & Ad Intent
Describe the product and the type of advertisement you want to create using a single prompt.
You can control:
Product appearance and emphasis
Editorial or commercial tone
Color balance and mood
Headline and supporting copy (if the reference ad includes text)
The workflow ensures any generated text matches the original typography style and placement.
4. Replace the Original Product
The workflow removes the existing product from the reference ad and inserts the new product in the exact same position, scale, and perspective.
During this step, it:
Matches lighting and shadows
Aligns reflections and highlights
Preserves depth and realism
Maintains the original layout structure
5. Harmonize Design & Finish
The inserted product is visually blended into the scene by:
Matching texture, grain, and print artifacts
Adjusting contrast and color harmony
Ensuring the product feels native to the ad
Nothing looks pasted or artificial—the ad remains cohesive and professional.
6. Generate the Final Advertisement
The workflow outputs a high-quality, print-ready advertisement that looks like it was originally designed for your product.
Everything except the product remains unchanged, allowing you to reuse proven ad designs with entirely new subjects.
Final Result
A polished, high-end advertisement where your product seamlessly replaces the original—while the layout, typography, lighting, and visual storytelling remain perfectly intact. Ideal for rapid ad iteration, concept testing, and reusing premium ad designs across multiple products.
Read more
_1766997541061.png?width=400&height=300&quality=80&resize=cover)
_1768210693794.png?width=400&height=300&quality=80&resize=cover)