INPAINTING
Remove, replace, and rebuild image regions with prompt-driven inpainting workflows.
Overview
A quick read before you jump in. Helps you know what to pick and why.
Most AI-generated images have at least one thing wrong. A distorted hand. A face that does not quite look right. A texture that breaks the illusion. Regenerating the entire image throws away everything that was good. Inpainting lets you fix the 5% that is wrong without touching the 95% that works.
Dual-reference logic rebuilds identity into the actual scene lighting. 3,500+ runs on Floyo. Best face results of all seven workflows.
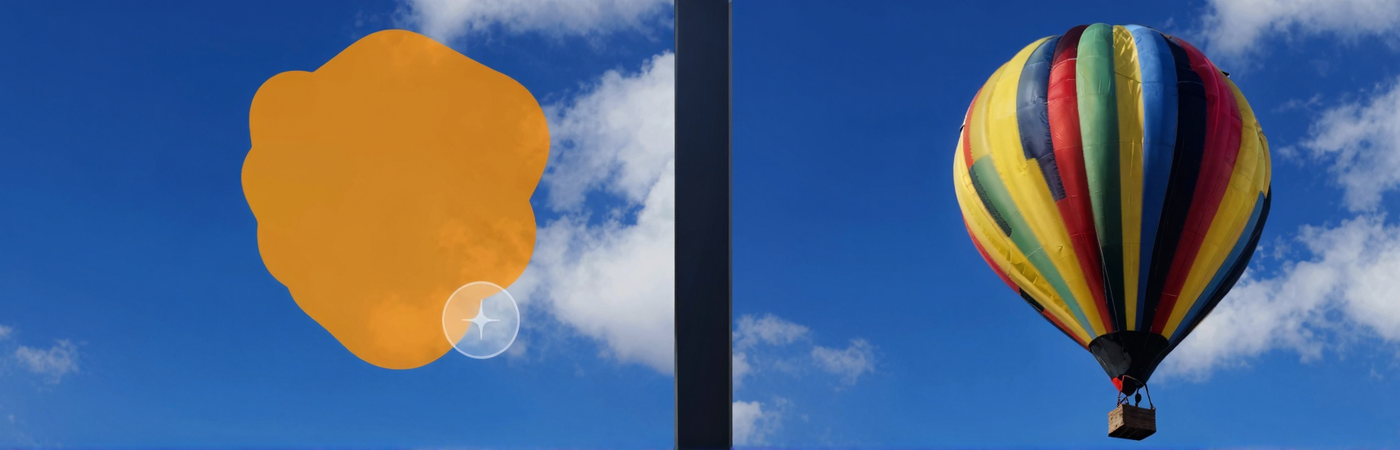
Scene-aware model that understands what should replace the masked area based on full image context. 2,200+ runs on Floyo.
The simplest entry point. Mask the area, write a prompt, run. Good starting point for most inpainting tasks before reaching for specialist workflows.
Inpainting workflows on Floyo
Pick a workflow that suits your needs and start building something amazing right away.
_1774874350635.png?width=400&height=300&quality=80&resize=cover)
Z-Image Turbo Inpainting
Z-Image Turbo Inpainting
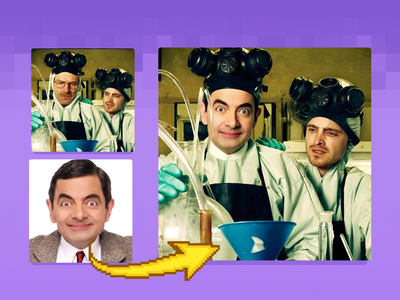
Qwen Image Edit 2509: Face Swap
Face Swap and Inpainting
pixelworld_ai
4.1k
Flux
Inpainting
Kontext
Inpaint with the power of Flux Kontext, providing additional content-awareness.
Flux Kontext Inpainting
Inpaint with the power of Flux Kontext, providing additional content-awareness.
sebastiankamph
3.0k
flux
flux inpaint
flux inpainting
inpaint
inpainting
retouch
sebastian kamph
Flux inpainting with Flux fill model and regular Flux dev model. All in one Flux inpainting workflow that easily AI retouches any image.
Flux Inpaint - ULTIMATE workflow.
Flux inpainting with Flux fill model and regular Flux dev model. All in one Flux inpainting workflow that easily AI retouches any image.
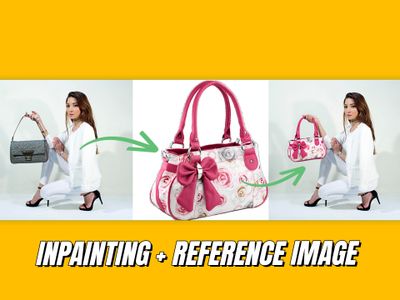
Inpainting with reference image
Flux
Image
Inpaint
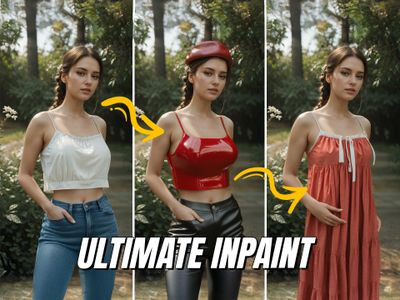
Change specific details on just a portion of the image, sometimes known as inpainting or Erase & Replace. Key Inputs Image reference: Use any JPG or PNG showing your subject clearly Masking tools: Right-click to reveal the masking tool option, and create a mask of the desired area to inpaint Prompt: as descriptive a prompt as possible to help guide what you would like replaced in the masked area
Image Inpainting
Change specific details on just a portion of the image, sometimes known as inpainting or Erase & Replace. Key Inputs Image reference: Use any JPG or PNG showing your subject clearly Masking tools: Right-click to reveal the masking tool option, and create a mask of the desired area to inpaint Prompt: as descriptive a prompt as possible to help guide what you would like replaced in the masked area
floyoofficial
5.7k
Flux
Flux.2 Klein
Image2Image
Inpainting
LanPaint
Inpainting image using Flux.2 Klein and LanPaint
FLUX.2 Klein 9B: Image Inpainting
Inpainting image using Flux.2 Klein and LanPaint
💡 Tips for getting a good inpaint result
📏 Mask bigger than you think
Extend the mask 10-20px beyond the edges of what you want to fix. For face repairs, mask the entire face, not just the problem area. For object removal, include the shadow the object casts. Tight masking is the most common inpainting mistake.
🎚️ Denoise by change size
Small fix (blemish, minor texture) = 0.3-0.5. Medium change (object swap, face fix) = 0.5-0.7. Major replacement (new element, complete content change) = 0.7-0.9. Using too-low denoise for a major change is the top cause of blurry or incomplete results.
✏️ Describe what to generate
"Clean wooden floor with natural grain pattern, matching the warm lighting" produces much better results than "remove the chair." The AI needs to know what to put in the space, not what to take away. Always describe what should appear, not what was there.
🔗 Chain small fixes
If an image has several problems, fix them one at a time. Each inpainting pass is cleaner when it has one objective. Fix the hand first, save the result, then fix the texture. If you hit repeated failures on the same area, try a different workflow rather than running the same one again.
Which inpainting workflow for which job ?
All workflows matched to their best use case.
| Use Case | Best Workflow | Why |
|---|---|---|
| 🖼️ Basic object removal or replacement | Image Inpainting | Simplest workflow. Mask the area, write a prompt, run. Good starting point for most tasks. |
| 😶 Face swap with identity preservation | Qwen Image Edit 2509 | Dual-reference logic rebuilds identity into the scene's lighting and environment. 3.5k runs. |
| 🔄 Content-aware scene editing | Flux Kontext Inpainting | Understands full scene context when deciding what fills the masked area. 2.2k runs. |
| ✂️ Precise mask-based editing with multiple models | Flux Inpaint ULTIMATE | Combines Flux Fill and Flux Dev. Most manual control over the inpainting process. 1.6k runs. |
| 🖼️ Reference-guided replacement | Inpainting with Reference | Provide a reference image to guide the fill when text prompts alone are not enough. 1.3k runs. |
| 🧩 Lightweight model for fast iteration | FLUX.2 Klein 9B | Faster execution for multiple mask-and-fix cycles. Good for draft-stage iteration. 1.2k runs. |
| 👓 Depth-aware structural fixes | Z-Image Turbo Inpainting | ControlNet-based. Respects depth structure of the scene. Good for architectural corrections. |
Qwen Image Edit 2509
The highest-run workflow on Floyo for inpainting. Dual-reference face rebuilding produces results that look like they belong in the scene. Start here for any face-related fix.
Face swap · face correction · identity work · portrait retouching
Flux Kontext Inpainting
Scene-aware model that reads the full image before generating what fills the mask. Strong at object removal, background swaps, and e-commerce product editing.
Object removal · background swaps · product editing · content replacement
Frequently asked questions
Common questions about running inpainting workflows on Floyo.
Yes. Inpainting workflows accept any JPG or PNG regardless of how it was generated. Upload a Midjourney output, a DALL-E image, a Stable Diffusion generation, a Flux image, or a photograph. The inpainting model works on all of them.
Most inpainting workflows include a built-in masking tool. Right-click on the Load Image node to access the masking option. Paint over the area you want to fix. The mask should cover the problem area plus a 10-20 pixel margin for blending.
It depends on how much you want to change. Subtle fixes like skin texture or minor blemishes: 0.3-0.5. Moderate changes like object swaps or face correction: 0.5-0.7. Major replacement, completely different content: 0.7-0.9. Start at 0.5-0.6 for most tasks.
The most likely cause is denoise set too low. At values under 0.3, the model does not generate enough detail to match the sharpness of surrounding pixels. Increase denoise to at least 0.5. Also make sure you are inpainting at full resolution, not a downscaled version of the image.
Yes. Distorted hands are the most common AI generation defect and a primary inpainting use case. Mask the entire hand (not just the fingers), write a specific prompt ("human right hand, five fingers, relaxed natural pose, matching skin tone and lighting"), and set denoise to 0.6-0.7. Expect 2-3 attempts. Hands are hard for AI.
You can mask multiple areas in a single pass, but results are usually better when you fix one area at a time. Each inpainting pass is cleaner when it has a single objective. Fix the hand first, save the result, then fix the texture, then remove the unwanted object.
Soft inpainting uses a gradient mask instead of a binary on/off mask. The center of the mask gets full replacement. The edges get gradual blending with the original content. This produces the most natural-looking results because there is no hard boundary between original and regenerated pixels. In ComfyUI, soft inpainting is achieved through mask feathering nodes or by creating gradient masks manually.