Z-IMAGE LORAS
Train & use custom Z-Image LoRAs on your own products, characters, styles and ideas so the model learns your exact look and style.
Step 1: Build Your Dataset
pixelworld_ai
2.6k
Character Sheet
Flux
Image to Image
Kontext
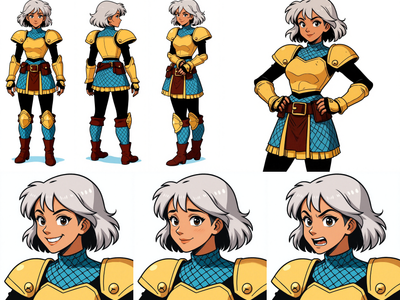
Create a character sheet with multiple poses and expressions from a single image!
Image to Character Sheet with Kontext
Create a character sheet with multiple poses and expressions from a single image!
pixelworld_ai
3.7k
Character Dataset
Prompt List
Qwen 2511
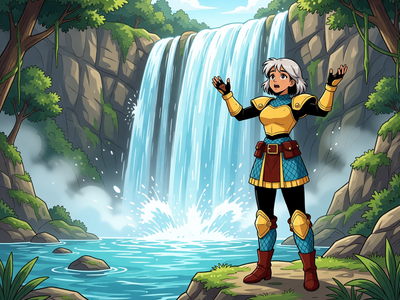
Create a 60 image character dataset from one character image or sheet.
Qwen 2511 Edit - Single Image to Character Dataset
Create a 60 image character dataset from one character image or sheet.
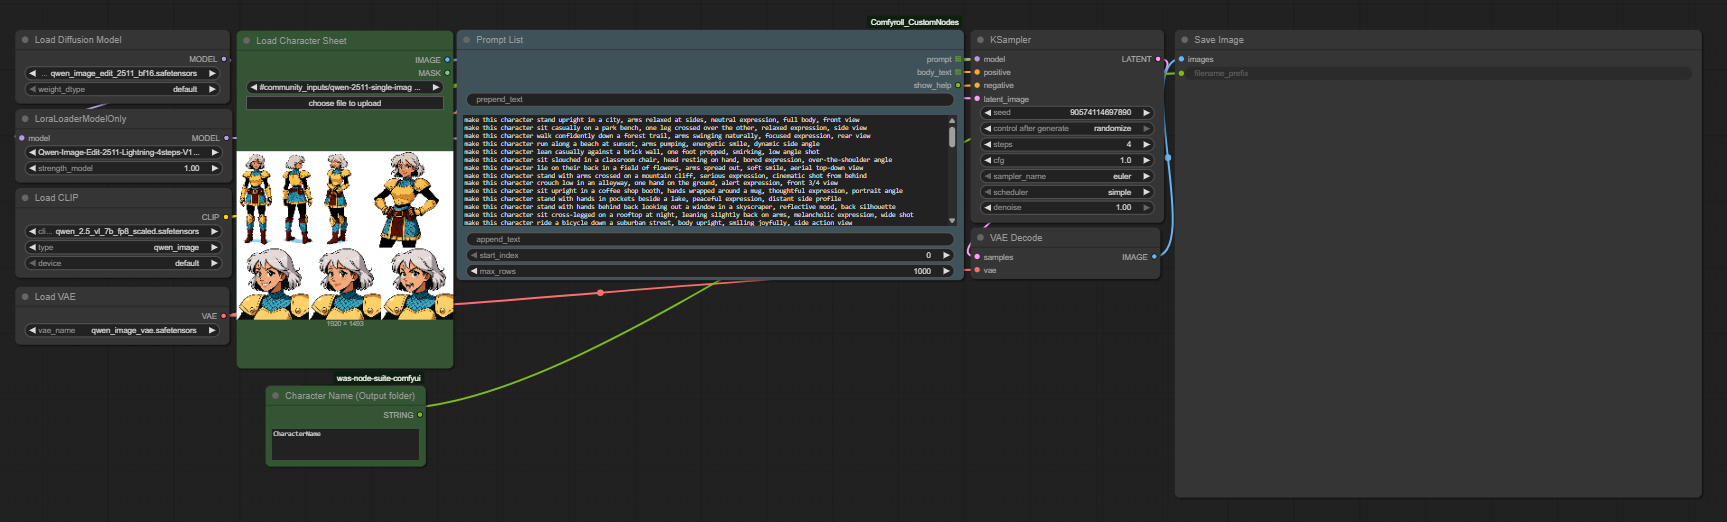
A great LoRA starts with a great dataset. If you already have a set of images ready, you can skip ahead to Step 2. If you need to generate one from scratch, the Qwen 2511 Edit workflow makes it easy to produce a consistent, varied character dataset from a single reference image. Optionally, you may start with a character sheet as it is the best way of making sure your character is consistent front and back throughout the whole dataset, in which case start with the Image to Character Sheet with Kontext, or your favorite text-to-image workflow!
This workflow uses Qwen Image Edit to generate multiple variations of your character with different poses, angles, expressions, and lighting while keeping facial identity consistent. It outputs a ready-to-use dataset folder.
What Makes a Good Dataset?
15-25 images is the sweet spot for character and subject LoRAs. As few as 9 can work if they are excellent quality. Quality always beats quantity.
Vary your angles - front, side, three-quarter, from above.
Vary your lighting - natural, studio, warm, cool, dramatic, soft.
Vary poses and expressions - do not rely on the same headshot repeated.
Include non-portrait shots - environmental, hands, partial body. This prevents the model from locking into one composition.
Mix your backgrounds - if every image has the same backdrop, the model will associate your subject with that setting.
No watermarks, heavy filters, blur, or compression artifacts.
Avoid near-duplicate images - slight crop variations of the same photo increase overfitting risk.
Step 2: Caption Your Images
jacob
1.8k
Captioning
Flux
LORA Training
Generate high-quality captions for LoRA training and automatically resize images to SDXL/Flux-compatible resolution.
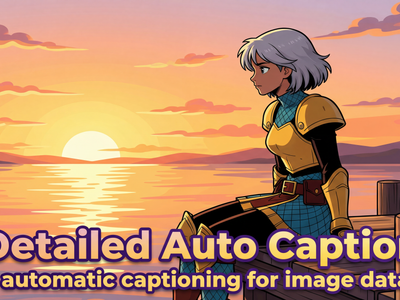
Detailed Auto Caption
Generate high-quality captions for LoRA training and automatically resize images to SDXL/Flux-compatible resolution.
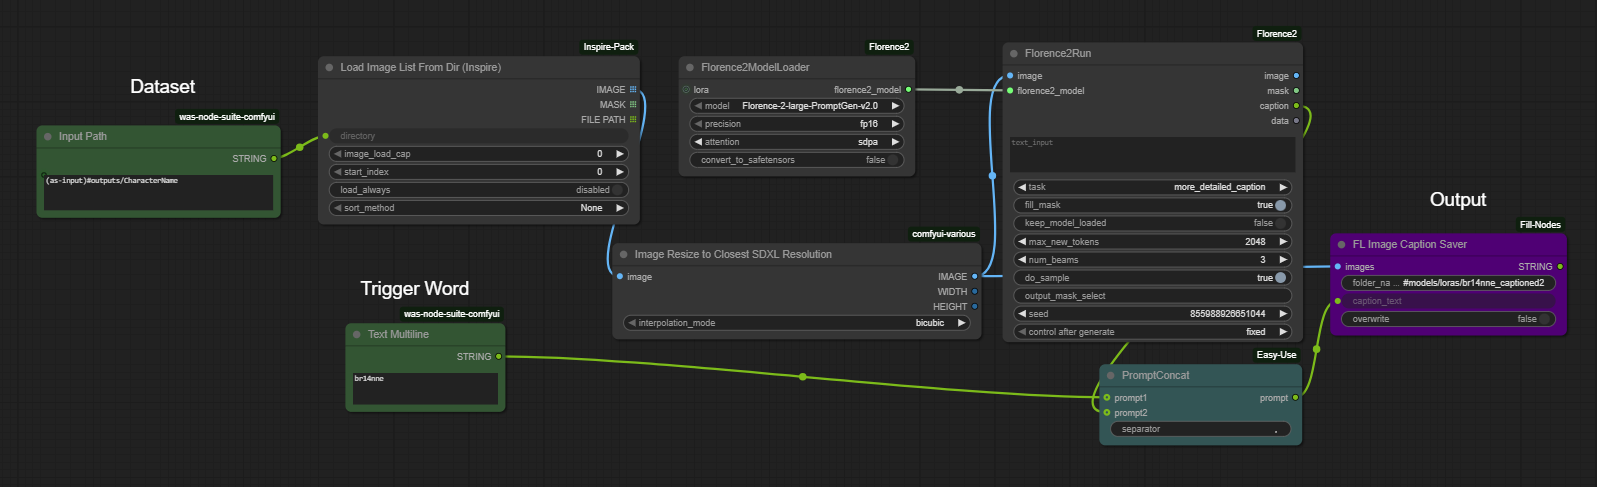
Captions tell the model what it is looking at, which helps it learn your subject without accidentally baking in backgrounds, lighting, or other unintended details.
Each image needs a matching .txt file with the same filename:
my_dataset/
  image01.png
  image01.txt
  image02.png
  image02.txt
Use the auto caption workflow to generate these automatically:
Caption Tips
For character LoRAs, less is often more. Z-Image learns identity well without heavy captioning. Start simple and only add captions if you need more control.
If you do caption, keep it descriptive and factual:
zxqperson, woman with long dark hair, blue denim jacket, standing in park, natural lightingUse a unique trigger word - a short nonsense token like
zxqpersonorfloyocharworks best. Avoid real words that might already exist in the model vocabulary.Do not over-describe mood or aesthetics. Words like "moody," "cinematic," or "ethereal" get amplified by the model and become hard to escape at inference time.
Stay consistent - use the same caption structure across all images so the model has a clear pattern to learn.
Step 3: Train Your LoRA
With your dataset captioned and ready, it is time to train with the Musubi Z-Image LoRA Trainer.
jacob
2.6k
LoRA
Musubi Tuner
Training
Z-Image
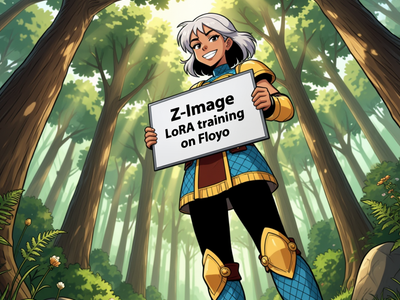
Train Z-Image LoRAs directly on Floyo with this simple all-in-one custom node.
Musubi Tuner - Z-Image LoRA Trainer
Train Z-Image LoRAs directly on Floyo with this simple all-in-one custom node.
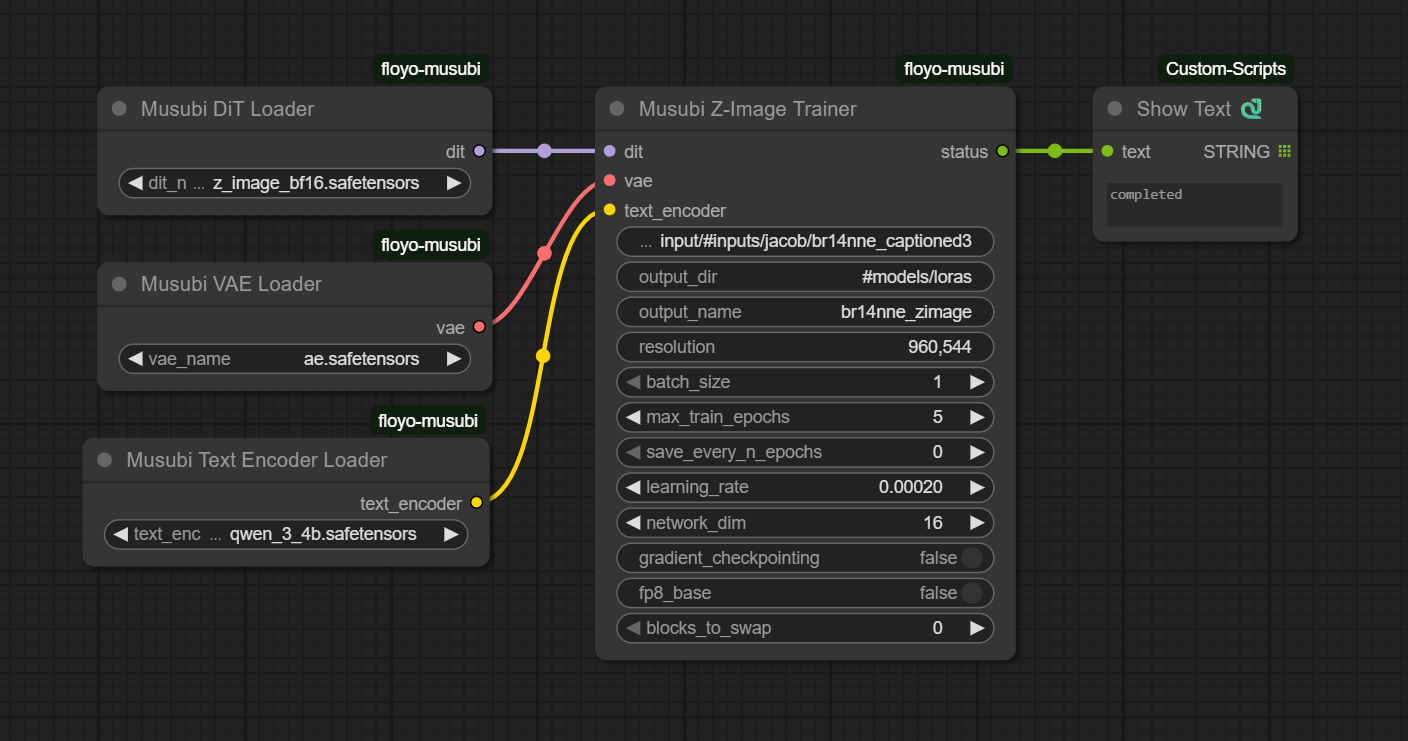
This workflow handles the full training loop inside a single node. All defaults are already optimized for Z-Image. Most users only need to do two things before hitting Queue.
Setting Your Dataset Path
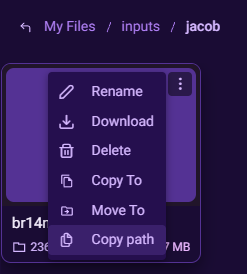
Open the Floyo file browser by clicking the folder icon on the left side of the canvas.
Navigate to your dataset folder inside
#inputs.Click the three-dot menu on your dataset folder and select "Copy Path".
Paste the path into the
data_pathfield on the trainer node. Your path should look like#inputs/my_dataset. If your dataset lives outside of#inputs, use "Copy path as input" instead, which adds the(as-input)prefix automatically.
For more detailed guidance on the Floyo file browser, see documentation
Name Your LoRA
In the output_name field, type the name you want your LoRA saved as. The trained file will appear in #models/loras when complete.
Key Settings
data_path: Path to your dataset folder (required)
output_dir: Where your trained LoRA is saved (default: #models/loras)
output_name: Name of your saved LoRA file (default: name_of_lora - change this!)
resolution: Training resolution (default: 960,544)
batch_size: Images processed per training step (default: 1)
max_train_epochs: Number of full passes through your dataset (default: 5)
save_every_n_epochs: Save a checkpoint each epoch, 0 = only save at the end (default: 0)
learning_rate: How fast the model learns, lower is more stable (default: 0.00020)
network_dim: LoRA rank, higher captures more detail but creates a larger file (default: 16)
gradient_checkpointing: Trades speed for lower memory usage (default: false)
fp8_base: Use fp8 precision for the base model (default: false)
blocks_to_swap: Offload transformer blocks to CPU to save GPU memory (default: 0)
Quick Tuning Tips
Want to compare checkpoints? Set
save_every_n_epochsto1so you can test each epoch and pick the best one.Want more detail captured? Try
network_dimat32. The file will be larger but the LoRA can learn finer features.Overfitting or too prompt-rigid? Lower the learning rate to
0.0001or reduce epochs.
Step 4: Test Your LoRA
Z-Image Base - Text to Image w/ LoRA
Run Z-Image Base with a custom LoRA
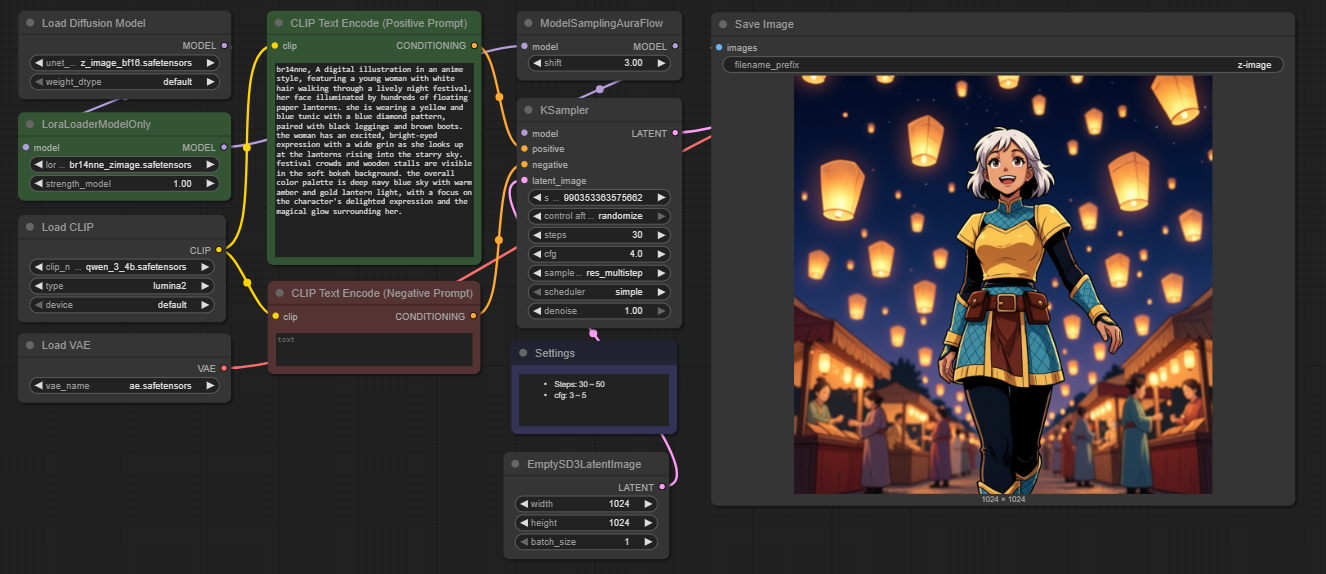
Once training is complete, your LoRA is saved to #models/loras and ready to use immediately. Load it into the testing workflow to see your results.
Testing Tips
Start with a LoRA strength of 0.7 to 0.8 and adjust from there.
If outputs look too locked-in to your training data, reduce the strength.
If your concept is not showing up strongly enough, increase it.
Use your trigger word in the prompt to activate the learned concept.
If you saved multiple epoch checkpoints, test each one and compare. Earlier epochs are often more flexible, later epochs more faithful to identity.
Train a custom Z-Image LoRA from scratch - from building your dataset all the way to testing your results. This guide walks through four simple steps, each backed by a dedicated Floyo workflow.