Z-Image Turbo · Inpainting
Repaint any masked area with a text instruction using Z-Image Turbo and depth-guided ControlNet. Upload an image, paint the mask, describe the edit, run.
controlnet
Image
inpainting
z-image-turbo
1.9k



Nodes & Models
UNETLoader
z_image_turbo_bf16.safetensors
CLIPLoader
qwen_3_4b.safetensors
VAELoader
ae.safetensors
LoadImage
ModelPatchLoader
Z-Image-Turbo-Fun-Controlnet-Union-2.1.safetensors
ModelSamplingAuraFlow
CLIPTextEncode
AIO_Preprocessor
VAEEncode
ConditioningZeroOut
ZImageFunControlnet
DifferentialDiffusion
KSampler
VAEDecode
SaveImage
ABOUT THE WORKFLOW
Repaint a Masked Area Upload an image, paint a mask over the area you want changed, and describe the edit. A depth map locks the spatial structure. The ControlNet and DifferentialDiffusion hold everything outside the mask fixed while the model repaints the masked region in 8 passes. The rest of the image stays untouched.
Model
Z-Image Turbo by Tongyi-MAI under Alibaba. Released 26 November 2025. A 6 billion parameter single-stream diffusion transformer distilled to 8 steps with a Qwen 3 4B text encoder. Apache 2.0.
Z-Image Turbo Fun ControlNet Union 2.1. A depth-guided ControlNet adapter that reads spatial structure from the image and preserves it during inpainting.
DifferentialDiffusion. A mask-aware diffusion method that restricts the model's changes to the painted area.
HOW IT WORKS
Step 1. Upload your image and paint the mask Upload the image, then right-click it and choose Open in MaskEditor. Paint over the area you want changed. Paint generously: a tight mask fights the model at the edges. Works great with: photos · renders · product shots · illustrations
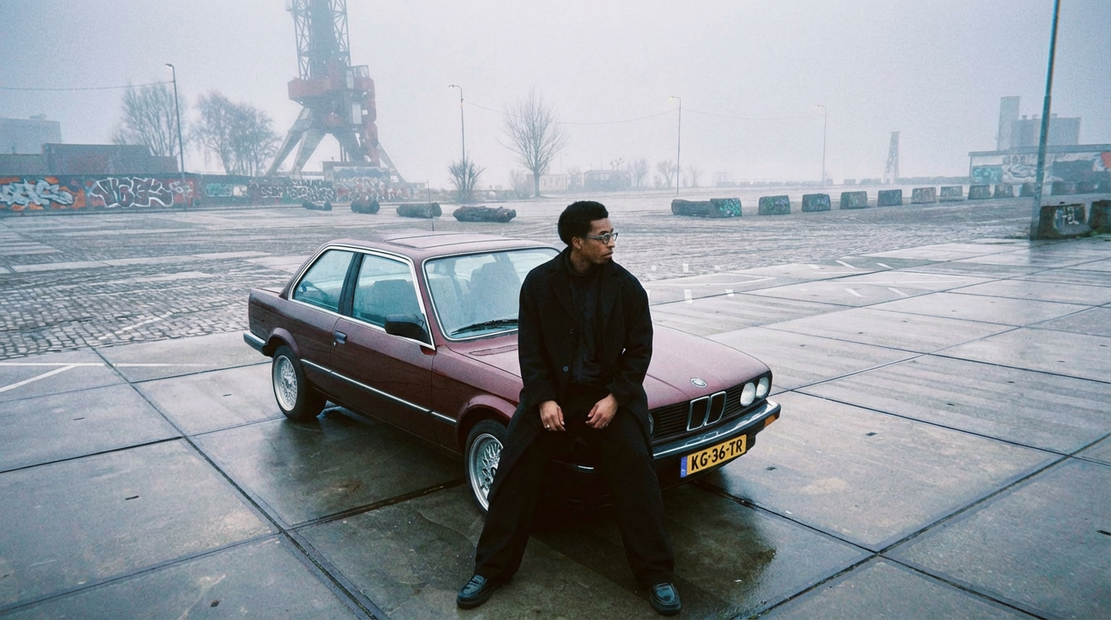
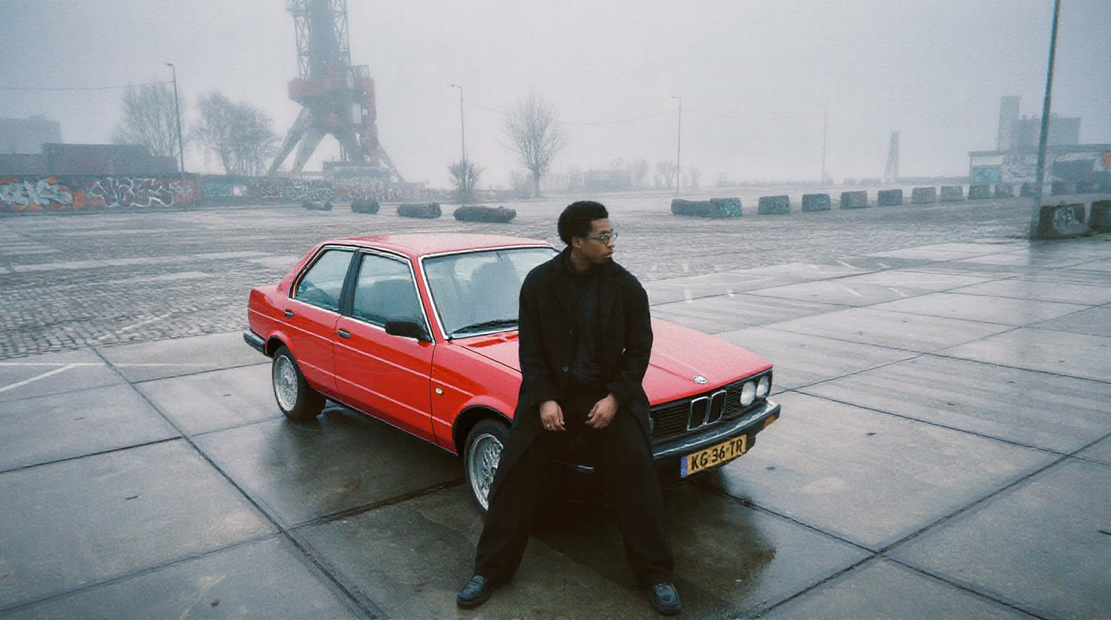
Step 2. Describe the change Write what the masked area should become. "Change the colour of the car to blood red" or "replace the wall with exposed brick."
Step 3. Hit run and download The model extracts a depth map, locks the unmasked area, repaints the mask in 8 passes, and saves the result under ComfyUI. Ready for: Photoshop · Figma · Canva · any editor
First time? Leave every setting as-is. The defaults (8 steps · CFG 1 · ControlNet 0.7 · flow shift 3 · fixed seed) are the right starting point for almost everyone.
RECOMMENDED SETTINGS
Quick-start guide. Find the goal that matches yours and copy the settings.
Standard inpaint (most people) — 8 steps · CFG 1 · ControlNet 0.7 · flow shift 3 · fixed seed. The right starting point for almost everyone.
The edit bleeds outside the mask — Paint the mask more generously. The model needs room to blend at the edges. A tight mask creates hard seams.
The edit changes the shape of the object — Raise ControlNet strength above 0.7. Higher values hold the depth structure more tightly, keeping the original 3D shape while changing the surface.
The edit is too subtle — Lower ControlNet strength below 0.7. The model has more room to reshape the masked area.
The unmasked area changed slightly — DifferentialDiffusion should prevent this. If it happens, the mask boundary is too loose. Repaint a tighter mask edge.
Want a different take — Change the seed number. The default runs on fixed.
Want to change what the depth preprocessor sees — The DepthAnythingV2 preprocessor runs at 512px resolution. Fine edges may lose precision at this scale.
Prompt: Describe what the masked area should become, not what it is now. "Blood red metallic car paint, reflective, under overcast sky" is better than "change the car." Name the material, the colour, and the lighting.
LEARN
📹 Videos
ComfyUI 101 Free Course ft. Sebastian Kamph
Floyo 101 for Team Collaboration
✨ Quick links
USE CASES
🎨 Targeted Colour and Material Swaps Change the colour, texture, or material of a specific object without affecting anything else in the frame.
🖼️ Object Replacement Paint over an object and describe what should take its place. The depth map keeps the spatial structure consistent.
🛍️ Product Variant Mockups Generate colour and material variants of a product shot from one source image by masking and re-prompting.
✂️ Selective Retouching Fix a specific area of a render or a photo without regenerating the entire image.
WHAT WORKS BEST / WHAT TO AVOID
✅ Works great
Generous masks with room for the model to blend at the edges
Prompts that name the target material, colour, and lighting
Changes to colour, texture, and surface properties
ControlNet strength between 0.5 and 0.9
⚠️ May produce softer results
Tight masks that clip the edge of the target object
Masking large areas where the depth map loses guidance
Prompts that describe the whole image instead of the masked area
Expecting shape changes with ControlNet at high strength
FAQ
What is Z-Image Turbo inpainting? This workflow uses Z-Image Turbo for targeted inpainting: you paint a mask over the area to change, describe the edit, and the model repaints that region while holding everything else fixed. A DepthAnythingV2 preprocessor extracts a depth map for spatial guidance, a ControlNet enforces the structure, and DifferentialDiffusion restricts changes to the masked area.
How do I paint the mask? Upload your image, right-click the image node, and choose Open in MaskEditor. Paint white over the area you want changed. Paint generously rather than tightly: the model blends better with room at the edges.
What does the ControlNet do here? It reads a depth map from your image and enforces the 3D spatial structure during generation. At strength 0.7 (the default), the model changes the surface of the masked area (colour, material, texture) while keeping its shape and position in the scene.
What is DifferentialDiffusion? A mask-aware diffusion method that restricts the model's changes to the painted area. Without it, the full denoise pass would regenerate the entire image. With it, only the masked pixels are affected.
How does this compare to the Z-Image Turbo text-to-image workflow? The text-to-image workflow generates a picture from scratch. This workflow edits an existing image by repainting a masked region. They use the same Z-Image Turbo model and the same 8-step distilled schedule. Pick text-to-image to create and this one to edit.
Is Z-Image Turbo free for commercial use? Yes. It is released under Apache 2.0, which allows commercial use, modification, fine-tuning, and self-hosted deployment with no revenue threshold and no territory restrictions.
How to run Z-Image Turbo inpainting online? You can run Z-Image Turbo inpainting online through Floyo. No installation, no setup, no model downloads. Open the workflow in your browser, upload an image, paint the mask, and hit run. Free to try.
WHY FLOYO?
Floyo is the only platform with team collaboration for ComfyUI in the browser. You run workflows with no install. You share run history, assets, and models across your team. You pay only when you generate. Floyo supports open-source and closed-source models.
A designer runs an edit and likes the result. A teammate opens that exact run from shared history and keeps going. No file handoffs. No version confusion.
For studios and enterprise teams, Floyo adds private workspaces, pooled resources, and a team usage dashboard. Other ComfyUI cloud tools run for one person at a time. Floyo runs for the whole team, with transparent per-generation costs.
Ready to try it? Upload an image, paint the mask, describe the change, and run it. The rest stays untouched.
Questions? Watch the free course or check the FAQ above.
Read more