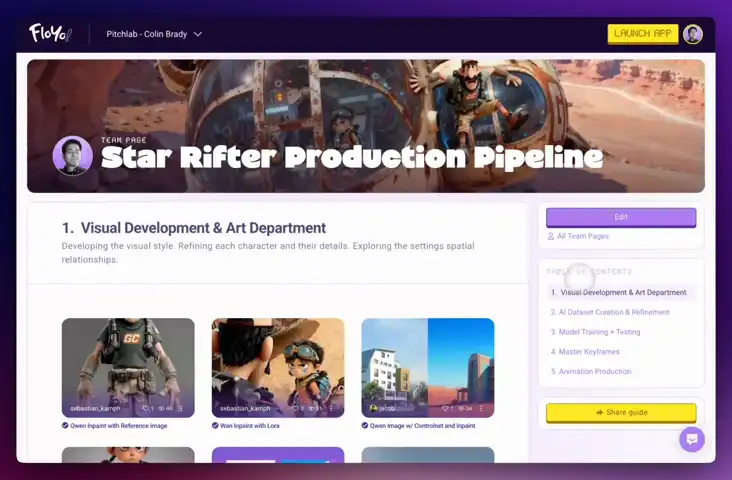
COMMUNITY PAGE
Star Rifter
The Human Touch: Directing AI in Production.
4/17/26 Los Angeles - Update:
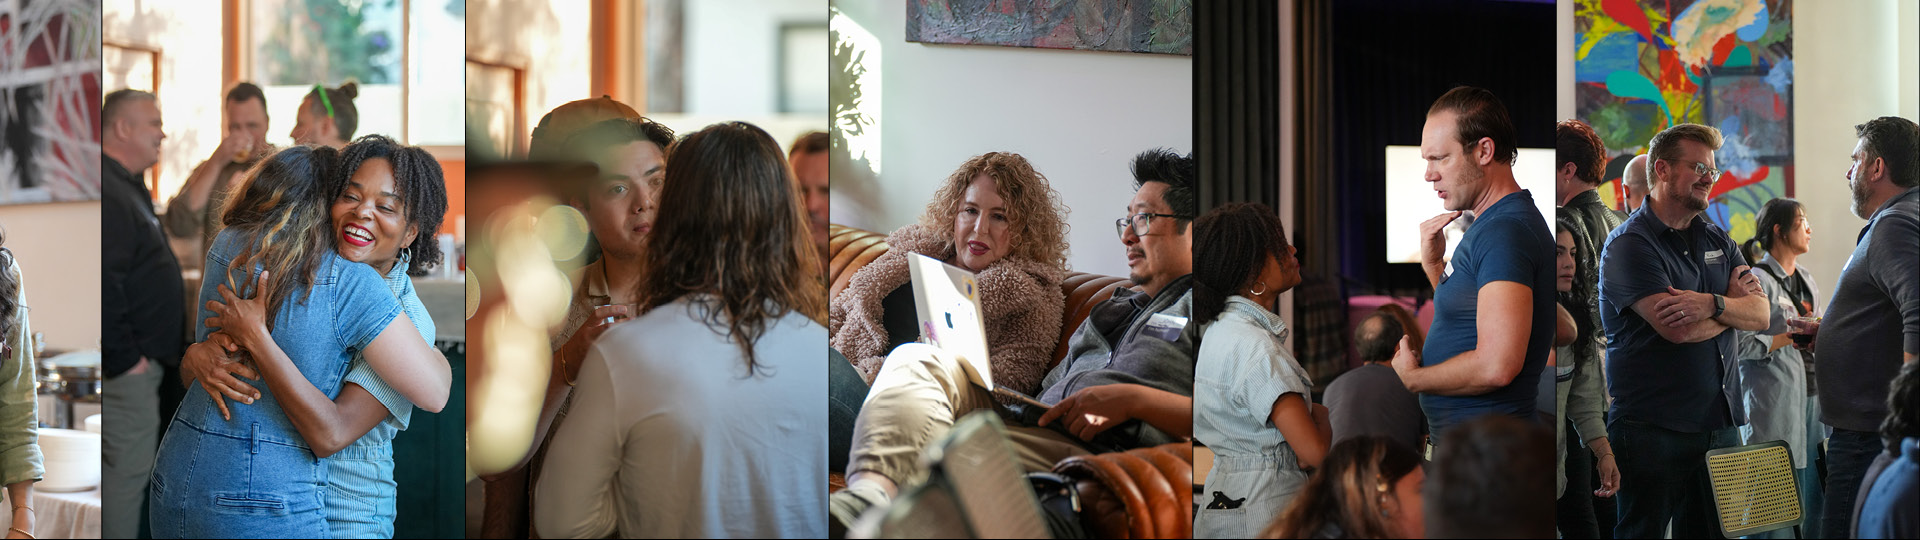
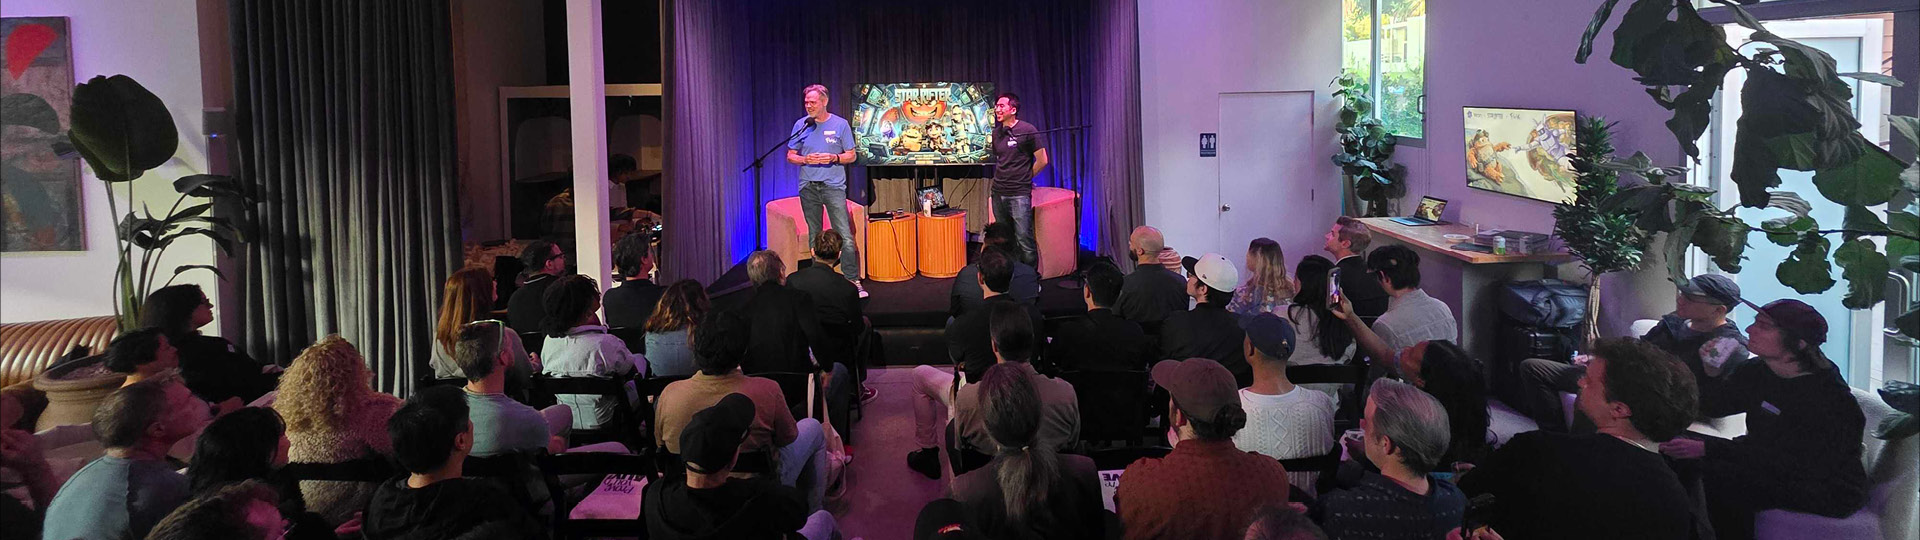
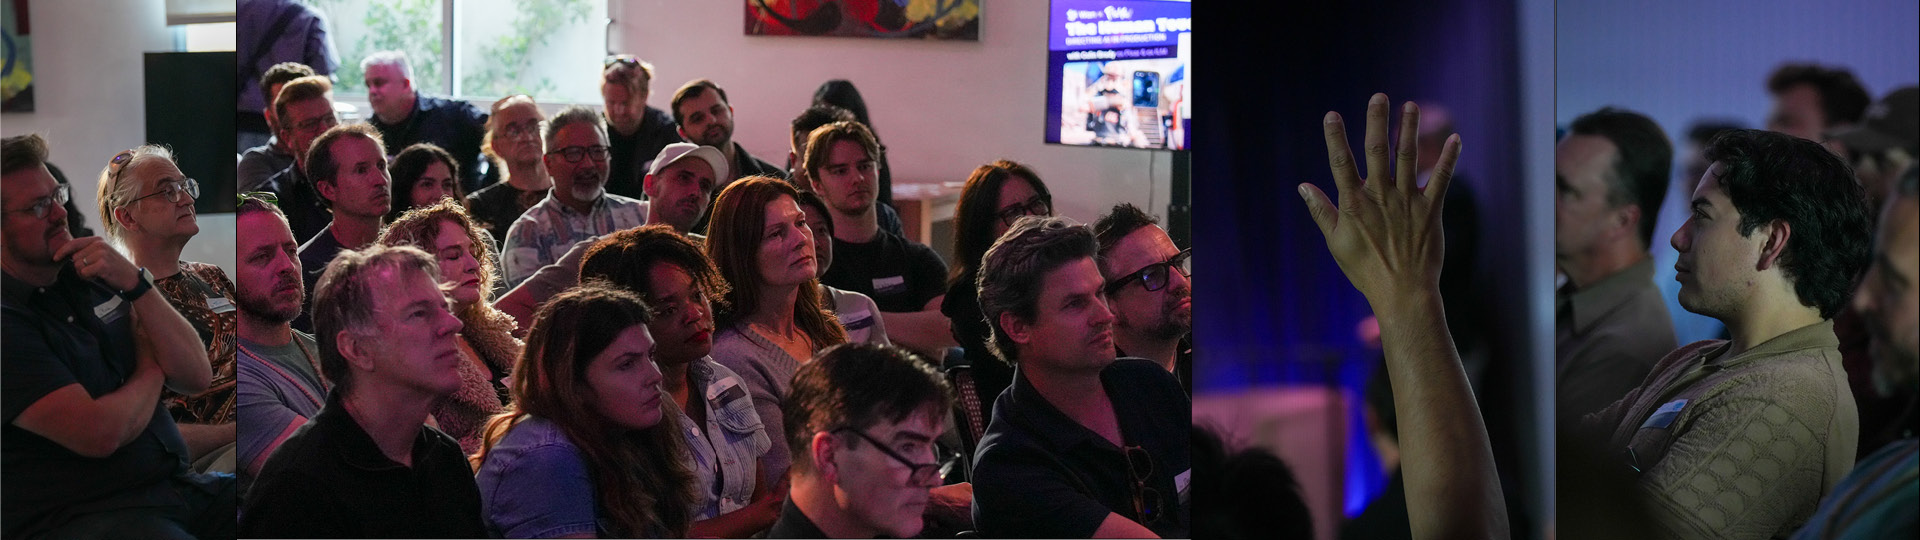
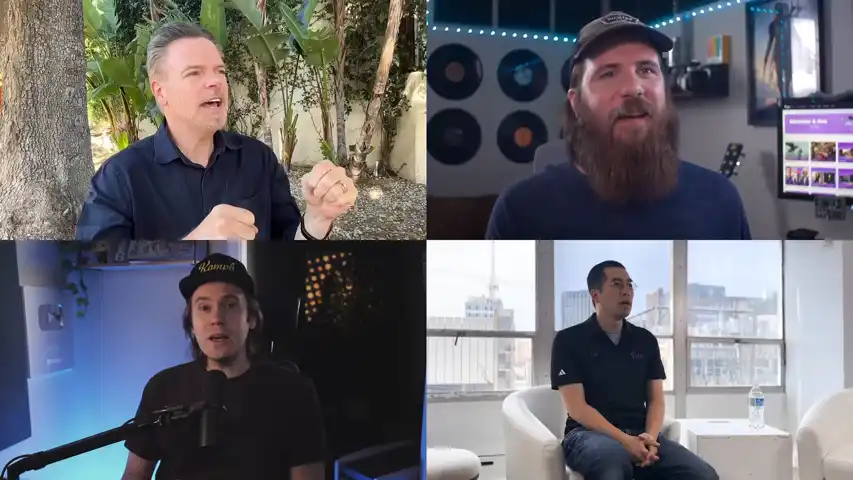
Our Floyo event in LA presenting this project brought together animation directors, VFX supervisors, technical leads, and AI strategists from Pixar, ILM, Disney Animation, DreamWorks, and Nickelodeon. The room included Emmy-winning VFX talent behind Game of Thrones and The Mandalorian, strategy and creative leadership from Amazon MGM Studios and Prime Video, and Omnicom Productions. Full Recap below:
How former Pixar & Industrial Light & Magic (ILM) Director Colin Brady produced a cinematic AI-animated pilot with human performance driving every frame, proving AI could serve as a tool for directors. Not a replacement for them.
Note: This interactive case study includes runnable AI workflows, used for this project and others like it, that you can try out yourself in seconds.
The Vision
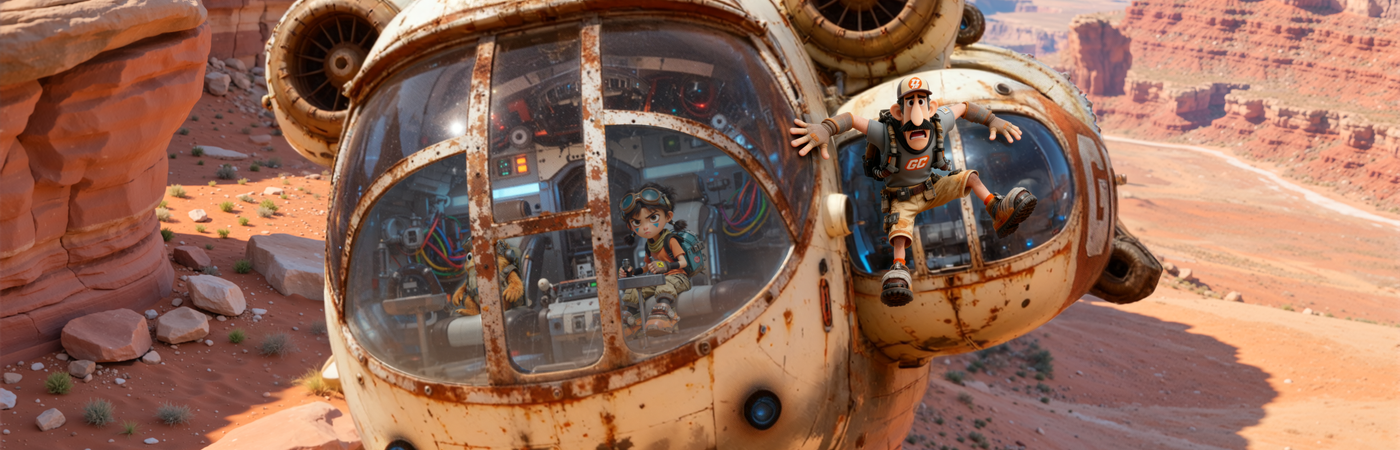
Star Rifter is an animated character-driven sci-fi story about a deadbeat delivery dad who encounters a spunky girl and her mischievous alien friend on a remote planet / delivery site. After getting ambushed, tied up, and hanging for dear life from his stolen ship while dodging cannon fire in the sky, he discovers a daughter he never knew he had.
Think Pixar-style emotional storytelling crossed with Star Wars spectacle: comedy, heart, action, adventure, and of course a cute little alien sidekick.
The project was conceived by Colin Brady, a director whose career spans Pixar (Toy Story, A Bug’s Life) and Industrial Light & Magic. But Star Rifter was also a production experiment. Could generative AI become a real part of the filmmaking process without sacrificing the human craft that makes stories touching?

Results: a complete 6-minute animated pilot. 130+ shots. Produced end-to-end in roughly two months with fewer than ten people. An unthinkable timeline with traditional animation pipelines.
“Making this Star Rifter pilot honestly felt like crossing a new line for me. Seeing the Floyo team take my quick concepts and turn them into a finished project in just two months … honestly, that still blows my mind. Two months with a small dedicated team. I wouldn’t have believed that a few years ago.”
— Colin Brady, Director
The Challenge
AI image and video tools can generate impressive visuals in isolation. But cinematic storytelling demands a lot more. The team needed characters that stayed consistent across more than a hundred shots and camera angles. They needed believable acting performances with real emotional nuance. They needed directed camera moves with spatial logic, environments that held up under close inspection, and a fictional world with its own look and feel.
The core question Colin kept asking: Can we actually craft true narratives, not just simple montages set to music, which is what AI is so good at these days?
These are problems traditionally solved by large animation teams, years of production, and big budgets.
Could we, with the help of hybrid AI workflow, with Floyo driving production, achieve that quality with a fraction of the resources?
Colin working on Toy Story performances @ Pixar
One of Colin's inspirations is the original Star Wars effects team: a bunch of artists and hippies in warehouses in Van Nuys, figuring out how to robotically control spaceship models, synchronizing them with the camera. Nobody had done it before. They were inventing the technology as they went.
That’s the energy Star Rifter was going for. Except this time, the warehouse was a Floyo workspace.
“The challenge wasn’t just speed. It was proving AI could serve as a tool for directors. Not a replacement for them. Colin came with decades of ingrained filmmaking instincts, and none of them were negotiable. Eye lines, performance nuance, compositional intent. Every one of those standards had to be met.”
— Matt Shih, Creative Director @ Floyo AI
The Full Production Pipeline
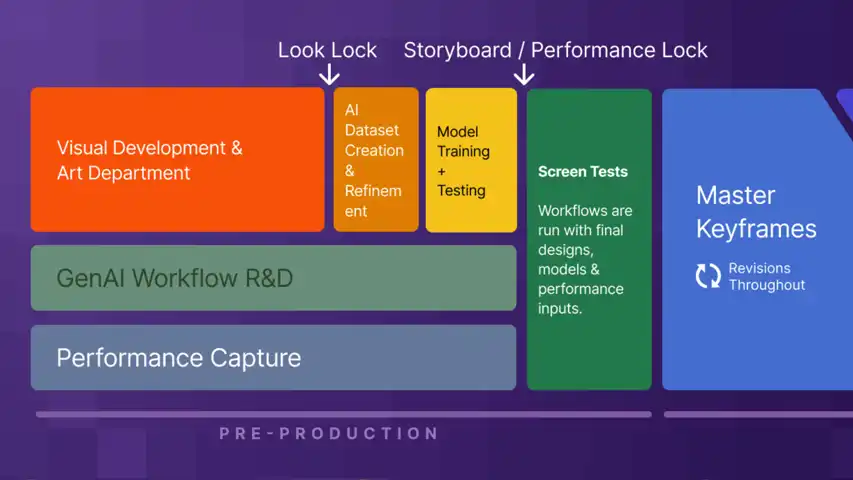
A hybrid production pipeline for AI-native productions that doesn't skimp on traditional creative development steps.
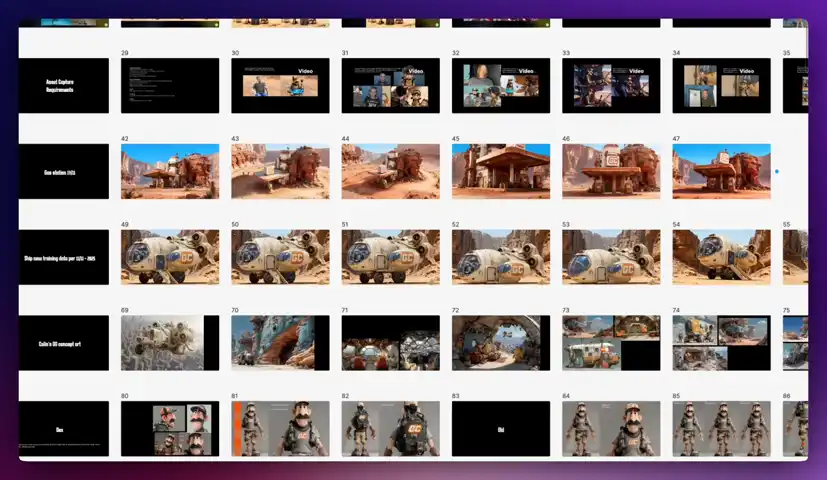
Star Rifter followed a structured sequence from concept to delivery, with Floyo workflows embedded at every stage. It wasn’t a linear handoff. Three parallel tracks (art development, performance capture, and workflow R&D) ran simultaneously and converged progressively into the shot production phase.
Pre-Production
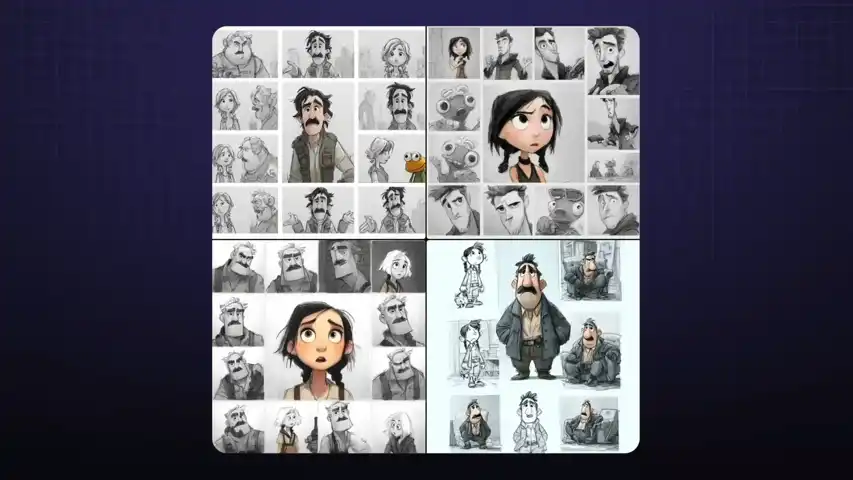
Early character concepts for the Star Rifter cast and crew. Traditional creative development wasn't sacrificed in our process.
Visual Development.
Colin arrived with a rough script, loose character sketches, and an animatic assembled from inconsistent AI-generated frames. The art development phase, carried out through Floyo workflows and Figma, transformed that into a production-ready asset library.
Just a few of the traditional creative stages where we're using AI not to make decisions for us, but to execute our vision more efficiently.
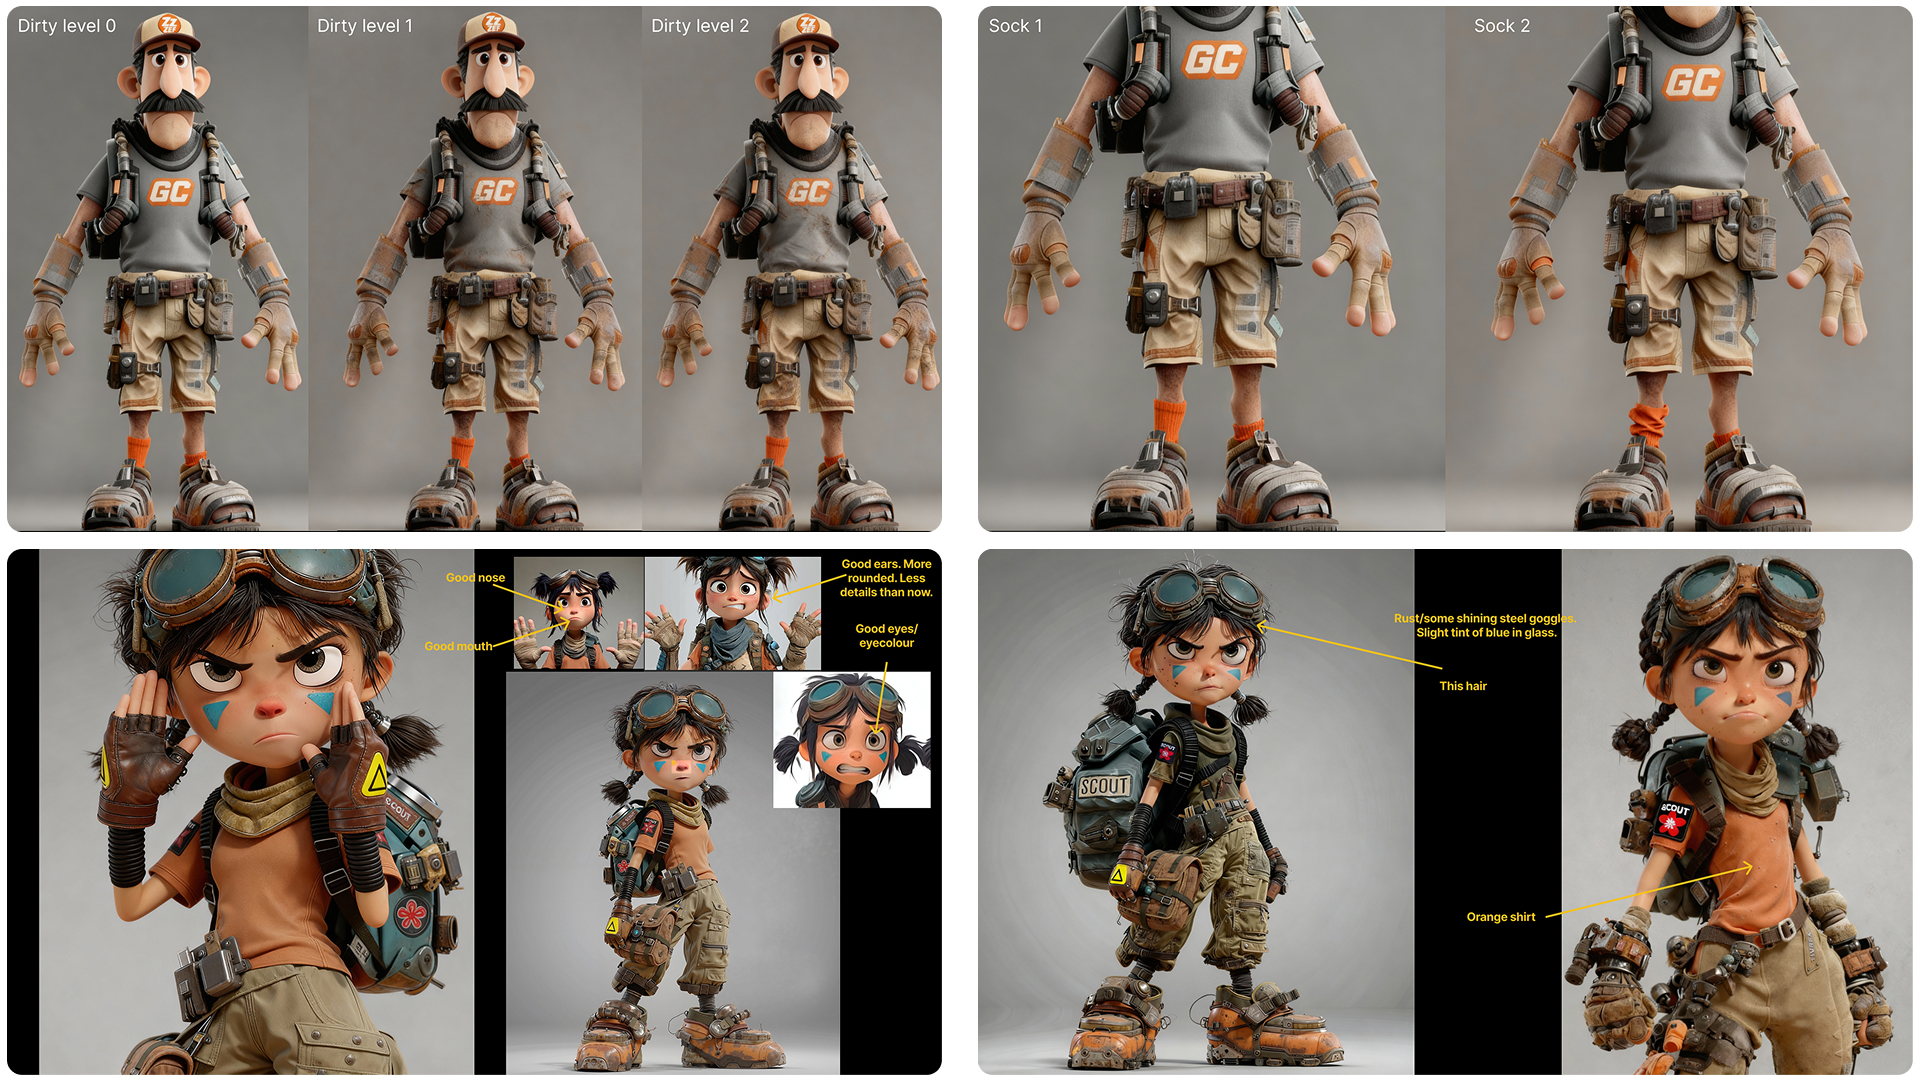
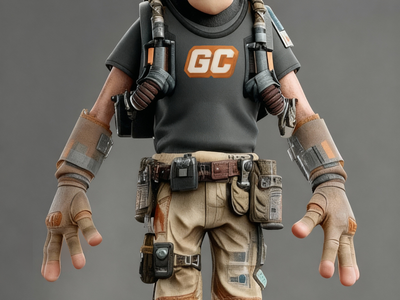
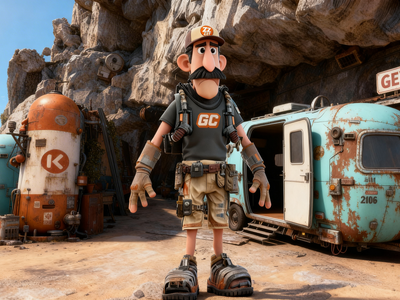
Every character required painstaking refinement. Dex had mismatched socks, a specific level of dirtiness and scratchiness to his outfit, and a particular hair style. Mooch’s teeth had to be irregular, simplified, and alien-looking, with a specific asymmetric tooth pattern. Yuki’s nose had a particular pointiness, her hands needed to be a specific size, and her hair had its own personality. The team used inpainting workflows to introduce details like fictional brand logos (“Galactic Cart”), costume patches, and asymmetric features that AI systems naturally want to smooth out into symmetry.
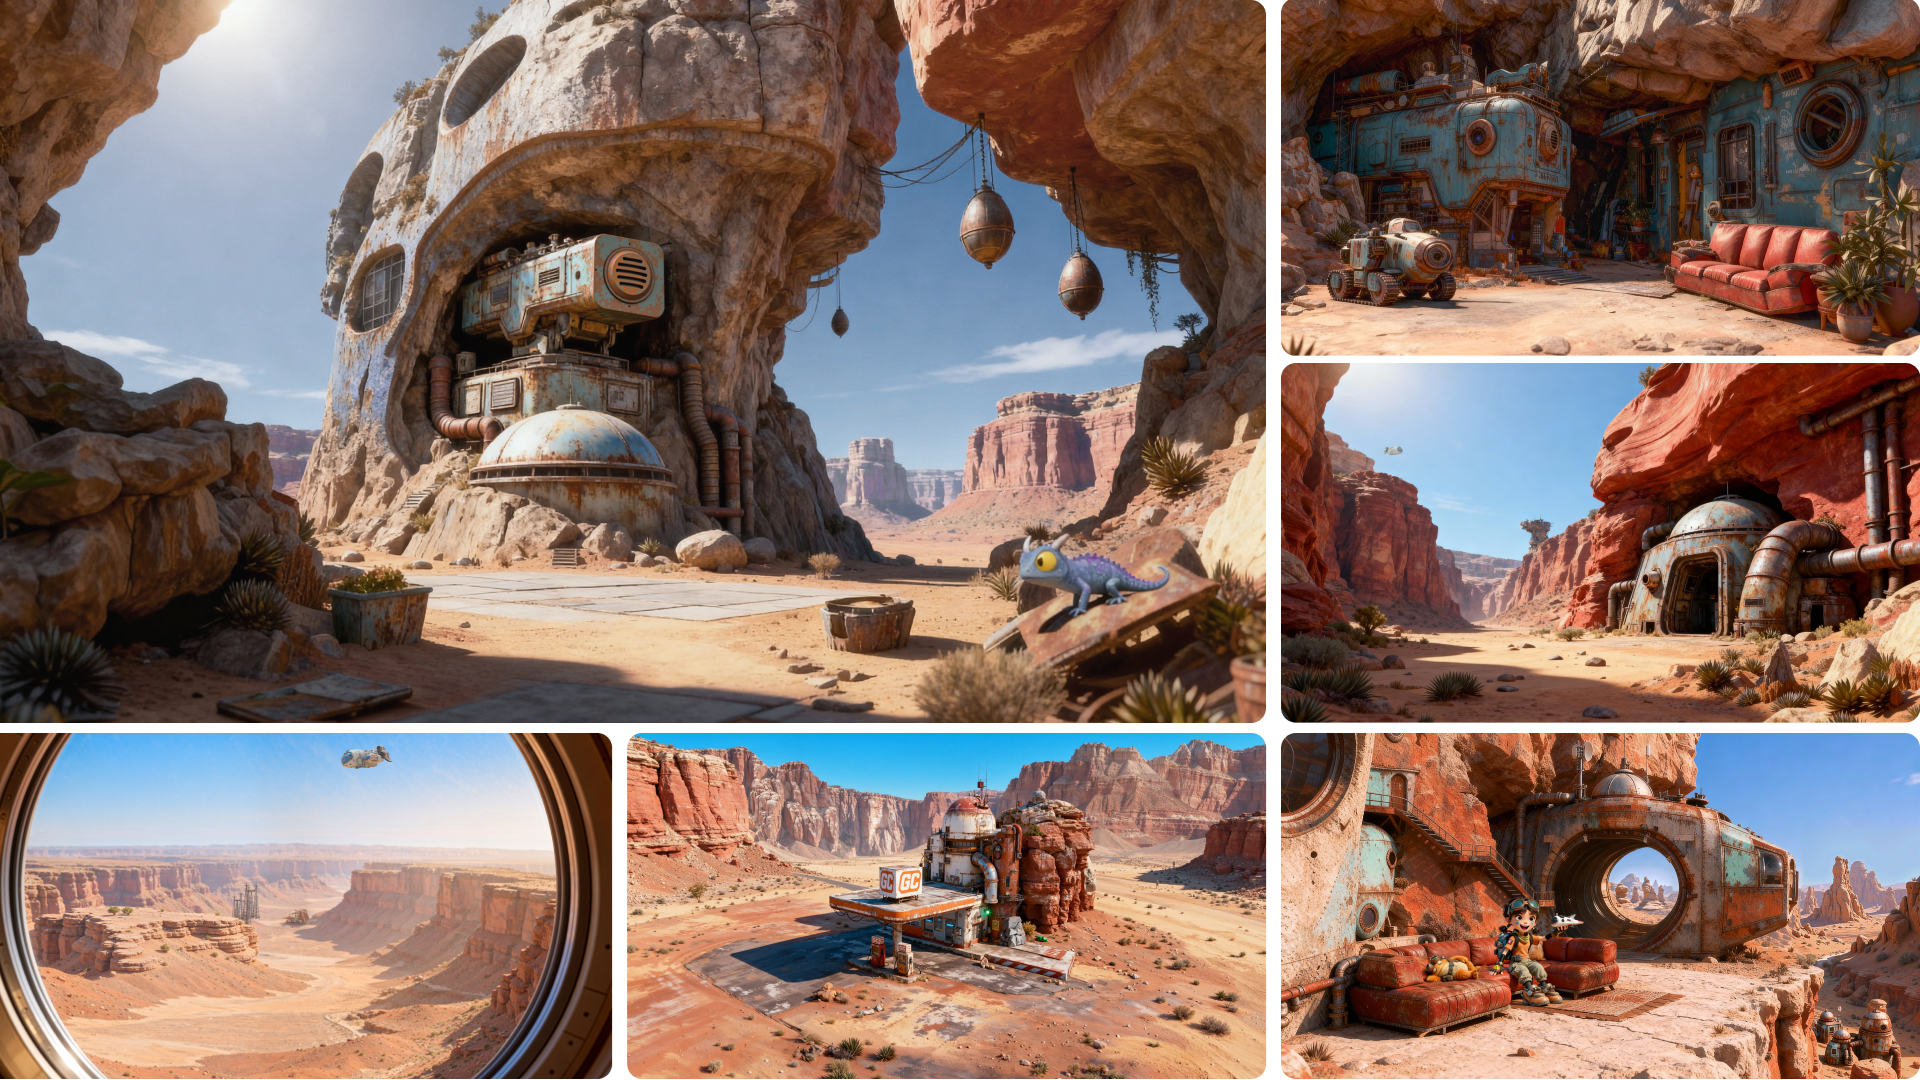
The alien yet familiar environment of Orchus Prime, one of many settings planned for the full feature.
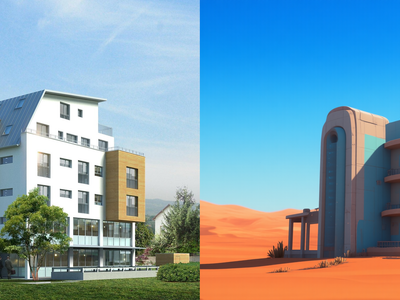
Environment Design.
Colin envisioned a world that felt familiar yet alien. A dystopian battle planet blending wild-west aesthetics with ancient alien technology. No symmetry. No sharp corners.
Something had been living in this desolate wasteland a long time ago, but nobody knew who or what. The team explored multiple architectural styles and rendered approaches before training style LoRA models that locked in the aesthetic and kept environments consistent with Colin’s Maya playblasts.
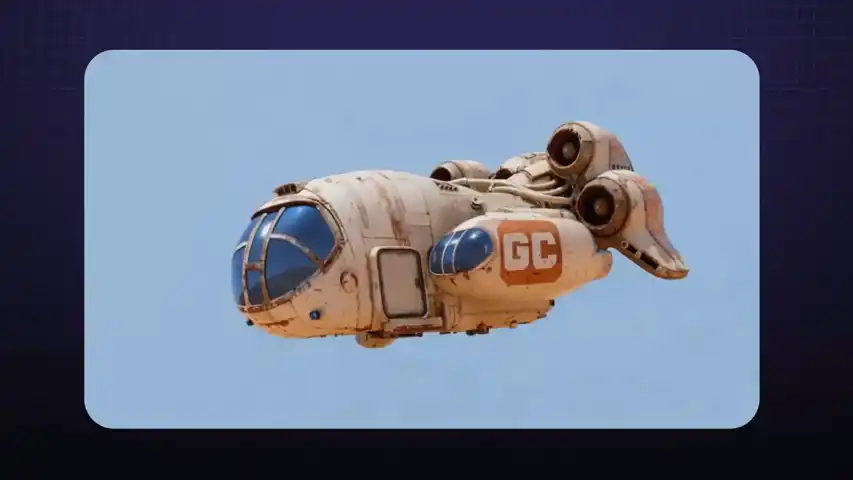
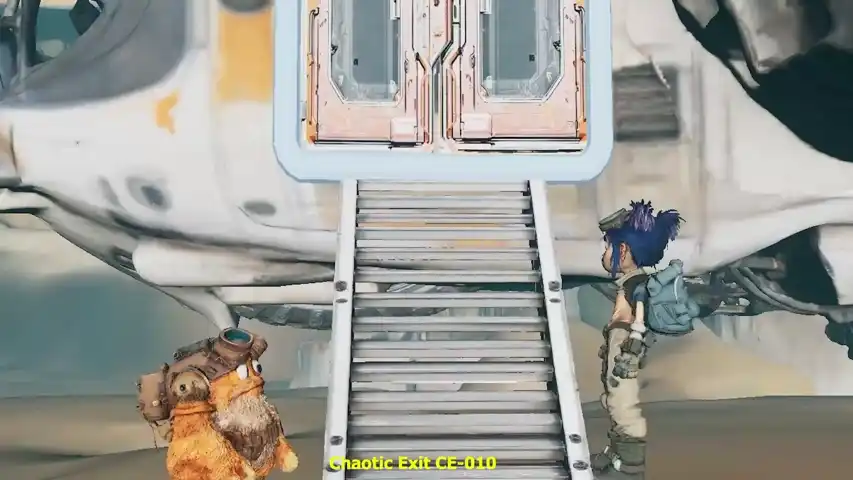
Our intrepid intergalactic delivery ship needed to be consistent from all angles, including its distinctive branding.
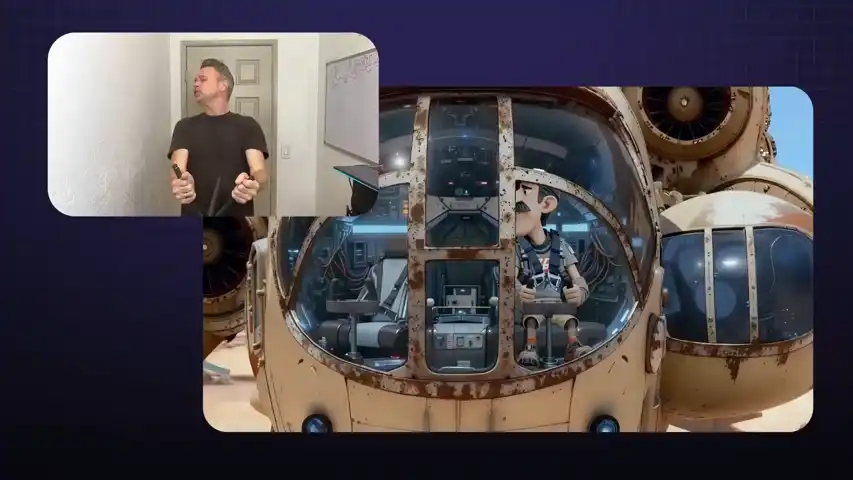
The Wallaby
Our heroes’ ship was a special challenge because of its deliberate asymmetry: a single side pod on one side, specific logo placements, a retractable ladder, and a cockpit interior that had to hold spatial consistency when the camera moved inside.
AI assumes symmetry by default, and fighting that took extra control and workflow customization. The team thought of the ship as a consistent “setting”: the hallway leads to the cockpit on the left, the engine bay sits to the right, and Malcolm the AI assistant is always positioned behind the cockpit next to the door.
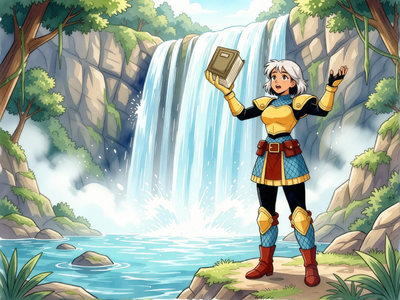
Detailed consistent character designs from all angles and expressions, used to create our fine-tuned AI character models.
AI Dataset Creation and Model Training.
For every character, the ship, and key environments, the team used Floyo to generate comprehensive training datasets, varied in angle, expression, lighting, and setting. The goal was to make the resulting LoRA models understand each subject on its own terms, disconnected from any particular scene.
If a character always wears a specific hat and outfit, those appear in every training image. But backgrounds, expressions, and camera angles vary, so the model doesn’t learn to associate the character with one environment. Training sets were quality-checked through Floyo correction workflows, ensuring details were accurate from every angle.
Workflow R&D.
Before shot production started, the team catalogued all anticipated shot types from the animatic. They categorized shots by complexity and mapped out which inputs and outputs each type required. An establishing shot of a distant planet needs very little.
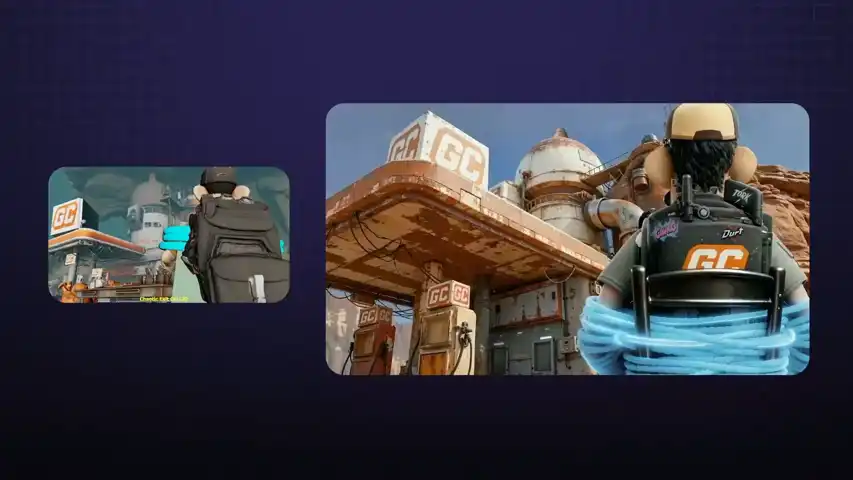
But take a scene where Yuki jumps into frame yelling “freeze,” holding a specific prop (in real life, the actress is just gripping a hairbrush), while moving through a designed environment with a tracking camera. That needs everything: her design, her movements, her face, the fake object re-mapped to the real prop, the 3D camera move, the designed location, all of it consistent with every other scene at the gas station. The polar opposite of a planet flyby.
Each shot category got a matching Floyo workflow, creating a playbook that removed the guesswork once production began.
Qwen Inpaint with Reference image
Flux Inpaint with Reference Image
High Quality Multi-Image Editing
Qwen Image w/ Controlnet and Inpaint
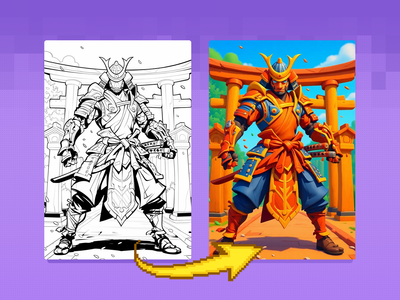
Bring your sketches to life in full color with Flux Kontext! Key Inputs Load Image – Upload the sketch you want to transform. Prompt – Describe the desired output style, such as: “Render this sketch as a realistic photo” or “Turn this sketch into a watercolor painting.”
Flux Kontext - Sketch to Image
Bring your sketches to life in full color with Flux Kontext! Key Inputs Load Image – Upload the sketch you want to transform. Prompt – Describe the desired output style, such as: “Render this sketch as a realistic photo” or “Turn this sketch into a watercolor painting.”
floyoofficial
4.0k
API
gemini flash image
Image2Image
Text2Image
typography
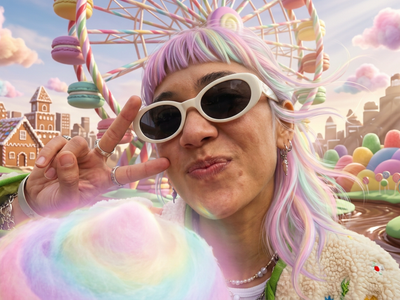
The top-ranked image model on Artificial Analysis and LM Arena. 4K output, text rendering, and subject consistency across 5 characters.
Nano Banana 2: Fast Image Generation & Editing
The top-ranked image model on Artificial Analysis and LM Arena. 4K output, text rendering, and subject consistency across 5 characters.
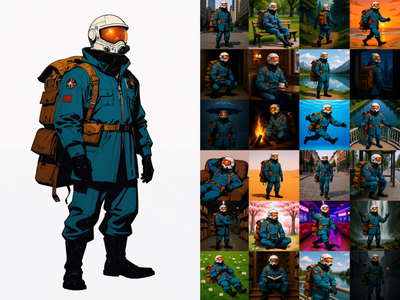
Generate a 60-Image LoRA Dataset from a Single Character Image This workflow creates a rich, varied dataset of 60 images from a single input image. It includes a range of poses, lighting, expressions, and environments to give your LoRA maximum flexibility and generalization. Key Inputs Load Image: Upload your character image here. Best results come from character sheets with multiple angles (front and back), but a front-facing image will also work well. Character Name (Output Folder): Set the name of the character — this also becomes the name of the output folder where your generated images will be saved. This helps keep things organized for LoRA training. Prompt List: This controls the variety of images generated. The default list includes 60 diverse prompts from ChatGPT, but you can freely edit it to add or remove prompts. Want a specific setting or theme? Just replace or expand the prompt list with your own. Not every image will be perfect, but the ideal minimum for a good Flux character LoRA dataset is about 30 images, so out of the 60 images pick only the best ones to train your LoRA!
Flux Kontext - Single Image to Character LoRa Dataset
Generate a 60-Image LoRA Dataset from a Single Character Image This workflow creates a rich, varied dataset of 60 images from a single input image. It includes a range of poses, lighting, expressions, and environments to give your LoRA maximum flexibility and generalization. Key Inputs Load Image: Upload your character image here. Best results come from character sheets with multiple angles (front and back), but a front-facing image will also work well. Character Name (Output Folder): Set the name of the character — this also becomes the name of the output folder where your generated images will be saved. This helps keep things organized for LoRA training. Prompt List: This controls the variety of images generated. The default list includes 60 diverse prompts from ChatGPT, but you can freely edit it to add or remove prompts. Want a specific setting or theme? Just replace or expand the prompt list with your own. Not every image will be perfect, but the ideal minimum for a good Flux character LoRA dataset is about 30 images, so out of the 60 images pick only the best ones to train your LoRA!
See an image of a character spin 360 degrees. Key Inputs Image reference: Use any JPG or PNG showing your subject clearly Width & height: Default resolution settings are noted: Default image resize resolution works best for portrait images, if the image is landscape change from 480x832 to 832x480 Prompt: Follow example format: The video shows (describe the subject), performs a r0t4tion 360 degrees rotation. Denoise: The amount of variance in the new image. Higher has more variance. File Format: H.264 and more
Image to Character Spin
See an image of a character spin 360 degrees. Key Inputs Image reference: Use any JPG or PNG showing your subject clearly Width & height: Default resolution settings are noted: Default image resize resolution works best for portrait images, if the image is landscape change from 480x832 to 832x480 Prompt: Follow example format: The video shows (describe the subject), performs a r0t4tion 360 degrees rotation. Denoise: The amount of variance in the new image. Higher has more variance. File Format: H.264 and more
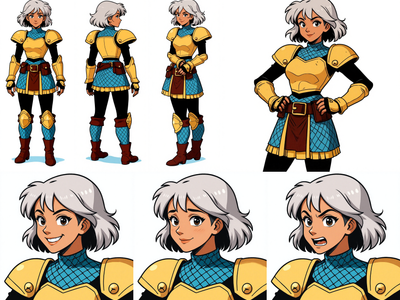
Image to Character Sheet with Kontext
Create a character sheet with multiple poses and expressions from a single image!
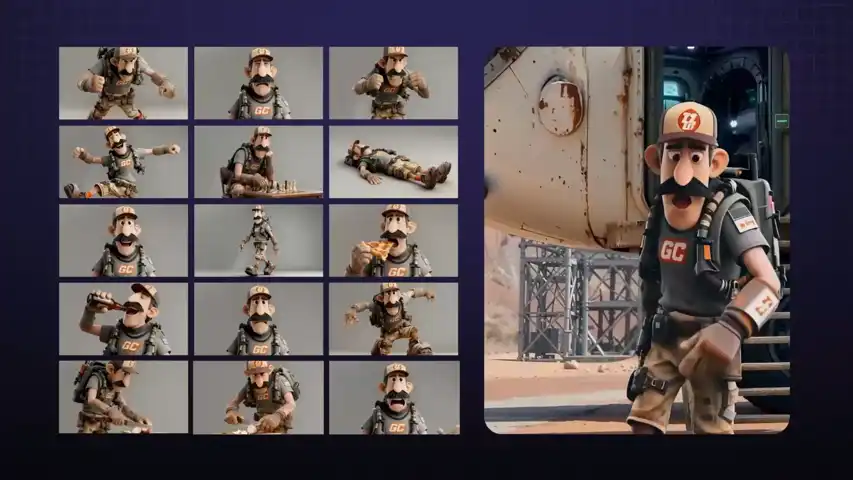
Production
Screen Tests. The first chance to put everything in the blender and see what comes out: workflows, trained AI models, final character designs, and actual performances, all combined for the first time. This is where the team could see whether the whole system worked together and catch what needed fixing before committing to volume.
Master keyframes, the foundation of each shot, created faithfully from the director's compositional vision.
Master Keyframes. High-fidelity still images representing the key frame of each shot, with every detail of the characters and settings rendered accurately and consistently.
As Colin describes it, this is where about 90% of the work was done. Unlike traditional animation where you iterate until the very last day and then the shot is final, in this pipeline you have to make sure frame one is perfect before you begin rendering.
Each master keyframe was, in itself, a work of art: a precisely composed image that became the visual foundation for the animated shot. Roughly 150 master keyframes were produced across the pilot, each created through iterative image-to-image and inpainting workflows that combined character LoRAs, style models, and compositional inputs from Maya.
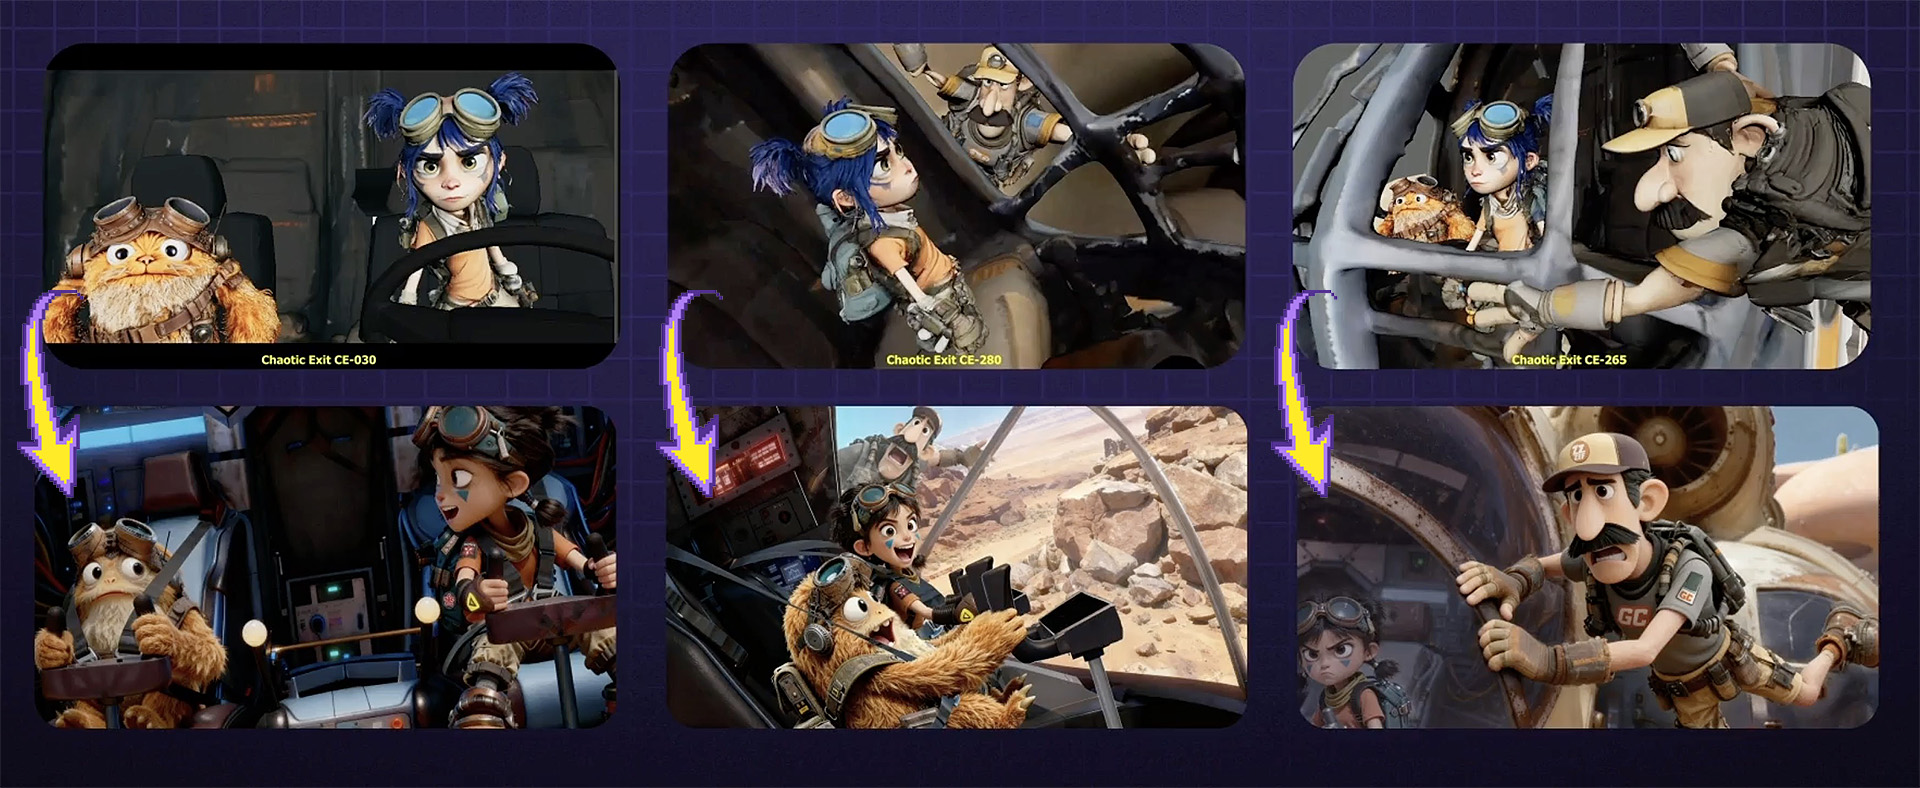
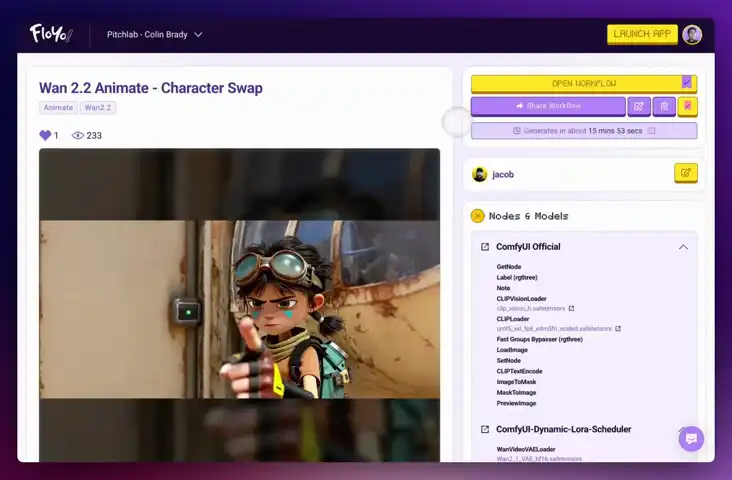
Animation Production. Each shot ran through a different combination of Floyo workflows depending on what it needed, always anchored by the master keyframe. A simple establishing shot might use a single image-to-video pass. A complex multi-character dialogue scene required stacked layers of body performance, facial performance, eye direction, camera movement, and environment styling, all running through Floyo in sequence.
Putting it all all the driving inputs, designs, performances and workflows together.
Wan 2.2 Animate - Character Swap
Swap out any actor with a new character using Wan Animate
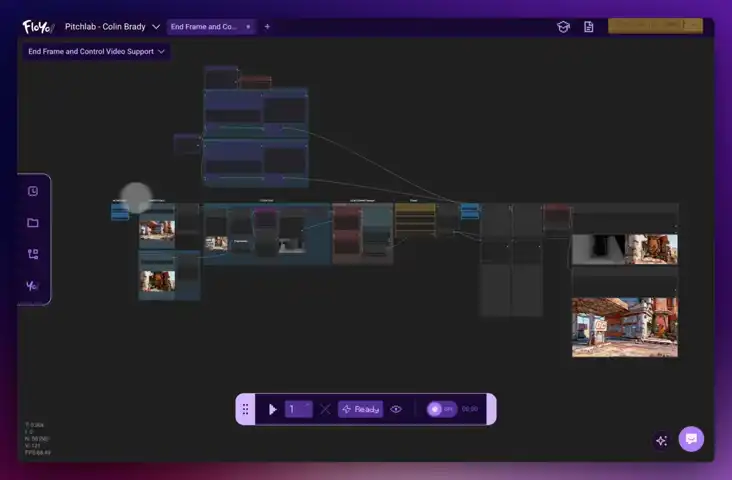
Wan 2.2 VACE
Wan2.2 Fun Control - Video to Video with Start/End Frame and Control Video Support

Wan2.2 Animate
Kling Omni - Video-to-Video with Reference
Wan2.1 VACE Video Outpaint
Wan2.2 14b - Image to Video w/ Optional Last Frame
Video to Video Restyle with Wan
Create a new video by restyling an existing video with a reference image.
Used for image to video generation, defined by the first frame and end frame images. Key Inputs Load Image (Start Frame): Use any JPG or PNG showing your subject clearly to start your video Load Image (End Frame): Use any JPG or PNG showing your subject clearly to act as the last part of your video. Make sure it's the same resolution as the load image. Width & height: Optimal resolution settings are noted. Default is set to 480P, up to 72oP. Prompt: as descriptive a prompt as possible. Num Frames: Default set at 77, higher frame numbers may result in out of memory. Frame Rate: 16fps is optimal for this Wan video model Notes to extend the clips: If you want to extend your clip, right click on the last frame output above and click "Copy (Clipspace)" and go back to the start frame image loader, right click and "Paste (Clipspace)", from there you can adjust your prompt for what happens next in the clip, or include a new end image. Doing this over and over without introducing an end image may result in deterioration in quality over time, and context may be lost. If you want to combine your clips, bypass this current group and enable the multi video combine group below, load however many videos you have saved and queue again.
Image to Video with Wan Start & End Frame
Used for image to video generation, defined by the first frame and end frame images. Key Inputs Load Image (Start Frame): Use any JPG or PNG showing your subject clearly to start your video Load Image (End Frame): Use any JPG or PNG showing your subject clearly to act as the last part of your video. Make sure it's the same resolution as the load image. Width & height: Optimal resolution settings are noted. Default is set to 480P, up to 72oP. Prompt: as descriptive a prompt as possible. Num Frames: Default set at 77, higher frame numbers may result in out of memory. Frame Rate: 16fps is optimal for this Wan video model Notes to extend the clips: If you want to extend your clip, right click on the last frame output above and click "Copy (Clipspace)" and go back to the start frame image loader, right click and "Paste (Clipspace)", from there you can adjust your prompt for what happens next in the clip, or include a new end image. Doing this over and over without introducing an end image may result in deterioration in quality over time, and context may be lost. If you want to combine your clips, bypass this current group and enable the multi video combine group below, load however many videos you have saved and queue again.
floyoofficial
2.2k
Animation
Image to Video
Kling 2.6
motion transfer
Create an excellent for movement for your characters using Kling 2.6 Standard Motion Control
Kling 2.6 Motion Control: Animate Images
Create an excellent for movement for your characters using Kling 2.6 Standard Motion Control
LTX2 Image + Sound to VIDEO
Image + Sound to VIDEO

LTX 2.3 Pro Image to Video
LTX 2.3
Post-Production
Completed shots were upscaled from HD to 4K, interpolated from 16fps to 24fps, and converted to delivery formats using Floyo’s upscaling workflows. The final outputs moved through Frame.io into the editorial pipeline, where the 6-minute cut was assembled in After Effects, DaVinci Resolve, and Premiere. Basic color grading was applied before final delivery.
%20(2)_1774208003255.webp?width=400&height=300&quality=80&resize=cover)
API
Floyo API
Topaz
Video2Video
Video Upscale
Upload a video, pick your enhancement model and quality level, and Topaz Video AI sharpens, denoises, and upscales it. Audio is preserved. Output is H265 MP4.
Topaz Video Upscaler for Sharper Results
Upload a video, pick your enhancement model and quality level, and Topaz Video AI sharpens, denoises, and upscales it. Audio is preserved. Output is H265 MP4.
floyoofficial
5.4k
API
Image2Image
image restoration
SeedVR2
SeedVR Upscale
super resolution
Upscale to Extreme Clarity
SeedVR2: Upscale Images to Extreme Clarity
Upscale to Extreme Clarity
An Integrated AI Production Ecosystem
This was never a one-tool project. A production of this scope (multi-character, multi-environment, 130 shots with cinematic consistency with every aspect controlled) required a coordinated ecosystem of specialized tools, all orchestrated around a central platform. Floyo served as that centerpiece.
Figma was the perfect place for the development process, being fluid and refining concepts together.
Figma
Served as the visual development workspace. It was their collaborative mood board, the place where the team refined character designs, explored architectural styles, compared and contrasted concepts, and locked down the reference library that model training depended on. Colin arrived with loose sketches and a pile of inconsistent AI-generated concepts. Figma was where those raw ideas got debated, refined, and eventually locked for production.
Frame.io
Functioned as the production management backbone. With hundreds of performance recordings, Maya playblasts, master keyframes, and animated shot outputs flying around, the team needed a system for organizing, commenting on, and delivering assets. The best Floyo outputs moved into Frame.io for director review, editorial handoff, and archival, all with metadata preserved. The team also considered other asset management tools like FlowPT and Ftrack.
Maya Playblasts used to explore the space, establish camera paths, and guide character motion.
Maya
Provided the 3D layout and camera planning. Colin used Maya to block scenes the way he would on a live-action set, creating playblasts that established camera paths, spatial composition, and the physical logic of each environment. These playblasts fed directly into Floyo workflows as structural inputs.
Floyo
As where all of those inputs came together. The platform where AI workflows were authored, organized, iterated, and deployed across every phase of production, from early art development and training data generation through model training and screen testing to final animation and delivery upscaling.
The three F’s, as the team called them: Figma for discovery, Frame.io for coordination, Floyo for production. Inputs came in from Figma and Frame. Outputs went back to Figma during the exploratory phase or into Frame once they were finished video. And everything, always, stayed on Floyo too, so every artist had access.
Enterprise Collaboration at Scale
For a production with multiple team members, evolving assets, and shot-by-shot iteration, collaboration infrastructure matters as much as the AI itself.
Floyo’s enterprise workspace gave the team a private, project-specific environment where workflows, reference materials, context notes, and examples all lived in one place.
Each client on Floyo gets private team pages which can be organized by project, department, or production phase. For Star Rifter, the team created dedicated pages for character and art development, training set and LoRA creation, video and playblast workflows, and specialized tools.
Every workflow included context notes, tips, and visual examples so any artist could pick up a task and produce consistent results without wondering which settings to use or where the latest files were.
Technical leads workspaces to prototype complex solutions, like bone re-proportioning for differently sized characters or 360-degree wardrobe consistency, without disrupting the active production pipeline. Once something worked, it got published to the shared private page.
On the file management side, every output was organized into defined folder structures within Floyo’s shared file drive. Nothing got lost. Every workflow, every output, every intermediate result stayed accessible to the full team, alongside the corresponding workflow that produced it. Anyone could pick up and iterate on any shot at any time.
Why Open Source Matters Here
One of the reasons Floyo was chosen for Star Rifter comes down to its architecture: an open-source, workflow-centric platform built for teams.
Closed-source AI platforms offer simplified interfaces that work well enough for people with loose requirements.
But a production like this, with a discerning director, evolving creative requirements, hard deadlines, and a constant need for custom solutions that don’t exist yet? That’s flying a plane while it’s being built. We needed a platform that could keep rolling with the punches.
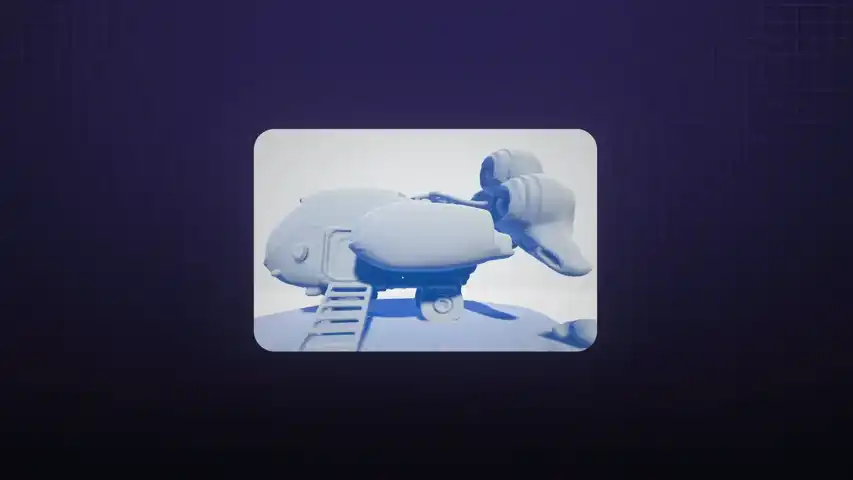
Complex shot sequences such as the ship rising, requires experimentation and a combination of various techniques only possible with the flexibility of custom workflows.
Floyo gives teams access to the entire open-source ecosystem: thousands of community-developed nodes, every open and closed model, and the ability to build any workflow for any requirement that comes up. When the team needed a custom bone re-proportioning node that didn’t exist anywhere, they built it.
When they needed an eye-fixer workflow that could swap out eye direction without re-generating the entire shot, they built that too. On a closed-source platform, those moments are dead ends. You file a feature request and hope for the best.
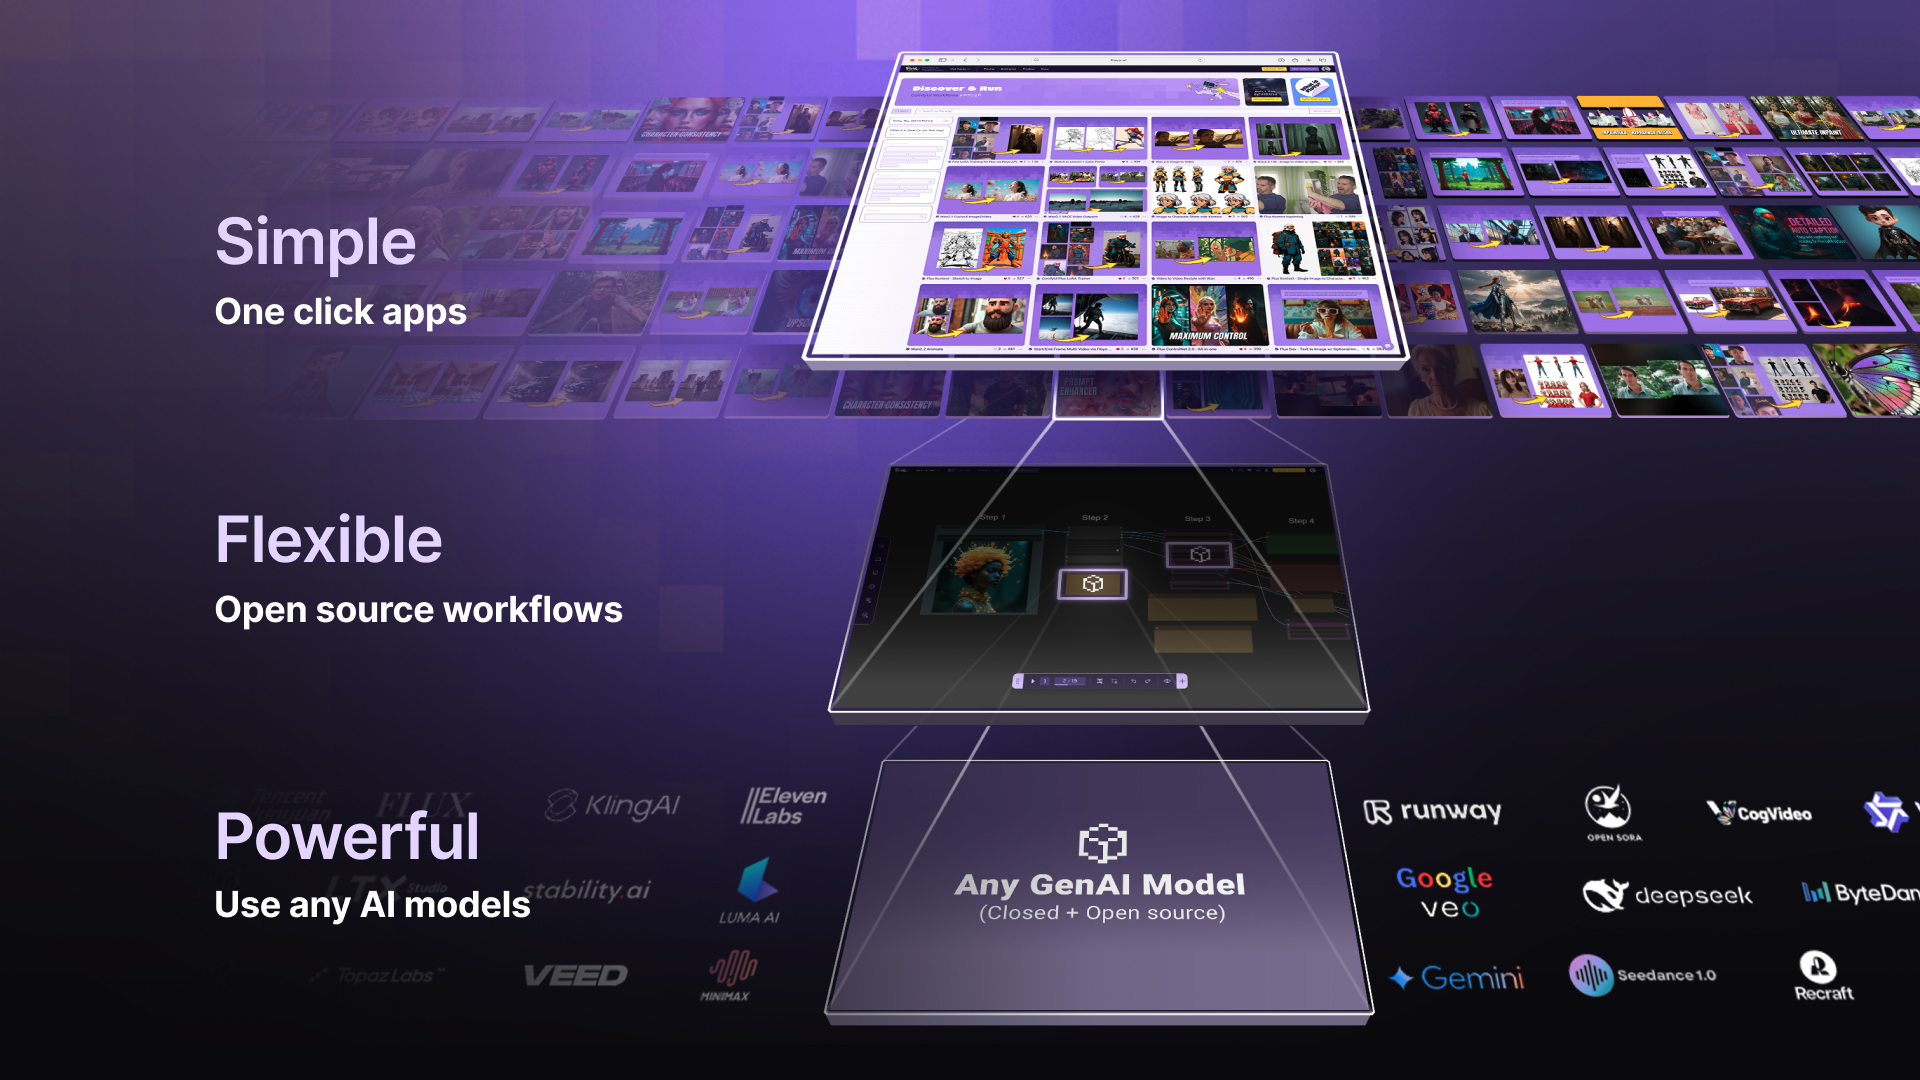
Floyo has pro-grade control with one-click simplicity. Swap models without retooling your production pipeline and always use the best model for the job.
And because the pipeline is open-source and model-agnostic, when underlying models were updated during and after production, the team could swap in improved models without rebuilding their workflows. Custom LoRAs, workflow structures, and production organization all carried forward.
Floyo is the only platform that combines open-source workflows with enterprise team collaboration. For productions that need both, there isn’t a second option.
Floyo for Human-Driven Performance
Only humans can have this much fun.
The Director at the Center
The defining goal of Star Rifter wasn’t just to use AI. It was to prove that AI can be a tool for directors. Not prompt engineers. Not AI specialists. Directors.
“It was really important to me that the performances feel alive. You don’t typically get that with a lot of AI tech out there. But the team figured out exactly how to capture all the little subtle motions, eyelines, and emotion. It was like magic to me.”
— Colin Brady, Director
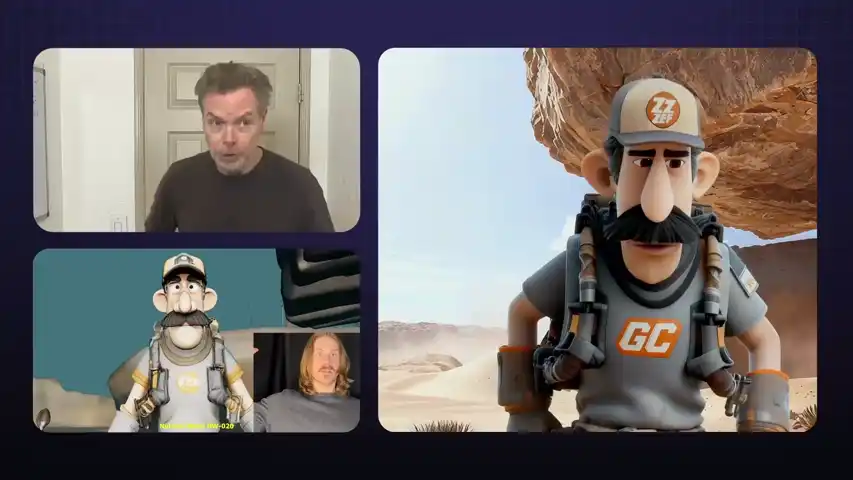
The workflows built for Star Rifter made this director-first approach work in practice. Every aspect of every shot was driven by human performance input: 3d playblasts for camera and composition, trained AI models for character designs and sets, video recordings that communicated intent visually, directly, and precisely. What would a prompt even be needed for?
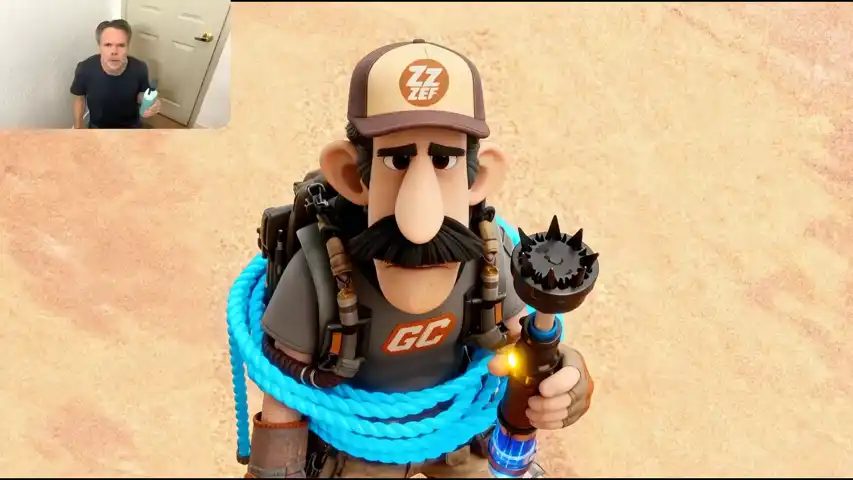
Now anyone with some props and an phone camera has the potential to create animated magic.
Performance, Not Prompts
The biggest technical investment in Star Rifter was building workflows that could take raw, imperfect human performance and turn it into polished AI animation while keeping the director’s intent intact at every level.
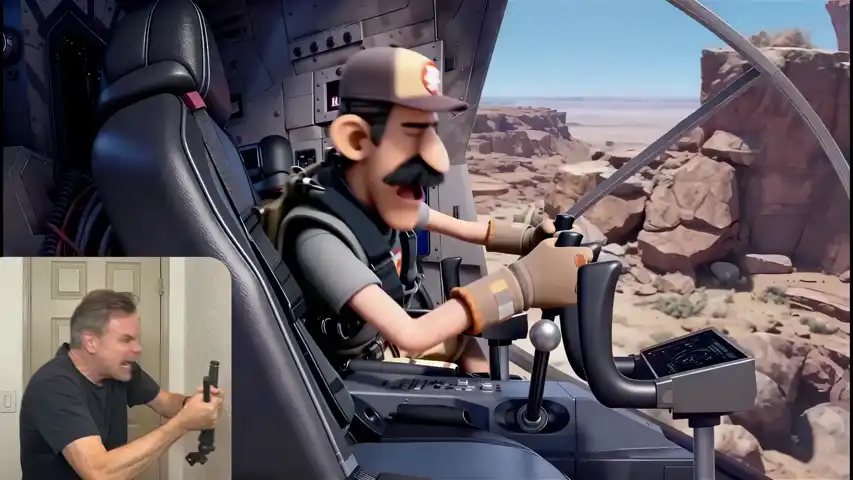
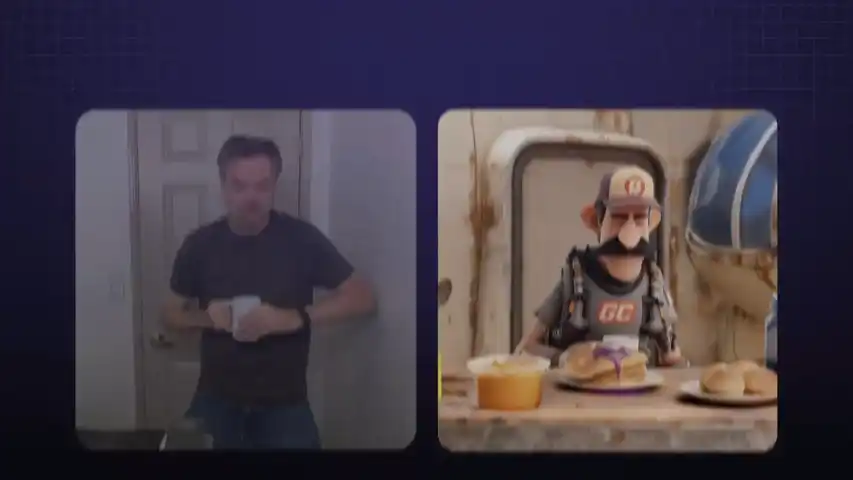
Colin and his team recorded every aspect they wanted to control. Body movements, facial expressions, eye direction, camera paths. They used whatever was practical: iPhone video for performances, Maya renders for camera and spatial composition. The performers weren’t motion-capture actors in expensive rigs.
They were Colin himself, his friend, his daughter. Sometimes they were acting in the rain. Sometimes the framing was too tight. Sometimes the eye lines were off because someone was reading from a script instead of looking where the other character would be. The tools were everyday and the conditions were imperfect. But the intent was cinematic, and that’s what the pipeline had to capture.
The workflows had to be robust enough to understand inputs that weren't perfect, and still grab the essence of the performance. Not just broad body movement, but the subtlety of a facial expression, the direction of a glance, the timing of a breath between lines.
Colin’s way of thinking about it:
AI is a very high-end rendering process. It handles the clothing, the hair, the simulation, the dust, the effects, the explosions. The grit and the rust and the environmental detail. Those are things AI does exceptionally well. What it doesn’t do well on its own is performance: the eyes, the emotion, the subtle human things that make a character feel alive. That’s what the humans bring. The AI renders. The humans direct.
Prompts optional. Everything is already controlled and directed by the director.
By the end, prompts were barely used across the entire production. Everything was already predesigned: the art style, the composition, the character training data, the models, the body and face and eye performances, the 3D environments, the camera moves.
There was no room left for a prompt. And there didn’t need to be. It was all the artist and the artist’s intentions.
Open source workflows allow you to create new tools if a solution doesn't exist.
Body Performance
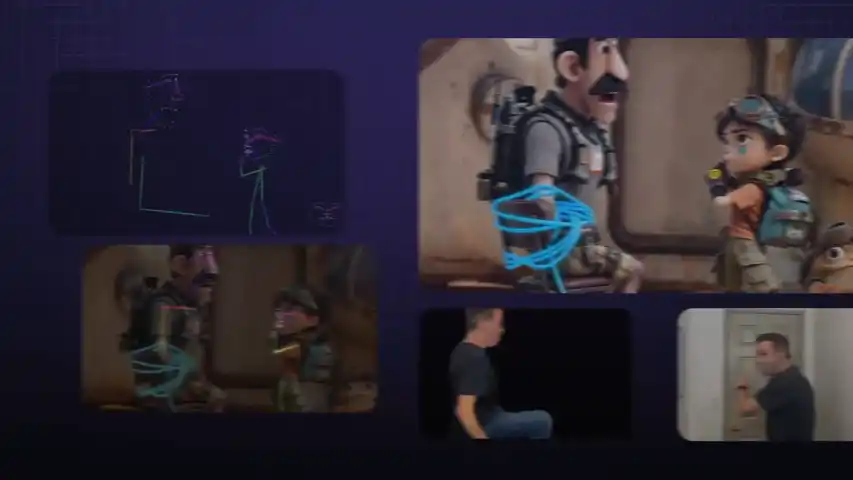
Actor recordings served as the body performance input for each shot. The key problem was that the performer’s physical proportions don’t match the animated character’s. A naive motion transfer would distort the character, conforming their body to the actor’s build instead of just following the movement. The team developed a custom bone re-proportioning workflow that extracted the performance intent (the gesture, the movement, the timing) without imposing the actor’s physical structure onto the character.
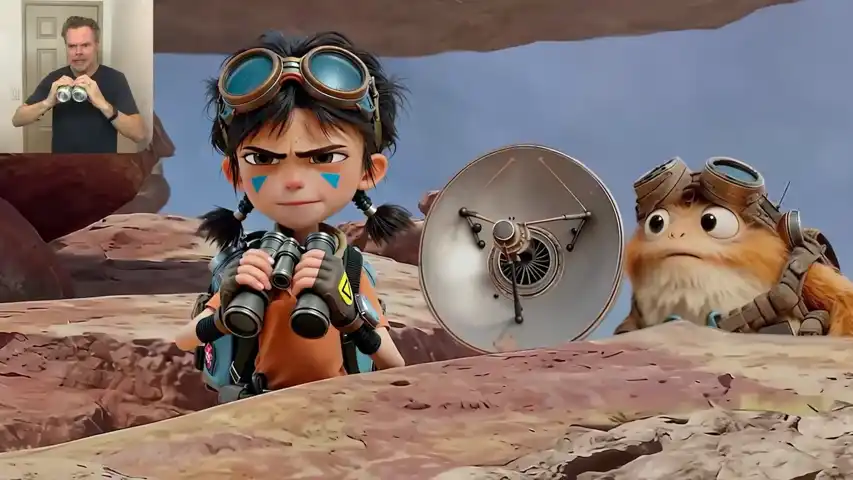
Multi million dollar special effects rigs vs. AI and an old TV antenna.
For shots where a complete body performance wasn’t feasible, the team used selective control to isolate the useful parts and discard the rest. Take the shot of Dex hanging off the ship as it flies away. Nobody had expensive stuntmen or rigs to hoist a person into the air. So Colin acted out what he could, the team grabbed the upper body and facial expression, and left the legs behind. The AI filled in the rest within the established character model. That’s the magic of granular workflow control: you don’t need a perfect capture if you can surgically extract the parts that matter.
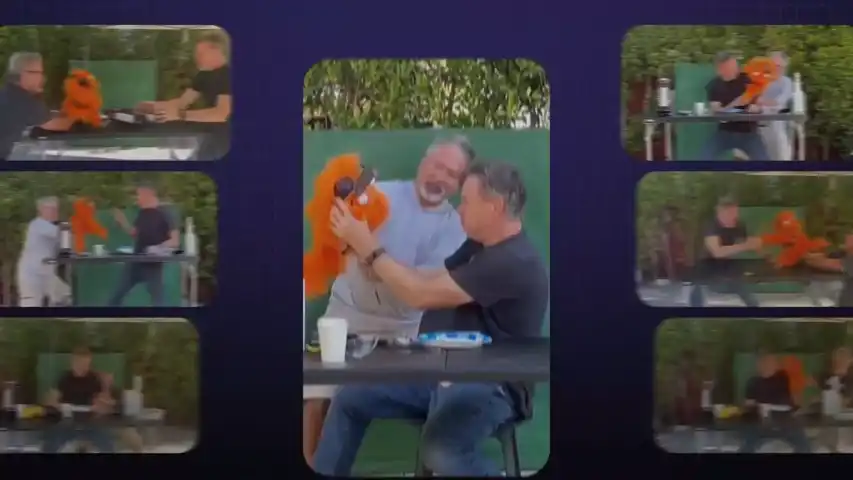
And then there was the puppet. For some motions that humans simply couldn’t perform as reference (Mooch isn’t exactly human-shaped), Colin built a little puppet and acted out scenes with it. To everyone’s surprise, the Floyo team was able to track the puppet’s motion and translate that silly little puppeteering performance. It’s the kind of moment that reminds you this is still filmmaking, not software engineering.
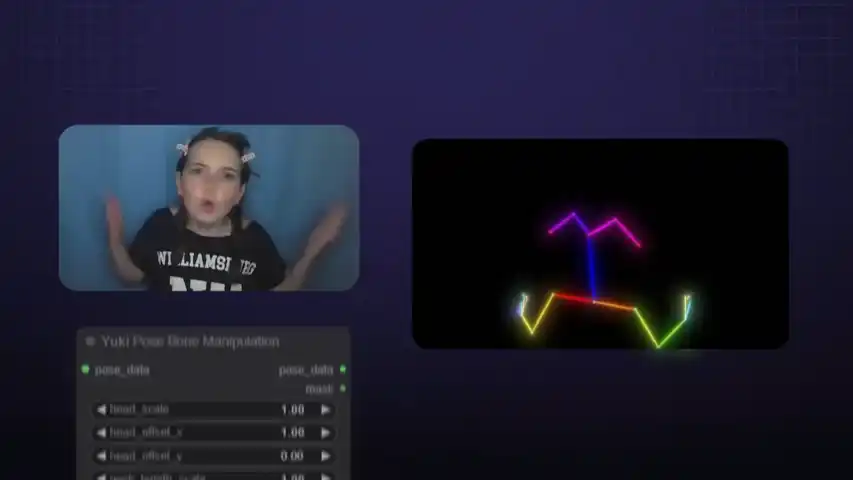
Capturing the most subtle aspects of human performances is what adds the soul.
Facial Performance and Eye Line
For Colin, the eyes were everything. Eye lines determine whether characters feel present in a scene, whether they’re actually talking to each other or just performing in parallel. Getting eye lines wrong is one of the most visible failures in screen performance, and it was the single highest priority on Star Rifter.
“The eyes are super important to me. Every little eye dart, every squint, every blink, every breath. These are things you want to put in the characters’ performance that are often overlooked. If the character’s darting their eyes too much, every eye dart speaks volumes about the character’s personality.”
— Colin Brady, Director
Facial performance was captured as a separate input stream, independent of body performance. This decoupling let the team refine facial nuance without touching body motion, and vice versa. The two layers were then composited together in Floyo to create the final cohesive shot.
When the captured eye line needed correction after the fact, the team had a dedicated eye-fixer workflow that could replace or adjust eye direction in the final output without regenerating anything else. That kind of granular, after-the-fact control is what separates a professional pipeline from a consumer tool.
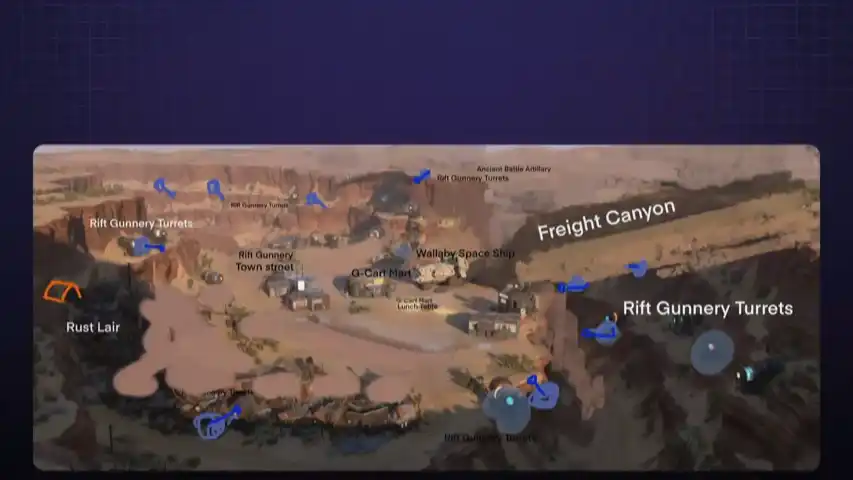
Camera Direction
Colin calls it virtual location scouting. He’d build a rough 3D environment in Maya, then walk through it with a virtual camera, finding the right angles, checking that the staging worked, making sure the spatial relationships between characters and objects made sense. He’d take screen grabs from these sessions and hand them to the Floyo team as the structural foundation for each shot.
These Maya playblasts fed into Floyo’s V2V restyle workflows, which used them as drivers for the final shot. The AI wrapped animated characters and styled environments around the director’s specific camera move, keeping spatial accuracy while applying the visual style.
With the right workflows, you don't have to roll the dice with AI.
Colin’s camera intent came through Maya playblasts: renders from his 3D scene that established the camera path, framing, and composition. These fed into Floyo’s V2V restyle workflows, which used them as structural drivers for the final shot. The AI wrapped animated characters and styled environments around the director’s specific camera move, keeping spatial accuracy while applying the visual style.
This let Colin think cinematically. He could block a scene in Maya the way he would on a live-action set and trust the pipeline to carry that intent through to the final output.
Selective Fidelity: Keep What Works, Drop What Doesn’t
One of the most practically important things Floyo enabled was selective control. The ability to apply performance influence at a granular level and deliberately throw out elements that would introduce noise.
Capturing the essences of performances without the need for fancy production setups, rigs and green screen studios.
Most AI tools apply a transformation globally and uniformly. Floyo’s workflow architecture let the team treat each shot as a stack of independently controllable elements: body movement, facial expression, eye direction, camera, environment. Each element could come from a different input, get refined on its own, and then be composited into the final output.
Shot Workflows: A Spectrum of Complexity
Because different shots need different things, the team built a systematic taxonomy of shot types at the start of production. Each category got a corresponding Floyo workflow:
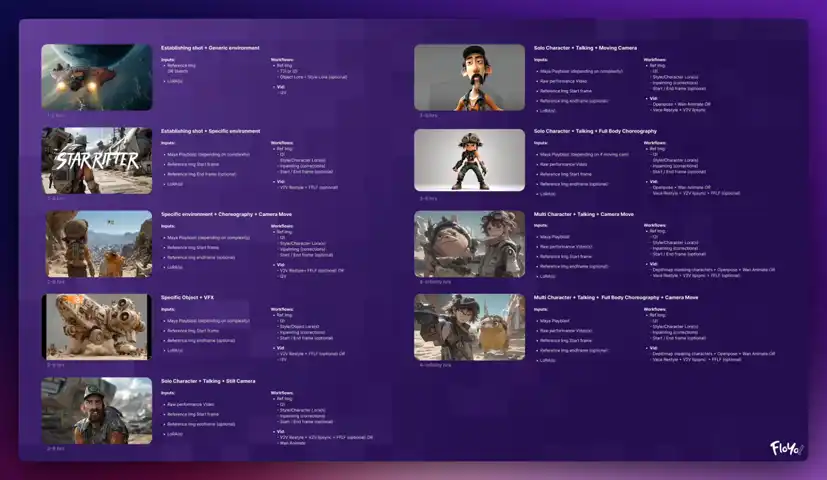
Preliminary workflow shot assessment based on Colin's pre production animatic.
“Once you strip away all the technical AI process, it really comes down to pure filmmaking rules and one question: do we like that performance?”
— Colin Brady, Director
The People Behind the Process
A compact team working across creative, technical, and production roles at once.
Star Rifter was built by a small, highly collaborative team. Roles often overlapped, but each discipline played a critical part in turning Colin Brady’s vision into a finished pilot in roughly two months with fewer than ten people.Director
At the center was the director, shaping the story, characters, performances, and emotional intent of the film. Every creative decision flowed from that vision. This was not a process of prompting and accepting whatever came back. It was a production built around preserving judgment, nuance, and cinematic intention at every stage.
Creative Direction
Creative direction helped translate that vision into something the team could actually build. It connected story goals to shot design, identified where the technology could support the narrative, and helped make sure the process stayed in service of the film rather than pulling it off course.
Art Direction
Art direction protected the visual standard. It meant evaluating color, composition, character appeal, consistency, and overall shot quality with a critical eye. AI can generate variation endlessly. Art direction is what helped shape that variation into something cohesive, deliberate, and believable.
Workflow Lead
The workflow lead turned creative needs into working systems. Different shots required different combinations of inputs, tools, and logic. This role was about building the bridge between what the film needed and what the pipeline had to produce, then adapting that bridge again and again as new challenges emerged.
Model Training Lead
Model training was not just technical setup. It was part of the craft. The quality of the result depended on the quality of the data, the structure of the training set, and the fit between a given approach and the underlying model. This role helped ensure that the characters and visual world stayed recognizable, controllable, and true to the project.
AI Artists
AI artists carried much of the production forward shot by shot. They worked across development, training data, master keyframes, cleanup, inpainting, refinement, and animation. On a larger production, these responsibilities might be divided into narrower specialties. Here, the small size of the team meant flexibility mattered as much as skill.
Results
Better Economics for Storytelling, Not Less Direction
With Floyo, the team cut timelines, lowered production cost, and kept creative control where it belonged: in the hands of the director.

The Star Rifter pilot delivered what it set out to prove. Like the story itself, it was made by a small but resourceful team exploring the unknown. With Floyo as the production backbone, they produced a complete, cinematic animated short at feature-film quality standards, fast.
| Complete Edit | 6 minutes, 130 shots |
| Production Window | ~2 months end-to-end |
| Core Team | Fewer than 10 people combined |
| Character Consistency | 360-degree accuracy across all shots and angles |
| Output Resolution | 4K with 24fps interpolation |
| Estimated Cost Reduction | ~1/10 of traditional animation budgets (i.e. 90% reduction) |
| Prompts Used | Sparingly, as every shot driven by human performance. |
Efficiency. 130 shots produced in a window that would traditionally take years. The combination of repeatable Floyo workflows, trained LoRA models, and the master keyframe approach let the team go from concept to finished shot in hours, not weeks.
Fidelity. Characters stayed visually consistent across varied environments, camera moves, and lighting conditions. The Star Rifter world (alien, asymmetric, weathered) was established with real clarity and specificity from any viewpoint.
Humanity. A performance-driven pilot that keeps the emotional heart a Pixar-trained director demands. Every eye dart, every breath, every subtle gesture was driven by human intent and preserved through the pipeline.
Reusable Infrastructure. Beyond the pilot, the production generated a library of trained LoRA models, master keyframes, typed shot-workflow configurations, and an organized enterprise workspace. All of it is ready for the next phase. The foundation for a feature-length Star Rifter project is already in place.
Creating a Rift in Storytelling
Star Rifter started as an experiment and ended as a proof point. A small team, a visionary director, an impossible timeline, and a pipeline that kept figuring things out as it went. Just like the original Star Wars crew in those Van Nuys warehouses. And just like Dex, Yuki and Mooch on that dusty alien planet, the team is just getting started.
A crew of scrappy explorers venturing out into the unknown, made by a crew of scrappy creators charting the unknown.
How a Former Pixar & ILM Director Produced a Cinematic AI-Animated Pilot with Human Performance Driving Every Frame