Partial Modification Reference Image using Flux.2
Paint a mask over the part of your product image you want to change, drop in a reference design, and Flux 2 Klein redraws only that region in four steps.
Flux
Image
Image to Image
Inpainting
2
320





Nodes & Models
Note
LoadImage
UNETLoader
flux-2-klein-9b.safetensors
VAELoader
flux2-vae.safetensors
KSamplerSelect
CLIPLoader
qwen_3_8b_fp8mixed.safetensors
RandomNoise
PreviewImage
LayerUtility: ImageScaleByAspectRatio V2
ImageScaleToTotalPixelsX
CLIPTextEncode
VAEEncode
GrowMaskWithBlur
Flux2Scheduler
ConditioningZeroOut
ReferenceLatent
InpaintModelConditioning
CFGGuider
SamplerCustomAdvanced
VAEDecode
SaveImage
MaskPreview+
Edit any part of a product image without touching the rest.
Paint a mask over the area you want changed in Image 1, drop a reference image in Image 2 to show what should replace it, and describe the edit in the prompt. Flux 2 Klein redraws only the masked region in four sampling steps. The original lighting, perspective, and surrounding pixels stay intact.
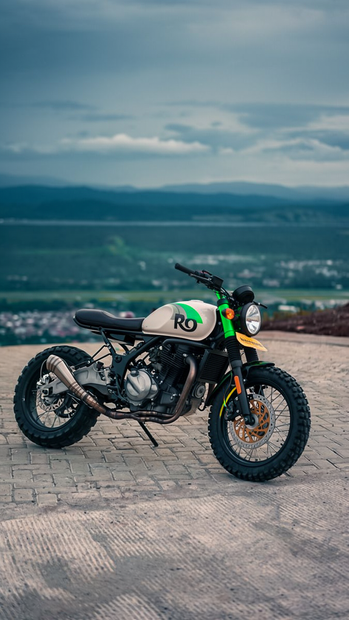
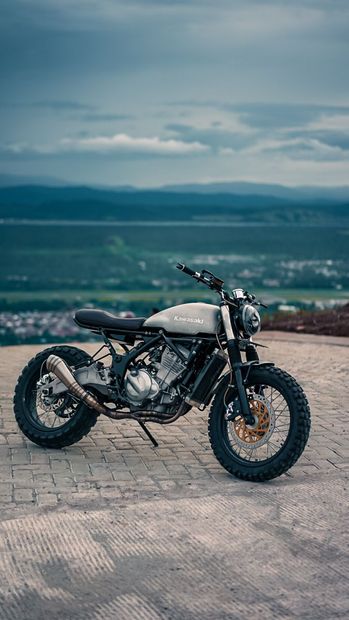
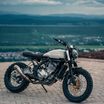
The reference image is optional. Skip it and the model edits using only the prompt. The example is tuned for swapping a motorcycle's front-end design, but the same setup handles furniture details, packaging changes, color shifts, or any localized product edit.
How do you do local edits on a product image with Flux 2 Klein?
Paint a mask over the area you want to change in your source image, optionally upload a reference image showing the design you want injected, and write a prompt describing the edit. Flux 2 Klein samples only the masked region in four steps using Qwen 3 8B as the text encoder. The rest of the image is preserved pixel-for-pixel.
Image 1 (source with mask) The product image you're editing. Right-click the load node to open ComfyUI's mask editor and paint over the area you want to change. Smooth strokes work better than ragged ones. Keep the mask slightly larger than the target area so the model has room to blend the edit into the surrounding pixels.
Image 2 (reference, optional) A second image showing the design you want injected into the masked area. The model treats it as a visual reference. If you only want prompt-driven editing, the workflow ships with a default placeholder you can leave alone, or bypass the entire reference group via right-click then Bypass Group Nodes.
Prompt Describe what should appear in the masked area. Reference "Image 1" and "Image 2" directly if you're using both. The default prompt is: "redesign the motorcycle's front-end, replacing it with the front-end design from Image 2. The colors must match the original body color scheme from Image 1. Strictly avoid blue or mint green." Be explicit about colors and what to exclude.
Mask grow and blur (default 10 / 20) Grow expands the painted mask outward by 10 pixels. Blur softens the boundary by 20 pixels. Higher grow gives the model more area to work with. Higher blur gives a softer transition between edit and original. Drop both to 0 if you need sharp, exact edges.
Total megapixels (default 1.7) Sets output resolution. 1.7 MP works out to roughly 1300×1300 at 1:1 ratio, or proportional at other aspect ratios. Drop to 1.0 for faster previews. Push to 2.5 for higher detail. Klein handles up to around 2 MP comfortably before slowing down.
Steps (default 4) Klein is distilled to run in 4 steps. The catch: pushing higher rarely improves output and can make it worse. Leave it at 4 unless you're experimenting.
CFG (fixed at 1) Klein wants CFG 1. Don't change it. Raising CFG with a distilled model produces burnt, oversaturated results.
Seed Default is randomize. Lock to a specific number when you want reproducible variations from the same inputs.
What is this workflow good for?
Anyone editing product images who needs to change one specific part, a logo, a color, a panel, a label, a piece of furniture, without touching the rest of the photo. Faster than masking in Photoshop, more controllable than full-image generation, and the optional reference image lets you inject a specific design instead of describing it in words.
Product design iteration where you want to test variations of one component: swap a motorcycle headlight, change a chair leg, restyle a shoe upper. The reference image lets you grab the design from a competing product or a sketch.
E-commerce edits where the product photo is fine except for one detail. A button needs to be red, a label needs different text, a fabric needs a new pattern. Mask the area, prompt the change, done.
Concept exploration during design reviews. Generate four variants of the same product with different handle shapes, colors, or materials in minutes instead of rebuilding renders.
When to skip it: full background swaps (use a background removal workflow), pose or composition changes (use a full image-to-image pipeline), or stylized art direction that needs cross-image consistency (use a LoRA-based setup).
FAQ
What is Flux 2 Klein? Flux 2 Klein is the lightweight variant of the Flux 2 image generation model. It runs at 9B parameters and is distilled to sample in 4 steps at CFG 1, making it dramatically faster than full Flux 2 while keeping most of the quality. This workflow pairs it with Qwen 3 8B as the text encoder.
What is inpainting? Inpainting is editing a specific region of an image while leaving the rest untouched. You paint a mask over the area you want to change, and the model regenerates only those pixels based on your prompt. The unmasked area passes through unchanged, so the rest of the photo stays pixel-perfect.
How is inpainting different from image-to-image? Standard image-to-image regenerates the entire image at a chosen denoise strength, so even areas you didn't want to touch shift. Inpainting only touches the masked region. For product photo edits where the background and surrounding details need to stay exact, inpainting is the right tool.
Do I need the reference image? No. The workflow runs fine on a prompt alone. The reference image helps when showing what you want is easier than describing it, like copying a specific headlight shape from another motorcycle, or matching a chair design you've seen elsewhere. To disable the reference path, right-click the reference group and select Bypass Group Nodes.
How do you run Flux 2 Klein inpainting online? You can run Flux 2 Klein inpainting workflows online through Floyo. No installation, no setup. Open the workflow in your browser, upload your source image, paint your mask, and hit run. Free to try.
Read more
_1786516256661.png?width=400&height=300&quality=80&resize=cover)