Panorama to Panorama Depth and Normal Map
Upload a 360 panorama and get a full panoramic depth map using Apple's SHARP model. Multi-view estimation, stitched back into equirectangular format. Hit run.
3d
apple
concept art
depth estimation
depth map
panorama
sharp
vfx
1
5

Nodes & Models
LoadSharpModel
SamplePanorama
SharpPredictDepth
ProjectDepthToPanorama
LoadSharpModel
LoadSharpModel
SamplePanorama
SharpPredictDepth
ProjectDepthToPanorama
LoadImage
PreviewImage
ABOUT THE WORKFLOW
Get a Depth Map from a 360 Panorama
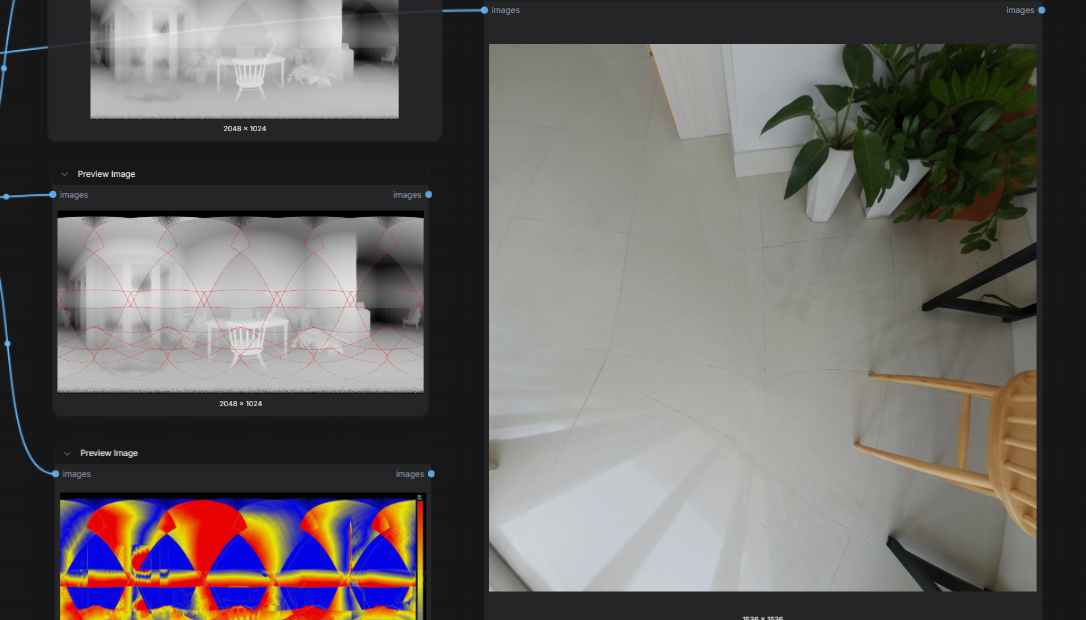
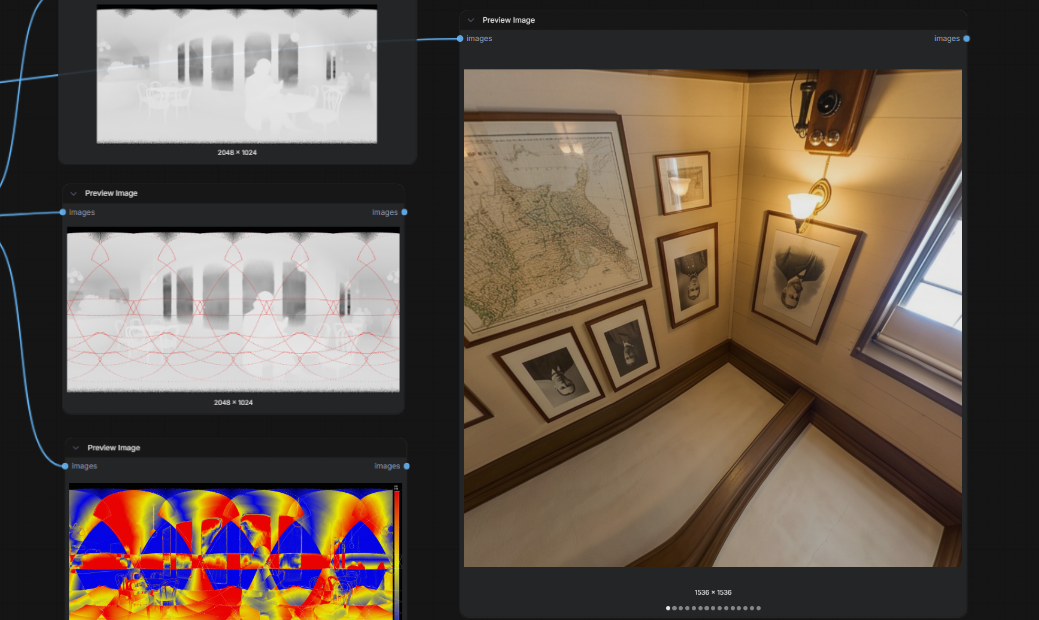
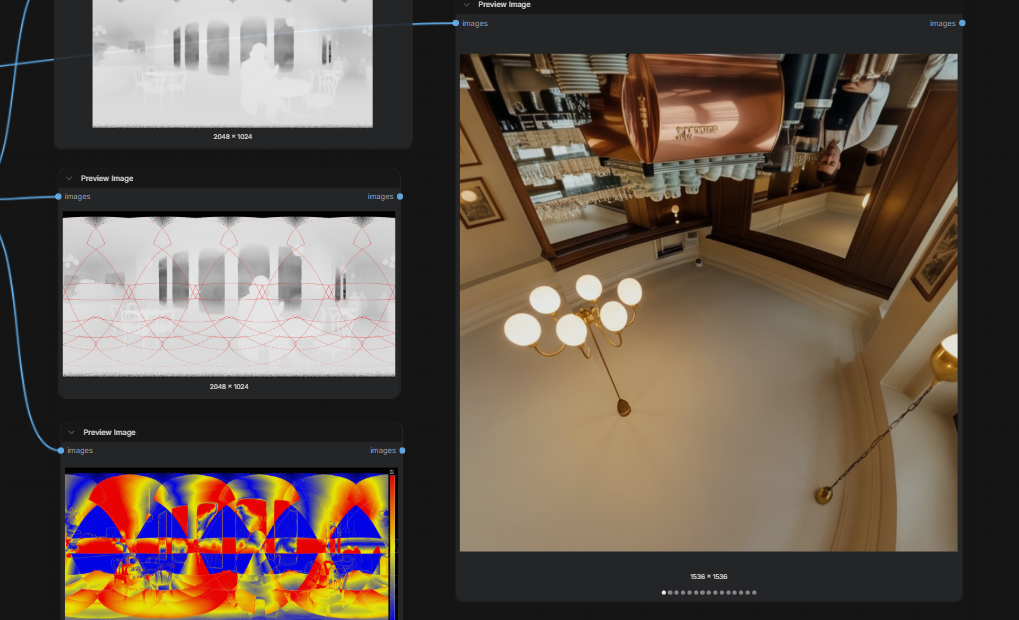
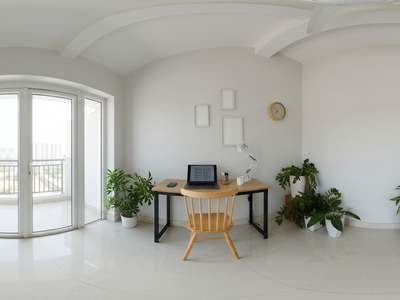
Upload an equirectangular panorama. The workflow splits it into overlapping perspective views, runs depth estimation on each one, and stitches the results into a single panoramic depth map. You also get a debug overlay and a disagreement heatmap so you can see where the depth predictions agree and where they diverge.
Model
SHARP by Apple. A monocular depth estimation model that predicts metric depth from a single image in a single feedforward pass. Strong at preserving fine edges and accurate real-world scale.
HOW IT WORKS
Step 1. Upload your panorama
A standard equirectangular (2:1) panorama image. Phone panoramas, rendered environments, and captured 360 photos all work.
Works great with: landscapes · interiors · architectural shots · street scenes
Step 2. Hit run
The workflow handles everything from here. It samples your panorama into perspective views, runs SHARP depth estimation on each one, and projects the results back into a panoramic depth map.
Step 3. Download your outputs
You get three outputs: the panoramic depth map, a debug overlay showing how the perspective views were sampled, and a disagreement heatmap highlighting where depth predictions conflict.
Ready for: Unity · Unreal · Blender · Nuke · TouchDesigner
First time? Leave every setting as-is. The defaults (90° FOV, 20% overlap, 2048px output) are the right starting point for almost everyone.
RECOMMENDED SETTINGS
Quick-start guide. Find the goal that matches yours and copy the settings.
Standard depth map (most people) — FOV 90° · overlap 20% · output size 1536 · panorama width 2048 · gaussian blend. The right starting point for almost everyone.
Higher resolution depth map — Raise panorama width above 2048 for larger output depth maps. Pair with a higher output size for the perspective views if you need sharper detail per tile.
Faster preview run — Lower the output size to reduce per-tile processing. You get a coarser depth map but the result comes back faster.
Reducing seam artifacts in the depth map — Increase the overlap percent above 20% so adjacent tiles share more of the scene. The gaussian blend smooths transitions, but more overlap gives it better data to work with.
Checking depth quality before using the map — Look at the disagreement heatmap output. Hot spots mean the model predicted different depths from different views at that location. If a region is noisy, the geometry there may be unreliable.
Poles look wrong — Skip poles is on by default, which avoids sampling the heavily distorted top and bottom of the panorama. Leave it on unless your scene has important geometry directly overhead or underfoot.
Note: This workflow has no text prompt. The only input is your panorama image. Quality depends on the panorama itself: well-lit, sharp, evenly exposed images produce the cleanest depth maps.
LEARN
📹 Videos
ComfyUI 101 Free Course ft. Sebastian Kamph
Floyo 101 for Team Collaboration
✨ Quick links
USE CASES
🎮 Game Developers
Generate depth maps from 360 environment captures and drop them into your engine for depth-based fog, occlusion, or parallax effects without manual modelling.
🎨 3D Artists & Compositors
Extract depth from a panoramic plate for relighting, depth-of-field, or compositing 3D elements into a real scene with accurate occlusion.
🥽 VR & Spatial Computing
Turn a flat 360 photo into a depth-aware scene for 6DoF viewing, where head movement reveals parallax instead of a static sphere.
🏗️ Architecture & Real Estate
Pull depth from interior or exterior panoramas to generate floor plan estimates, spatial measurements, or 3D walkthroughs from a single capture.
🎬 VFX & Post-Production
Use the panoramic depth map as a matte or pass in Nuke or After Effects for depth-based grading, fog insertion, or Z-depth compositing.
WHAT WORKS BEST / WHAT TO AVOID
✅ Works great
Well-lit outdoor panoramas with clear depth variation
Interior rooms with distinct walls, floors, and furniture
Street-level urban captures
Evenly exposed equirectangular images
⚠️ May produce softer results
Extremely low-light or noisy panoramas
Scenes with large reflective or transparent surfaces
Heavy lens flare or stitching artifacts in the source panorama
Flat scenes with minimal depth variation (open sky, empty walls)
FAQ
What is SHARP and how does it estimate depth?
SHARP is Apple's monocular depth estimation model. It uses a transformer-based encoder to predict metric depth from a single RGB image in one feedforward pass. "Metric" means the depth values represent real-world scale, not relative brightness. This workflow runs SHARP on multiple perspective views sampled from your panorama, then stitches the depth maps back together.
Why does this workflow split the panorama into perspective views first?
Equirectangular panoramas have heavy distortion, especially near the poles. Depth models trained on standard photos struggle with that warping. By sampling the panorama into flat perspective tiles with overlap, each tile looks like a normal photo the model can process accurately. The results are then projected back into panoramic format with blending to smooth the transitions.
What is the disagreement heatmap output?
It shows where the depth predictions from overlapping tiles disagree with each other. Cool areas mean the model predicted consistent depth from multiple viewpoints. Hot areas mean the predictions diverged, which flags geometry that may be less reliable. Use it as a quality check before relying on the depth map for precision work.
Can I use this depth map in Unity, Unreal, or Blender?
Yes. The output is a standard equirectangular image. In Unity, use it as a depth texture for post-processing or skybox parallax. In Unreal, apply it in a material or depth-based shader. In Blender, load it as a texture in the Compositor or Shader Editor. No conversion step needed.
What resolution panorama should I upload?
The workflow samples perspective tiles at 1536px by default. Your source panorama should be at least 4096px wide for clean tiles at 90° FOV. Larger panoramas (8K or above) give sharper per-tile results but take longer to process.
Is the SHARP model open source?
The code is open source via Apple's GitHub. The model weights are released under Apple's Machine Learning Research License, which is limited to research and non-commercial use. On this platform, the model is pre-loaded and ready to run with no setup on your end.
How to run SHARP panorama depth estimation online?
You can run SHARP panorama depth estimation online through Floyo. No installation, no setup, no API key to wire up. Open the workflow in your browser, upload your panorama, and hit run. Free to try.
WHY FLOYO?
Floyo is the only platform with team collaboration for ComfyUI in the browser. You run workflows with no install. You share run history, assets, and models across your team. You pay only when you generate. Floyo supports open-source and closed-source models.
A designer runs an edit and likes the result. A teammate opens that exact run from shared history and keeps going. No file handoffs. No version confusion.
For studios and enterprise teams, Floyo adds private workspaces, pooled resources, and a team usage dashboard. Other ComfyUI cloud tools run for one person at a time. Floyo runs for the whole team, with transparent per-generation costs.
Ready to try it?
Upload a 360 panorama and get a depth map back. No prompt, no settings to configure.
Questions? Watch the free course or check the FAQ above.
Read more

_1783028563354.gif?width=400&height=300&quality=80&resize=cover)