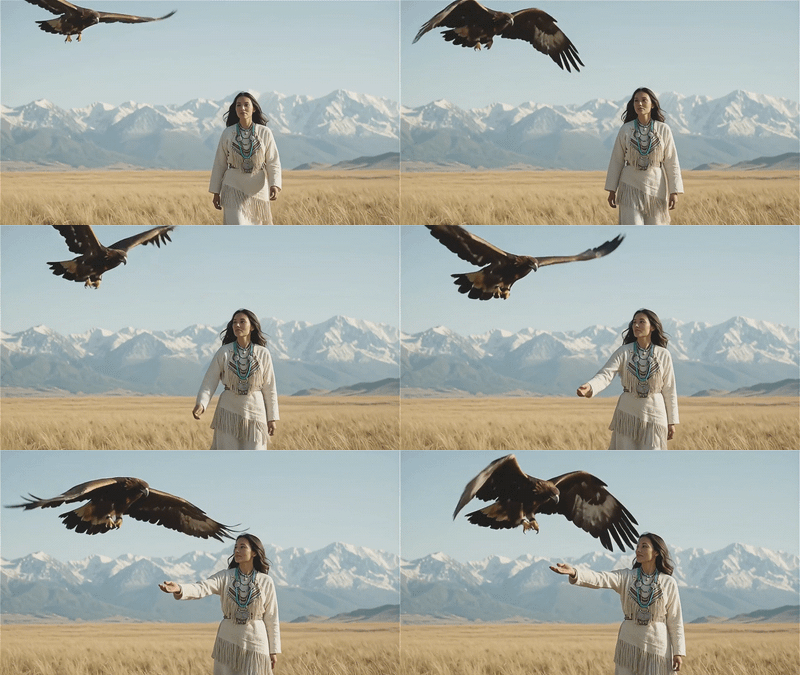
LTX 2.3 + Rogala for Prompt Relay and Overlay Txt
Turn a photo into a multi-scene video with synced audio and burnt-in text using LTX 2.3 and Prompt Relay. Upload an image, script your beats, hit run.
Audio
concept art
image to video
prompt relay
rogala
text overlay
vfx
Video
video generation
487

Nodes & Models
LoadImage
PrimitiveFloat
VAELoader
LTX23_video_vae_bf16.safetensors
DualCLIPLoader
gemma_3_12B_it.safetensors
ltx-2.3_text_projection_bf16.safetensors
LatentUpscaleModelLoader
ltx-2.3-spatial-upscaler-x2-1.1.safetensors
UNETLoader
ltx-2.3-22b-distilled_transformer_only_fp8_input_scaled_v3.safetensors
PromptRelayEncode
VAELoaderKJ
LTX23_audio_vae_bf16.safetensors
CLIPTextEncode
LoraLoaderModelOnly
LTX2.3_Crisp_Enhance-ltx-2-3-fmlf-morph-ima-z2QYkYAL.safetensors
Ltx2.3-Licon-VBVR-I2V-390K-R32-ltx-2-3-fmlf-morph-ima-z2QYkYAL.safetensors
LTXVAudioVAEDecode
LTXVTiledVAEDecode
VHS_VideoCombine
ABOUT THE WORKFLOW
Script a Multi-Scene Video from One Image Upload a starting image, write a global prompt for the scene, then describe what changes at each beat using pipe-separated segments. The model generates a smooth video that transitions through each stage with synced audio. A text overlay burns your copy onto the frames before export.
Model
LTX 2.3 (22B, distilled) by Lightricks. An open-source video model that generates video with synced audio in one pass. Upscaled to 1080p with a spatial upscaler.
Crisp Enhance LoRA for sharper detail. Licon I2V LoRA for better image-to-video consistency.
HOW IT WORKS
Step 1. Upload your image The starting frame for your video. Any photo, render, or screenshot works. Works great with: product shots · landscapes · portraits · food photography

Step 2. Write your global prompt Describe the overall scene, framing, lighting, and camera style. This anchors the entire video. Example: "A cinematic close-up shot of tacos on a white surface, warm golden studio lighting, shallow depth of field, professional food photography."
Step 3. Write your beat descriptions Describe what happens at each stage, separated by a pipe ( | ). Each segment gets its own slice of the timeline. Example: "The camera holds still on the subject | The camera slowly dollies right | The camera pushes in for a macro shot | The camera rises overhead for a top-down view."


Step 4. Add your text overlay (optional) Type the text you want burnt into the video. Set the position (top/bottom, left/right), font size, and colors. Leave it empty if you want clean video with no text.
Step 5. Hit run and download The workflow generates video with synced audio, applies your text overlay, and exports an MP4. Ready for: Premiere Pro · DaVinci Resolve · After Effects · social media
First time? Leave every setting as-is. The defaults (1080x1920 portrait · 5 seconds · 24 fps) are the right starting point for almost everyone.
RECOMMENDED SETTINGS
Quick-start guide. Find the goal that matches yours and copy the settings.
Standard use (most people) — 1080x1920 · 5 seconds · 24 fps · random seed. The right starting point for almost everyone.
Quick test before committing — Keep the default resolution but shorten the duration. Faster turnaround for prompt iteration.
Longer clip with more beats — Increase duration and add more pipe-separated segments. More segments means more distinct actions in the timeline.
Reproduce a result you liked — Lock the seed to the number from your previous run. Same seed, same prompt, same output.
Landscape orientation — Change the resolution to a landscape ratio. The model supports both portrait and landscape natively.
Text overlay not needed — Leave the text field empty. The overlay node passes frames through untouched when there is no text.
Text is hard to read — Increase font size, raise background opacity, or switch text color to contrast with your scene. White text on a dark background reads best.
Prompt: The global prompt sets the look and feel of the whole video. Keep it focused on the scene, lighting, and camera style. Beat descriptions (local prompts) handle the action. Separate each beat with a pipe ( | ). "The camera holds still, sharp detail on textures | The camera dollies right past the subject" is clearer than cramming everything into one block.
LEARN
📹 Videos
ComfyUI 101 Free Course ft. Sebastian Kamph
Floyo 101 for Team Collaboration
✨ Quick links
USE CASES
🎬 Short-Form Content Creators Script a multi-beat product reveal or recipe walkthrough from a single photo. The text overlay adds ingredient lists, captions, or titles without a separate editing step.
🛍️ Product & E-Commerce Teams Turn a product photo into a cinematic showcase video with camera moves that highlight different angles and details. Add product names or price text right in the workflow.
🎨 Concept Artists & Storyboarders Animate a still concept frame through multiple camera angles and scene transitions to pitch a sequence or mood before committing to a full production.
📱 Social Media & Marketing Generate vertical video with burnt-in text for Instagram Reels, TikTok, or YouTube Shorts. One run produces a ready-to-post clip with captions baked in.
🍔 Food & Lifestyle Photography Animate a hero shot with cinematic camera moves, add recipe steps or ingredient lists as overlay text, and export a ready-to-use video in seconds.
WHAT WORKS BEST / WHAT TO AVOID
✅ Works great
Clear, well-lit starting images with a single defined scene
3 to 6 beats with distinct camera or action changes per beat
Short, specific beat descriptions focused on one motion each
High-contrast text overlay on scenes with consistent lighting
⚠️ May produce softer results
Low-light or heavily composited source images
Too many beats crammed into a short duration
Vague beat descriptions like "things change" with no specific motion
Small font sizes on busy, high-detail backgrounds
FAQ
What is Prompt Relay and how does it work with LTX 2.3? Prompt Relay is a training-free technique that assigns different text prompts to different time segments of a video. You write a global prompt for the overall look and pipe-separated beat descriptions for what changes at each stage. The model transitions smoothly between beats without any fine-tuning or extra training.
How many beats should I use in my local prompts? Three to six beats work best for a 5-second clip. Each beat gets an equal share of the timeline by default. Fewer beats give each segment more time to develop. More beats create faster transitions but risk blending between actions. Start with three and add more once you see how the pacing reads.
Does LTX 2.3 generate audio with the video? Yes. LTX 2.3 generates synchronized audio alongside the video in a single pass. The audio matches the on-screen motion, so camera moves, ambient sound, and scene changes stay in sync. The exported MP4 includes both the video and the audio track.
Can I use this workflow without the text overlay? Yes. Leave the text field empty and the overlay node passes frames through unchanged. You get a clean video with no burnt-in text. The text overlay is an optional post-generation step, not part of the model's output.
What resolution and aspect ratio does this workflow output? The default output is 1080x1920 portrait (9:16), upscaled from the base generation using a spatial upscaler. LTX 2.3 supports native portrait generation, so vertical compositions are framed correctly rather than cropped from landscape. You can change the resolution to landscape or square if your project needs it.
Is the output from LTX 2.3 licensed for commercial use? LTX 2.3 is released under the Apache 2.0 license, which permits commercial use without restriction for companies under $10 million in annual revenue. Larger deployments require a separate license from Lightricks. Review the current terms on the official repository for the most up-to-date information.
How to run LTX 2.3 Prompt Relay online? You can run LTX 2.3 Prompt Relay online through Floyo. No installation, no setup, no API key to wire up. Open the workflow in your browser, upload your inputs, and hit run. Free to try.
WHY FLOYO?
Floyo is the only platform with team collaboration for ComfyUI in the browser. You run workflows with no install. You share run history, assets, and models across your team. You pay only when you generate. Floyo supports open-source and closed-source models.
A designer runs an edit and likes the result. A teammate opens that exact run from shared history and keeps going. No file handoffs. No version confusion.
For studios and enterprise teams, Floyo adds private workspaces, pooled resources, and a team usage dashboard. Other ComfyUI cloud tools run for one person at a time. Floyo runs for the whole team, with transparent per-generation costs.
Ready to try it? Upload a photo, script your beats, and run it. The settings are already set.
Questions? Watch the free course or check the FAQ above.
Read more
%20(3)_1774349172672.webp?width=400&height=300&quality=80&resize=contain&format=origin)