

There are many possible paths to get from a character idea to consistent and controllable character renders because everyone has different ways of thinking and working, unique starting assets and output requirements.
So here's a curated selection of several ways to get from A to B, designed to be as flexible as the creative process.
Character design
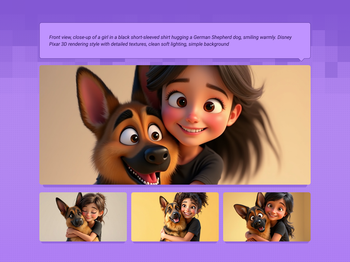
Start with a written description, a sketch or an existing image for starters. Add in a face of someone if there's a particular person you have in mind.

Text2Image + Prompt Enhancer LLM for Flux
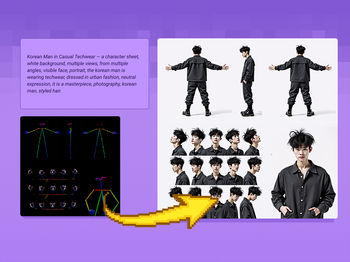
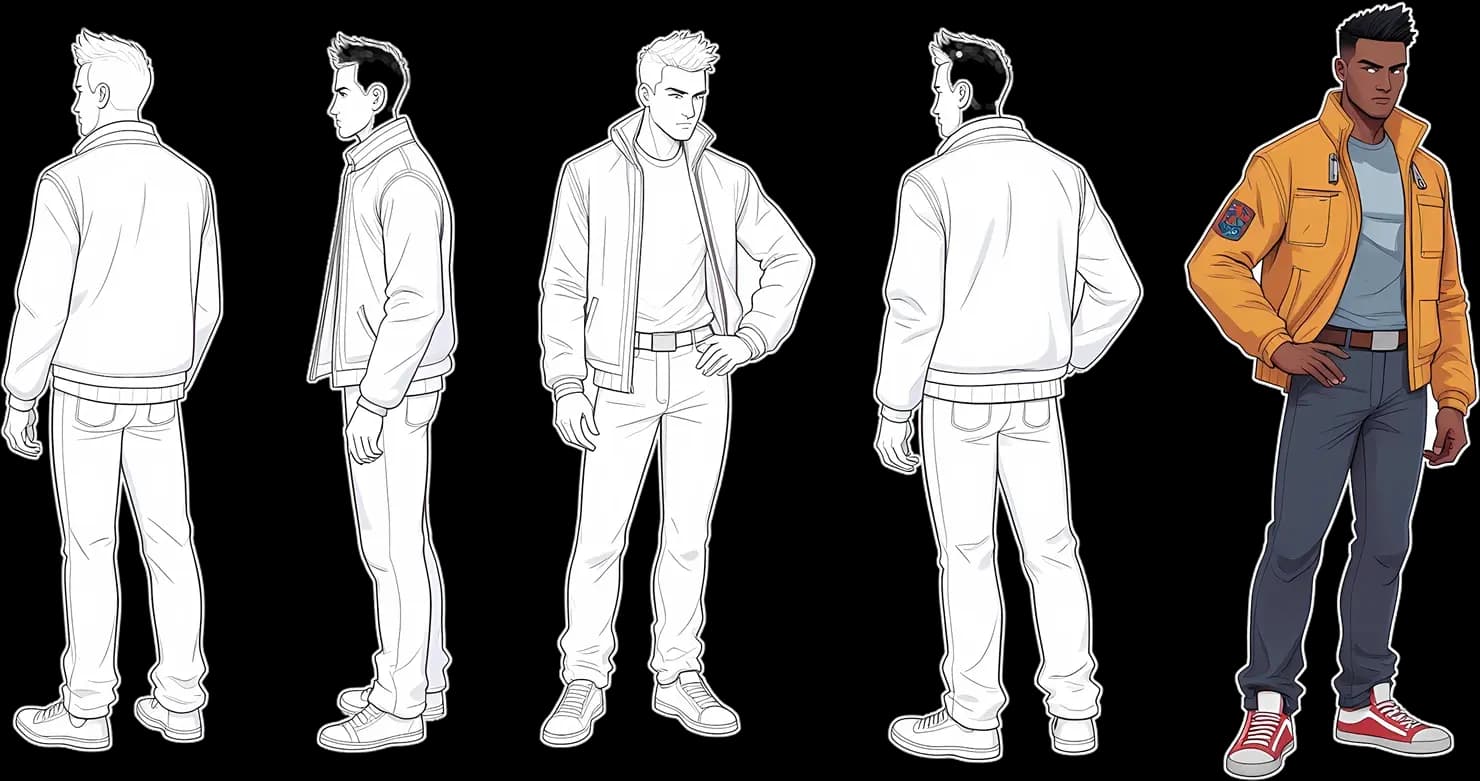
Flux Text to Character Sheet
Flux Kontext - Sketch to Image
Flux Kontext - Quick & Easy
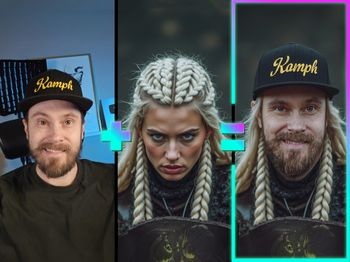
SMART FACE SWAPPER - Ace++ Flux Face swap
Image to Character Spin
Image to Character Sheet with Kontext
Training Set Creation & LoRA Training
In general, the more robust the variety of inputs, the more flexible and controllable the outputs will be while retaining the true essence of what the character is and isn't. Don't worry if there's minor inconsistencies in the input images, this is why we're creating a model in the first place!
Check out this step-by-step LoRA Training guide and downloadable workflows.
Character Consistency - 1 image only. Flux Ace++
Flux Kontext - Single Image to Character LoRA
Fast LoRA Training for Flux via Floyo API
ComfyUI Flux LoRA Trainer
Image Creation & Manipulation

Text to Image + LoRA model
Text to Image with Multi-LoRA
Flux Inpaint - ULTIMATE workflow.
Flux ControlNet 2.0 - All-in-one
Flux Kontext Inpainting
Image to 3D with Hunyuan3D w/ Texture Upscale