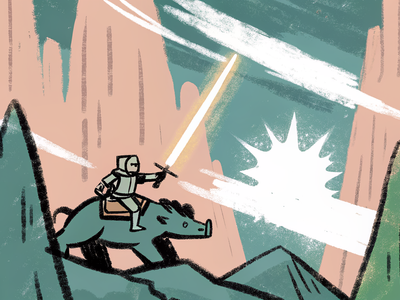
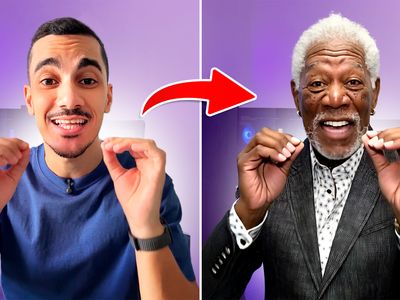
Flux Dev: Text to Image + Image Input
Flux Dev
image to image
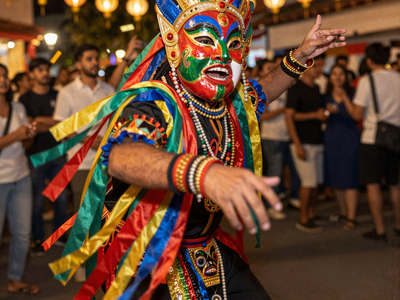
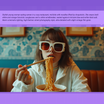
photorealism
text to image
10
1.4k

_1756358901929.png?width=1400&height=620&quality=80&resize=cover)
_1756358907187.png?width=1400&height=620&quality=80&resize=cover)
_1756358919230.png?width=1400&height=620&quality=80&resize=cover)
_1756358919230.png?width=1400&height=620&quality=80&resize=cover)
_1756358901929.png?width=104&height=104&quality=80&resize=cover)
_1756358907187.png?width=104&height=104&quality=80&resize=cover)
_1756358919230.png?width=104&height=104&quality=80&resize=cover)
_1756358919230.png?width=104&height=104&quality=80&resize=cover)
HOW IT WORKS
Step 1. Write your prompt Describe the image you want. Flux Dev is known for strong prompt following and photorealism, so detail in your description pays off. Works great with: photorealistic scenes · detailed objects · concept art · product shots
Step 2. Add a starting image (optional) Load an image and the workflow switches to image-to-image, transforming it toward your prompt. Leave it out to generate from scratch.
Step 3. Hit run and download You get back a 1024px image. In image-to-image mode, the default keeps some of your original while reworking the rest toward the prompt. Ready for: Photoshop · Figma · Canva · any editor
First time? Leave every setting as-is. The defaults (1024 x 1024 · 20 steps · guidance 2.5 · text-to-image) are the right starting point for almost everyone.
RECOMMENDED SETTINGS
Quick-start guide. Find the goal that matches yours and copy the settings.
Standard generation (most people) Start here — 1024 x 1024 · 20 steps · guidance 2.5. The right starting point for almost everyone.
Transform a starting image — Load one to switch to image-to-image. The default denoise of 0.7 reworks most of the image while keeping the rough composition.
Stay closer to your starting image — Lower the denoise toward 0.4 to 0.5. Less changes, and more of the original carries through.
Change more of the starting image — Raise the denoise toward 0.8 to 0.9. The prompt takes over and less of the original remains.
The prompt is not being followed closely — Raise the guidance toward 3.5 to 4. Higher sticks closer to your text, though too high can look over-baked.
Want a softer, more natural look — Lower the guidance toward 2 for a gentler result.
Reproduce a result you liked — Lock the seed to the number that produced it.
Prompt: Write detailed, natural descriptions. Flux Dev handles long prompts well thanks to its T5 text encoder, so name the subject, the lighting, and the style in full rather than using short keyword lists.
USE CASES
🎨 Photorealism & Art Make detailed, realistic images and a wide range of styles from a text prompt alone.
🖼️ Image-to-Image Transform a sketch, photo, or render toward a new look while keeping the layout you started from.
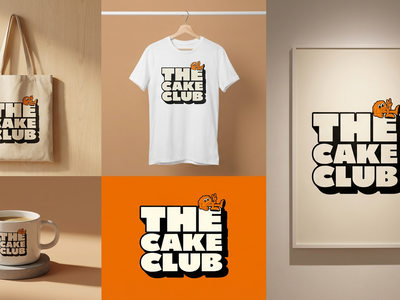
🛍️ Concept & Product Generate product shots, concept art, and design references with strong detail and clean composition.
🔧 LoRA-ready Base Flux Dev has a large ecosystem of LoRAs and tools, so it is a flexible base to build a style on.
WHAT WORKS BEST / WHAT TO AVOID
✅ Works great
Detailed, natural-language prompts
Photorealistic and stylized scenes
Image-to-image from a clear starting image
Prompts with lighting and composition
⚠️ May produce softer results
Short or vague prompts
Dense in-image text, which is not its strength
Denoise set too high for a faithful edit
Guidance pushed too high
NEW TO COMFYUI?
Start with the free ComfyUI for Beginners Course on Floyo. Sixteen short videos take you from zero to running your own AI workflows. No setup headaches, no jargon, clear hands-on lessons. Watch the course, then run any workflow here in your browser.
👉 Watch the free ComfyUI for Beginners Course →
FAQ
What is Flux Dev? Flux Dev, or FLUX.1 [dev], is an open-weight text-to-image model from Black Forest Labs, first released in August 2024. It is a 12-billion parameter rectified flow transformer known for strong prompt following and high-quality, photorealistic output, with quality the developers place second only to their FLUX.1 [pro] model.
What does the optional image input do? It switches the workflow from text-to-image to image-to-image. When you load a starting image, the model reworks it toward your prompt instead of generating from a blank canvas. The denoise value controls how much changes: lower keeps more of the original, higher lets the prompt take over.
What settings should I use for Flux Dev? Use 1024 x 1024 resolution, 20 steps, and a guidance of 2.5, with the euler sampler and simple scheduler. For image-to-image, a denoise around 0.7 is a balanced starting point. Raise the guidance for tighter prompt adherence, and adjust the denoise to control how much of a starting image you keep.
Does Flux Dev render text well? It handles short text reasonably, but text rendering is not its main strength. For images that depend on accurate, legible typography, like posters or logos, a dedicated text-rendering model such as Seedream 4.5 will give cleaner results.
How is Flux Dev different from Flux Schnell and Flux Pro? Flux Schnell is the fast, distilled version under a permissive Apache 2.0 license. Flux Dev is the higher-quality open-weight model under a non-commercial license. Flux Pro is the top-tier model, available through an API rather than as open weights. Dev is the usual choice when you want strong quality and an open model to run yourself.
Can I use the results commercially? Be careful here. Flux Dev is released under the FLUX.1 [dev] Non-Commercial License, which covers the model itself. Black Forest Labs states that generated outputs may be used for personal, scientific, and commercial purposes as described in that license, but commercial use of the model, such as in a product or service, requires a separate commercial license from Black Forest Labs. Review the license and the self-serve options at bfl.ai/licensing before using it commercially.
How to run Flux Dev online? You can run Flux Dev online through Floyo. No installation, no setup, no GPU to rent. Open the workflow in your browser, write a prompt, add a starting image if you want, and hit run. Free to try.
WHY FLOYO?
Floyo is the only platform with team collaboration for ComfyUI in the browser. You run workflows with no install. You share run history, assets, and models across your team. You pay only when you generate. Floyo supports open-source and closed-source models.
A designer runs a prompt and likes the result. A teammate opens that exact run from shared history and keeps going. No file handoffs. No version confusion.
For studios and enterprise teams, Floyo adds private workspaces, pooled resources, and a team usage dashboard. Other ComfyUI cloud tools run for one person at a time. Floyo runs for the whole team, with transparent per-generation costs.
Ready to try it? Type your first prompt and run it, or add a starting image to transform. The settings are already set.
Questions? Watch the free course or check the FAQ above.
Read more
_1775699601810.png?width=400&height=300&quality=80&resize=cover)