Qwen Image Edit 2511 · Camera Angle Control
Set a precise camera angle with yaw, pitch, and distance using Qwen Image Edit 2511 and the Multi-Angle LoRA. Upload an image, dial in the view, hit run.
Image
Image2Image
Image Edit
LoRAs
Qwen Image Edit 2511
1.6k



Nodes & Models
QwenMultiangleCameraNode
CLIPLoader
qwen_2.5_vl_7b_fp8_scaled.safetensors
VAELoader
qwen_image_vae.safetensors
UNETLoader
qwen_image_edit_2511_bf16.safetensors
LoadImage
LoraLoaderModelOnly
Qwen-Image-Edit-2511-Lightning-4steps-V1.0-bf16.safetensors
qwen-image-edit-2511-multiple-angles-lora.safetensors
ModelSamplingAuraFlow
CFGNorm
VAEDecode
KSampler
TextEncodeQwenImageEditPlus
PreviewImage
easy promptList
TextEncodeQwenImageEditPlusPro_lrzjason
ABOUT THE WORKFLOW
Set the Camera Angle With Numbers Upload an image and set the target angle using yaw, pitch, and distance controls. Four camera nodes define the from and to positions. The model re-renders the subject from the new view in four passes. No text prompt required for the angle, but you can add one to guide the result.
Model
Qwen Image Edit 2511 by the Qwen team at Alibaba. Released December 2025. The newer iteration of the Qwen Image Edit family with improved multi-image consistency and identity preservation over the 2509 release. 20 billion parameter MMDiT with a Qwen 2.5 VL 7B encoder. Apache 2.0.
Multi-Angle LoRA (2511 version). A community adapter trained for the 2511 model that maps yaw, pitch, and distance inputs to camera angle transformations.
Lightning 4-step LoRA. A speed adapter that compresses sampling to four passes.
HOW IT WORKS
Step 1. Upload your image The subject you want to see from a different angle. Works great with: products · characters · vehicles · furniture · portraits
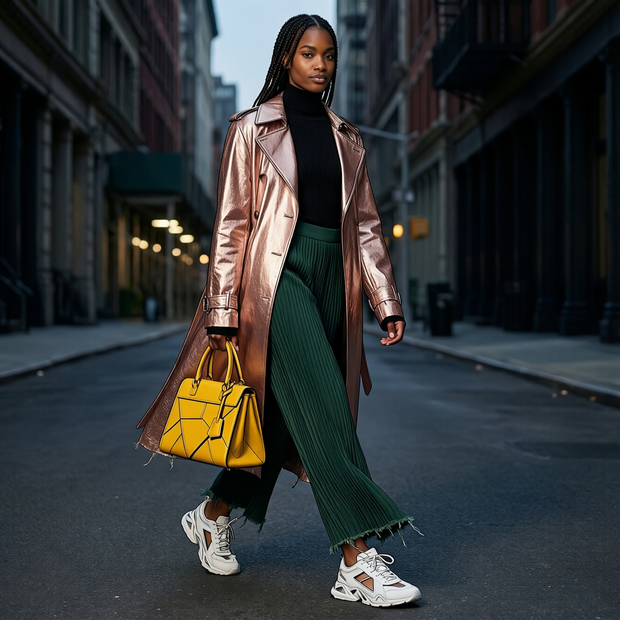
Step 2. Set the "From" angle The first camera node pair defines where the camera sits now. The defaults (yaw 0, pitch 0, distance 8) mean front-on at medium distance.
Step 3. Set the "To" angle The second camera node pair defines where you want the camera to move. Set yaw for left-right rotation, pitch for up-down tilt, and distance for how close the camera sits.
Step 4. Hit run and download The four camera nodes combine into a prompt, the model re-renders the subject from the new view in four passes, and the result appears in the preview. Right-click the preview to save. Ready for: Photoshop · Figma · Canva · any editor
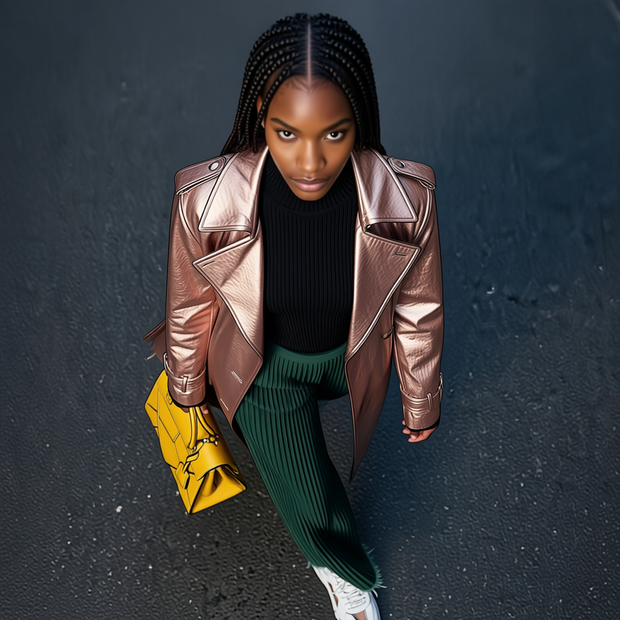
First time? Leave every setting as-is. The defaults (yaw 0→0 · pitch 0→60 · distance 8 · 4 steps · random seed) give you a bird's-eye view looking down at the subject.
RECOMMENDED SETTINGS
Quick-start guide. Find the goal that matches yours and copy the settings.
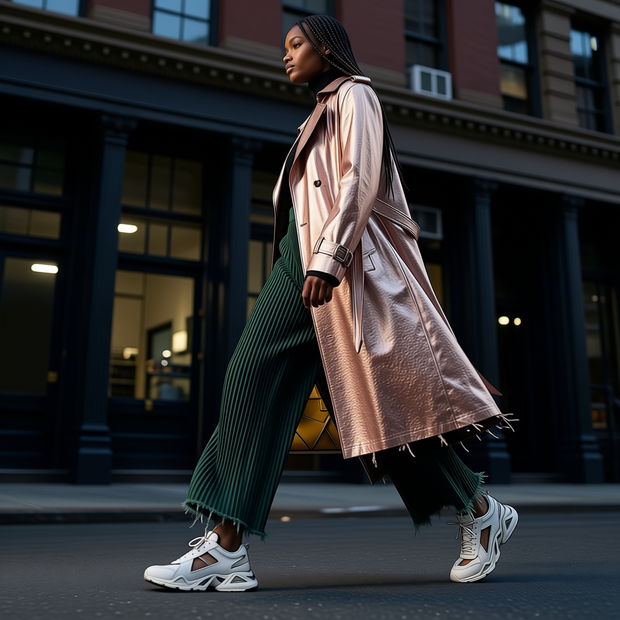
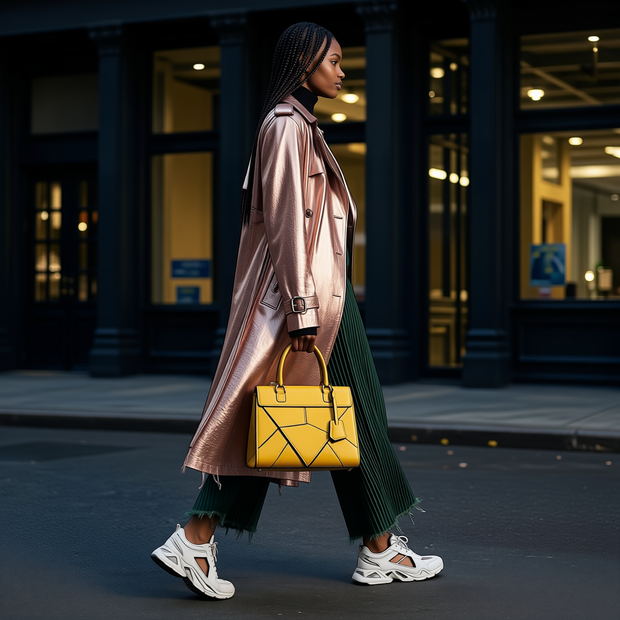
Bird's-eye view (default) — From: yaw 0, pitch 0. To: yaw 0, pitch 60. The default gives you a top-down view of the subject.
Side profile — Set the To yaw to 90 (or -90 for the other side). Keep pitch at 0 and distance at 8.
Three-quarter view — Set the To yaw to 45 and pitch to 15. A common portrait angle.
Back of the subject — Set the To yaw to 180. The model invents the unseen side, so detail will be softer than on angles closer to the front.
Closer or further — Lower the distance number to zoom in, raise it to pull back.
The result does not match the angle — Check that the From values match where the camera sits in your source image, not where you assume it is. If the source is already a three-quarter shot, set From yaw to 45 rather than 0.
Want a different take — Change the seed number. The default runs on random.
Want to add a text instruction on top — The prompt field is empty by default. The camera nodes generate the angle text automatically. Adding a text prompt steers both angle and content.
Angle reference: Yaw 0 is front, 90 is the right side, -90 is the left side, 180 is the back. Pitch 0 is eye level, positive looks down, negative looks up. Distance is unitless but defaults to 8.
LEARN
📹 Videos
ComfyUI 101 Free Course ft. Sebastian Kamph
Floyo 101 for Team Collaboration
✨ Quick links
USE CASES
🛍️ Product Multi-View Generate alternate angles of a product from a single photo using exact yaw and pitch values for catalogue consistency.
📐 Technical Turnarounds Produce a turnaround sheet with numerically precise angles rather than relying on text descriptions.
🎬 Previz Camera Planning Test how a subject looks from a planned camera position by dialling in the exact numbers before committing to the shot.
🎨 Character Sheet Generation Render a character from front, side, three-quarter, and back by setting each view's yaw and pitch.
WHAT WORKS BEST / WHAT TO AVOID
✅ Works great
Clear, well-lit subjects against clean backgrounds
Moderate angle shifts (front to three-quarter, eye level to bird's eye)
Products and objects with visible geometry
Setting the From angle to match the actual camera position in the source image
⚠️ May produce softer results
Full 180-degree turns where the model must invent the unseen side
From angles that do not match the actual source image perspective
Subjects with heavy occlusion or complex transparency
Extreme close-up distances combined with large angle shifts
FAQ
What is the difference between this and the Qwen Image Edit 2509 camera angle workflow? Both re-render a subject from a new view. The 2509 workflow uses text descriptions like "turn the camera to a close-up view" and runs on the September model. This workflow uses the December 2511 model with QwenMultiangleCameraNode for precise numeric control: yaw in degrees, pitch in degrees, and distance as a number. Use the 2509 workflow for quick angle changes described in words, and this one when you need exact numeric angles.
How do the four camera nodes work? Two pairs define a From and a To position. Each pair generates an angle description string with yaw, pitch, and distance values. The four strings are combined into a prompt list and fed to the encoder. The model reads the delta between From and To and applies that transformation to the image.
What do the angle numbers mean? Yaw is left-right rotation: 0 is front, 90 is the right side, -90 is the left, 180 is the back. Pitch is up-down tilt: 0 is eye level, positive looks down, negative looks up. Distance is how far the camera sits from the subject, unitless, defaulting to 8.
Why are there two extra camera nodes? The workflow ships with four QwenMultiangleCameraNode instances. Two are wired (the main From and To pair). Two more sit unwired with different angle values. They are there for experimentation: connect them to produce a four-point prompt that interpolates through multiple views.
Is Qwen Image Edit 2511 free for commercial use? Yes. It is released under Apache 2.0, which allows commercial use, modification, fine-tuning, and self-hosted deployment with no revenue threshold and no territory restrictions. The Multi-Angle LoRA is a community adapter with its own terms. Check both before building on them.
Why is there no save step? The workflow outputs to a preview node with no SaveImage node wired after it. Right-click the preview to download. Adding a save node would make downloads automatic.
How to run Qwen Image Edit 2511 camera angle online? You can run Qwen Image Edit 2511 camera angle online through Floyo. No installation, no setup, no model downloads. Open the workflow in your browser, upload an image, set the angle, and hit run. Free to try.
WHY FLOYO?
Floyo is the only platform with team collaboration for ComfyUI in the browser. You run workflows with no install. You share run history, assets, and models across your team. You pay only when you generate. Floyo supports open-source and closed-source models.
A designer runs an edit and likes the result. A teammate opens that exact run from shared history and keeps going. No file handoffs. No version confusion.
For studios and enterprise teams, Floyo adds private workspaces, pooled resources, and a team usage dashboard. Other ComfyUI cloud tools run for one person at a time. Floyo runs for the whole team, with transparent per-generation costs.
Ready to try it? Upload an image, set the yaw and pitch, and run it. The angle controls are already wired.
Questions? Watch the free course or check the FAQ above.
Read more
_1786522681696.png?width=400&height=300&quality=80&resize=cover)