First and Next Scene · Text to Image For AD Film
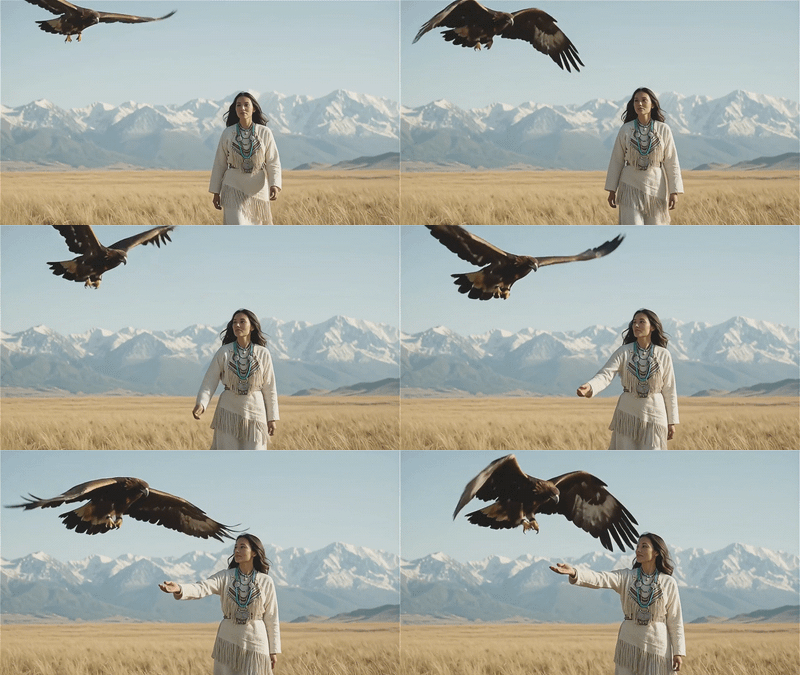
Describe an illustrated AD Film scene and what happens next using Qwen Image and Qwen Image Edit 2509 by Alibaba. Get two style-matched images in one run.
illustrated scene
Image
LoRAs
next scene
qwen image
text to image
144
_1784444920013.png?width=1400&height=620&quality=80&resize=contain)
_1784444920013.png?width=1400&height=620&quality=80&resize=contain)
_1784444920013.png?width=1400&height=620&quality=80&resize=contain)
_1784444920013.png?width=104&height=104&quality=80&resize=cover)
_1784444920013.png?width=104&height=104&quality=80&resize=cover)
_1784444920013.png?width=104&height=104&quality=80&resize=cover)

Nodes & Models
FloyoStickyNote
EmptySD3LatentImage
MarkdownNote
SaveImage
VAELoader
qwen_image_vae.safetensors
CLIPTextEncode
CLIPLoader
qwen_2.5_vl_7b_fp8_scaled.safetensors
UNETLoader
qwen_image_edit_2509_fp8_e4m3fn.safetensors
qwen_image_fp8_e4m3fn.safetensors
TextEncodeQwenImageEditPlus
LoraLoaderModelOnly
Qwen-Image-Edit-2509-Lightning-4steps-V1.0-bf16.safetensors
Qwen-Image-Lightning-4steps-V1.0.safetensors
next-scene_lora_v1-3000-anime-next-scene-text-Ir7bpz3Q.safetensors
realistic_enhanced_details_lora-flux-2-klein-9b-realis-TxUBt7PL.safetensors
Qwen-Image-Edit-2511-Lightning-8steps-V1.0-fp32.safetensors
ModelSamplingAuraFlow
CFGNorm
VAEDecode
KSampler
ConditioningZeroOut
VAEEncode
ImageScaleToTotalPixels
ABOUT THE WORKFLOW
Generate a Scene and Its Next Shot
Describe a AD Film scene and what happens next. The workflow generates both images in one run, keeping the characters and illustration style consistent between them. Stage one creates the first image from your text. Stage two takes that image and continues it into a second shot with matched characters, colors, and style. That's it.
Model
Qwen Image by Alibaba Qwen. Generates the first scene from your text prompt, with an illustration style add-on for colorful, child-friendly visuals.
Qwen Image Edit 2509 by Alibaba Qwen. Takes the first image and continues it into a second shot, with a Next Scene add-on that keeps characters and style matched across both images.
HOW IT WORKS
Step 1. Describe the first scene
Set the character, setting, and mood. "A smiling baby dinosaur standing beside a fossil" or "A curious fox cub discovering a glowing mushroom in a forest." Write it the way you would describe a picture book page.
Step 2. Describe what happens next
Start with "Next Scene:" and say how the camera or action changes. Keep the same characters and style. "Next Scene: Reveal a prehistoric valley filled with friendly dinosaurs. Gentle Brachiosaurus eat leaves, Triceratops families walk peacefully, colorful Pterosaurs fly overhead."
Step 3. Hit run and download
The workflow generates both images in sequence. The first scene comes from your text. The second scene continues from the first image with matched characters and style. Download both.
Ready for: Canva · PowerPoint · book layouts · educational apps · any editor
First time? Leave every setting as-is. The defaults (1280×720 · 4 steps · 1 guidance) are the right starting point for almost everyone.
RECOMMENDED SETTINGS
Quick-start guide. Find the goal that matches yours and copy the settings.
Standard generation (most people) — 1280×720 · 4 steps · 1 guidance · random seed. Two matched images in seconds. The right starting point for almost everyone.
Want higher resolution — Raise width and height. Both images scale together. Larger is sharper but takes longer.
Want the same result again — Set the seed to a fixed number. The same seed, prompts, and settings produce the same pair every time.
Want to explore variations — Leave the seed on random. Each run produces a different interpretation of the same scene description.
The second image does not match the first — Make sure the Next Scene prompt references the same characters and setting. Start it with "Next Scene:" and describe the change in camera or action, not a completely different scene.
Characters look different between shots — Be specific about what stays the same. "Preserve the baby dinosaur exactly while expanding into a wider valley" keeps the model anchored to the first image.
Prompt: Write the first prompt like a picture book page description. Be specific about the character, setting, and mood. For the next scene, start with "Next Scene:" and describe how the shot changes while keeping characters consistent. "Next Scene: Pull back to reveal a wider valley, same dinosaur in the foreground" works better than writing a completely unrelated scene.
LEARN
📹 Videos
ComfyUI 101 Free Course ft. Sebastian Kamph
Floyo 101 for Team Collaboration
✨ Quick links
USE CASES
📚 Children's Book Illustration
Generate consecutive pages of a picture book with consistent characters and art style. Describe a scene and its next beat, and get two matched illustrations per run.
🎓 Educational Content
Create visual pairs for lesson materials: a close-up of a dinosaur, then a wide shot of its habitat. A single cell, then a diagram of the body. Scene-to-scene consistency makes the content read as a sequence, not two unrelated pictures.
🎬 Storyboarding and Sequencing
Lay out shot-to-shot sequences for animated projects, explainer videos, or educational apps. Two matched frames per run, ready to drop into a storyboard template.
🧩 Flashcards and Learning Materials
Generate paired images for flashcard sets, workbook illustrations, or interactive quizzes. One image shows the setup, the next shows the answer or outcome.
WHAT WORKS BEST / WHAT TO AVOID
✅ Works great
Clear character descriptions with specific visual details
Scene-to-scene transitions (close-up to wide, before and after)
Educational subjects: animals, nature, science, history
Prompts written like picture book page descriptions
⚠️ May produce softer results
Completely unrelated scenes between the two prompts
Prompts with no character or setting overlap between shots
Very complex scenes with many small characters
Photorealistic requests (the style add-ons are tuned for illustration)
FAQ
What does "Next Scene" mean in this workflow?
The workflow generates two images in one run. The first image is created from your text prompt. The second image is generated by editing the first, using a Next Scene add-on that continues the action while keeping the characters, color palette, and illustration style consistent. The result is two images that read as consecutive frames in a sequence.
How does the workflow keep characters consistent between shots?
Stage one generates the first image from text using Qwen Image. Stage two feeds that image into Qwen Image Edit 2509 with a Next Scene LoRA trained to preserve character identity, color palette, and style across scene changes. The model uses the first image as a visual anchor for the second.
Can I use this for photorealistic images?
The style add-ons are tuned for colorful, child-friendly illustration. The output looks like a picture book or educational app, not a photograph. For photorealistic results, use a Qwen Image workflow without the illustration style add-ons.
Why are the steps set to 4 and guidance set to 1?
Both stages use a Lightning speed LoRA that is tuned for 4 steps at 1 guidance. Raising these values does not improve quality and may degrade the output. The speed LoRA bakes detail into fewer passes.
Can I generate more than two images in a sequence?
Not in a single run. The workflow produces one pair per run. To build a longer sequence, take the second image from your first run and use it as the starting point for a new Qwen Image Edit workflow, continuing the chain manually.
Is this workflow free to use commercially?
The base models (Qwen Image and Qwen Image Edit 2509) are released under the Apache 2.0 license, which allows commercial use. The style and Next Scene LoRAs are community contributions. Check the LoRA license terms if your use case is commercial.
How to run Kids Edu Next Scene online?
You can run Kids Edu Next Scene online through Floyo. No installation, no setup, no API key to wire up. Open the workflow in your browser, write both scene prompts, and hit run. Free to try.
WHY FLOYO?
Floyo is the only platform with team collaboration for ComfyUI in the browser. You run workflows with no install. You share run history, assets, and models across your team. You pay only when you generate. Floyo supports open-source and closed-source models.
An illustrator generates a scene pair and likes the result. A teammate opens that exact run from shared history and keeps going. No file handoffs. No version confusion.
For studios and enterprise teams, Floyo adds private workspaces, pooled resources, and a team usage dashboard. Other ComfyUI cloud tools run for one person at a time. Floyo runs for the whole team, with transparent per-generation costs.
Ready to try it?
Describe a scene and what happens next, then run it. The settings are already set.
Questions? Watch the free course or check the FAQ above.
Read more


_1786518453053.png?width=400&height=300&quality=80&resize=cover)