MiniMax H3 R2V · Reference to Video
Generate video with synchronized audio from reference images, video, and voice clips using MiniMax H3 Ref2VA, then describe the scene you want in a text prompt and hit run.
R2V
61
ABOUT THE WORKFLOW
Generate video from reference media
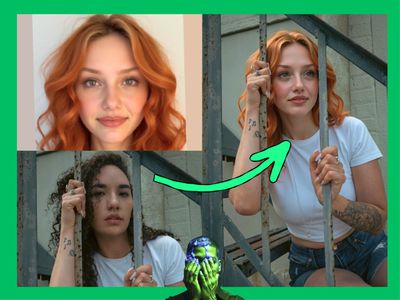
Upload reference images, a video clip, and an audio sample. Describe the scene you want. The workflow returns a video with synchronized stereo audio that preserves the identity, style, and voice from your references. No separate audio tool or lip-sync step needed.
Model
MiniMax H3 Ref2VA by MiniMax. A 33B-parameter omni-modal generation model that jointly understands text, images, video, and audio. Strong at identity preservation, voice matching, and generating coherent video with native 32 kHz stereo audio in a single pass. Open-weight, released under the MiniMax H3 Community License.
HOW IT WORKS
Step 1. Load your reference media
Upload up to 9 reference images, 3 reference videos (with paired audio), and 3 standalone audio clips. Use images for identity and product references. Use video for motion and scene references. Use audio for voice cloning and sound design.
Works great with: portrait photos · product shots · voice samples · short video clips
Step 2. Write your prompt
Describe the scene, the action, and how each reference should be used. Tag references in your prompt with <Picture 1>, <Video 1>, <Audio 1> so the model knows which input maps to which element. Example: “Use <Picture 1> as the character’s face. Use <Audio 1> as the voice. The character walks through a sunlit park and speaks directly to camera.”
Step 3. Set resolution and duration
Choose your output resolution and aspect ratio. The default is 1344x768 at 16:9. For vertical/portrait video, switch to 9:16. Set the duration with the Float (Duration) node. The workflow calculates the correct frame count automatically.
Step 4. Run and export
Hit run. The workflow generates video and audio in a single pass, decodes both, and combines them into an H.264 MP4. Download it or send it to your editor.
Ready for: Premiere Pro · DaVinci Resolve · After Effects · social platforms
First time? Leave every setting as-is. The defaults are the right starting point for almost everyone.
RECOMMENDED SETTINGS
Quick-start guide. Find the goal that matches yours and copy the settings.
Standard reference-to-video at 16:9 — Width 1344, Height 768, Duration 10s, Steps 16. The right starting point for almost everyone.
Want vertical/portrait video for Reels or TikTok? — Change Width to 480, Height to 864, and set the ResolutionSelector to 9:16. Keep megapixels at 0.4 for fast results.
Need higher resolution? — Increase megapixels in the ResolutionSelector. 0.98 MP gives you 1344x768. 2.0 MP gives you 1920x1088. Higher resolution costs more time and VRAM.
Want shorter or longer clips? — Change the Float (Duration) value. The model supports up to ~15 seconds. The frame-count math node handles the conversion automatically.
Video looks too static or stiff? — The hmmotion LoRA is already loaded at strength 1.0. If you still want more movement, try increasing the sigma shift for video (default 12) in the SigmaShift node.
Audio not matching the reference voice closely enough? — Write a more detailed prompt describing the speaker’s tone, accent, and pacing. Keep the reference audio clean, with one speaker, no background music, and no overlapping voices.
Prompt: Be specific about how each reference maps to the output. Tag every reference explicitly with <Picture 1>, <Video 1>, <Audio 1>. A good prompt: “Use <Picture 1> as the woman’s face. She stands at a kitchen counter and speaks to camera in a warm tone, matching <Audio 1>.” A vague prompt: “Make a video with the uploaded files.”
Read more