Meshy 7 · Multi Image to 3D
Build a textured 3D mesh from up to four photos of the same object using Meshy 7, the image-to-3D model from Meshy. Upload your reference shots and hit run.
3d model generation
image to 3d
Meshy7
muti image
93

Nodes & Models
Meshy7MultiImageTo3d_floyo
LoadImage
Preview3D
ShowText|pysssss
ShowText|pysssss
ABOUT THE WORKFLOW
Turn reference photos into a 3D mesh
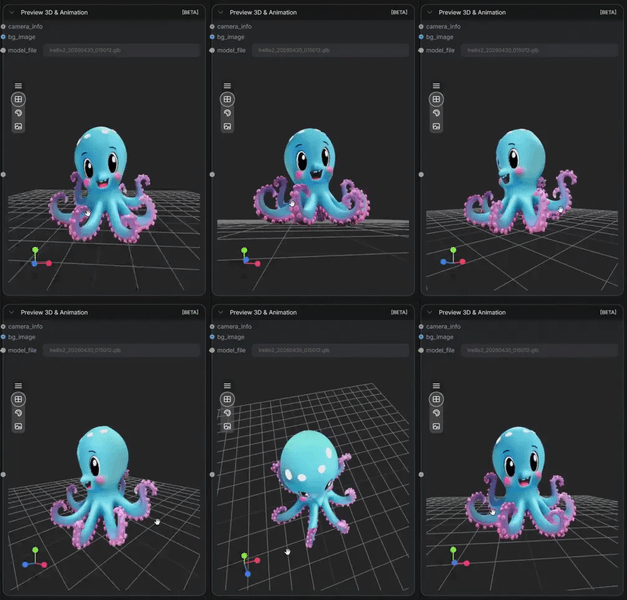
Upload one to four photos of the same object from different angles. Meshy 7 reads all the views together and reconstructs a single consistent 3D mesh with textures on it. The finished model loads in the 3D preview so you can spin it before you download.
Partner node. This workflow calls an external API, so each run uses credits from your API wallet. No API key needed. Floyo handles the connection.
Model
Meshy 7 by Meshy. An image-to-3D model released in August 2026, strong at reconstructing real objects from photographs, product assets, and game props from reference art.
HOW IT WORKS
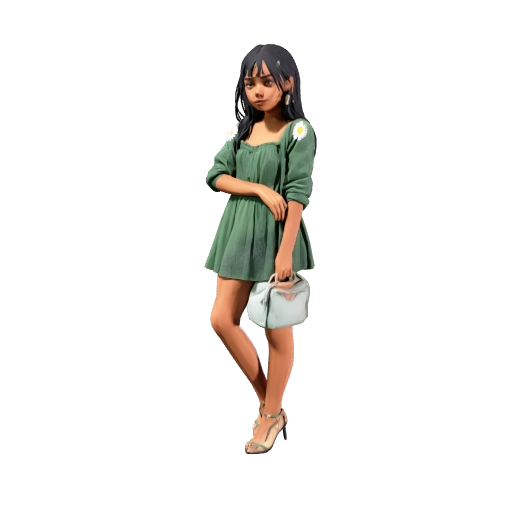
Step 1. Upload your main image
The primary reference photo of the object you want as a 3D model. A clean background and even lighting give the reconstruction the most to work with.
Works great with: products · characters · props · furniture
Step 2. Add more angles (optional)
A second, third, and fourth photo of the same object from different sides. Front, side, and back give the best coverage. Every image must show the same object, or the geometry falls apart. Extra images do not cost extra credits.
Step 3. Describe the surface (optional)
There is a texture prompt field on the node. Use it to spell out materials and surface detail the photos do not make obvious. Example: "cozy green knit sweater with detailed fabric texture, realistic skin texture, glossy hair strands."
Step 4. Hit run and download
The API returns a textured mesh. It loads in the 3D preview node, and the download URL plus the local file path appear in the text displays below it. The default export is GLB.
Ready for: Blender · Unity · Unreal · Maya · 3D printing slicers
First time? Leave every setting as-is. The defaults (triangle topology · 30,000 polys · auto symmetry · texturing on) are the right starting point for almost everyone.
RECOMMENDED SETTINGS
Quick-start guide. Find the goal that matches yours and copy the settings.
Standard reconstruction (most people) — triangle topology · 30,000 polycount · auto symmetry · remesh on · texture on. The right starting point for almost everyone.
Need it for a game engine? — Keep topology on triangle. Unity and Unreal both want triangles, and 30,000 polys sits in a workable range for a hero prop.
Need to sculpt or edit it afterwards? — Switch topology to quad. Quad meshes subdivide and deform cleanly in Blender, Maya, and ZBrush.
Need a lighter or heavier mesh? — Change the target polycount. The range runs from 100 to 300,000. Drop it for mobile and web viewers, raise it when surface detail matters more than file size.
Want richer material response? — Turn on PBR to generate metallic, roughness, and normal maps alongside the base texture. Useful when the asset has to sit under real lighting in a render.
The model comes out lopsided or mirrored wrong — Set symmetry mode to off. Auto detects symmetrical objects and enforces it, which hurts anything genuinely asymmetric.
Thin parts or fine details are missing — Add more angles rather than raising the polycount. Wire, hair, straps, and thin edges are the model's weak spot, and extra coverage helps more than extra geometry.
Prompt: The texture prompt describes surfaces, not shape. Name materials, finishes, and colours the photos leave ambiguous. "Brushed aluminium body, matte black rubber grip, glossy screen" gives the texture pass something to act on. "Make it look good" does not.
LEARN
📹 Videos
ComfyUI 101 Free Course ft. Sebastian Kamph
Floyo 101 for Team Collaboration
✨ Quick links
USE CASES
🎮 Game Asset Creation
Photograph a prop or feed in concept art from a few angles and get a triangle mesh ready to drop into Unity or Unreal.
🛍️ Product Visualisation
Turn existing product photography into a 3D model for a web viewer, an AR try-on, or a配 spin animation, without a scanning rig.
🧍 Character Models
Build a textured character mesh from front, side, and back reference art, then take it into Blender for rigging and animation.
🖨️ 3D Printing
Reconstruct an object from photos and export a mesh you can take into a slicer. Raise the polycount when surface detail has to survive the print.
🏗️ Previs and Set Dressing
Fill a shot with background props built from reference photos, at a polycount light enough to keep the scene responsive.
WHAT WORKS BEST / WHAT TO AVOID
✅ Works great
Photos from clearly different angles: front, side, back
Even lighting with a clean, uncluttered background
Solid opaque objects with readable surfaces
Products, props, furniture, and character references
⚠️ May produce softer results
Transparent or highly reflective objects like glass and chrome
Thin structures such as wire, hair, and fine straps
Precision mechanical parts with tight tolerances
Mixing photos of different objects in one run
FAQ
What is Meshy 7?
Meshy 7 is an image-to-3D model from Meshy, released in August 2026. It takes one to four photos of the same object and conditions on all of them together to produce a single consistent textured mesh. It is a closed-source, API-only model with credit-based pricing, so there are no open weights to download.
How many images does Meshy 7 need?
One image is enough to get a model. Up to four is supported, and more angles produce a more accurate mesh, particularly on the sides and back the single shot never sees. Additional images do not increase the credit cost of a run, so use all four when you have them.
Is this the same as photogrammetry?
No. Photogrammetry needs dozens or hundreds of overlapping photos and solves the geometry from camera positions. Meshy 7 generates the mesh from as few as one image and infers the parts it cannot see. That makes it far faster and far more forgiving about capture conditions, at the cost of being an interpretation of the object rather than a measurement of it.
What file formats can I export the 3D model in?
The default output is GLB. Meshy 7 also supports FBX, OBJ, USDZ, STL, BLEND, 3MF, and DXF, which covers game engines, DCC tools, AR viewers, and 3D printing slicers.
Should I use triangle or quad topology?
Use triangle for anything heading into a game engine, since Unity and Unreal render triangles anyway. Use quad when you plan to sculpt, retopologise, subdivide, or deform the mesh in Blender, Maya, or ZBrush, because quads behave predictably under those operations.
Can I use Meshy 7 models for commercial projects?
Meshy 7 is a proprietary, API-only model, so commercial use is governed by Meshy's terms rather than an open license. Commercial use is generally permitted, but review Meshy's current terms and make sure you hold the rights to every photo you upload.
Why does my model look wrong on one side?
Usually because that side was never photographed. The model infers unseen geometry, and the guess gets weaker the less coverage it has. Add an image from the problem angle and rerun. If the object is asymmetric, also switch symmetry mode off so the reconstruction stops mirroring one side onto the other.
How to run Meshy 7 online?
You can run Meshy 7 online through Floyo. No installation, no setup, no API key to wire up. Open the workflow in your browser, upload your inputs, and hit run. Free to try.
WHY FLOYO?
Floyo is the only platform with team collaboration for ComfyUI in the browser. You run workflows with no install. You share run history, assets, and models across your team. You pay only when you generate. Floyo supports open-source and closed-source models.
A designer runs an edit and likes the result. A teammate opens that exact run from shared history and keeps going. No file handoffs. No version confusion.
For studios and enterprise teams, Floyo adds private workspaces, pooled resources, and a team usage dashboard. Other ComfyUI cloud tools run for one person at a time. Floyo runs for the whole team, with transparent per-generation costs.
Ready to try it?
Upload a photo of your object, add a second angle if you have one, and run it. The settings are already set.
Questions? Watch the free course or check the FAQ above.
Read more

_1783319220986.gif?width=400&height=300&quality=80&resize=contain&format=origin)