Bria for Virtual Try-On
Upload a person photo and up to three garment images. Bria's FIBO-Edit 1.5 model dresses the person in those clothes, keeping their pose, face, and background intact.
Bria
Image
Image to Image
Virtual Try-On
55
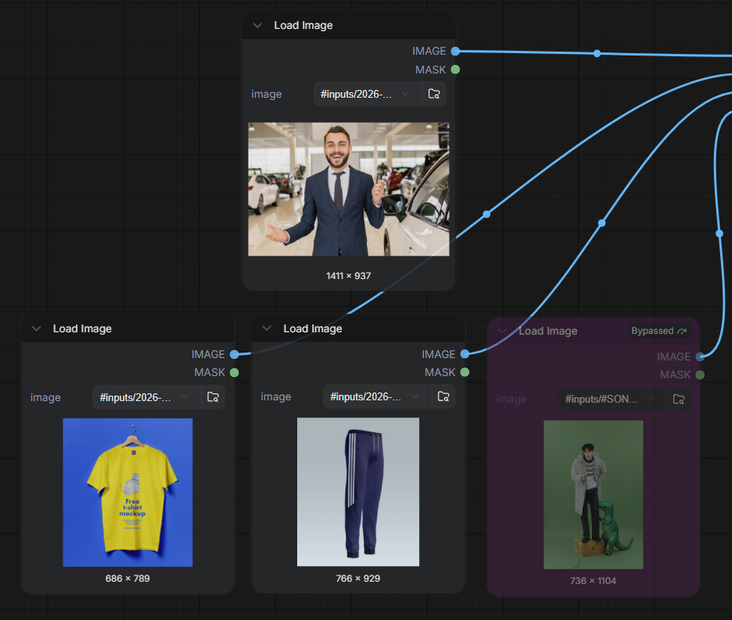


Nodes & Models
Bria_Virtual_Try_On_floyo
LoadImage
PreviewImage
ShowText|pysssss
ShowText|pysssss
ABOUT THE WORKFLOW
Try Clothes on a Photo
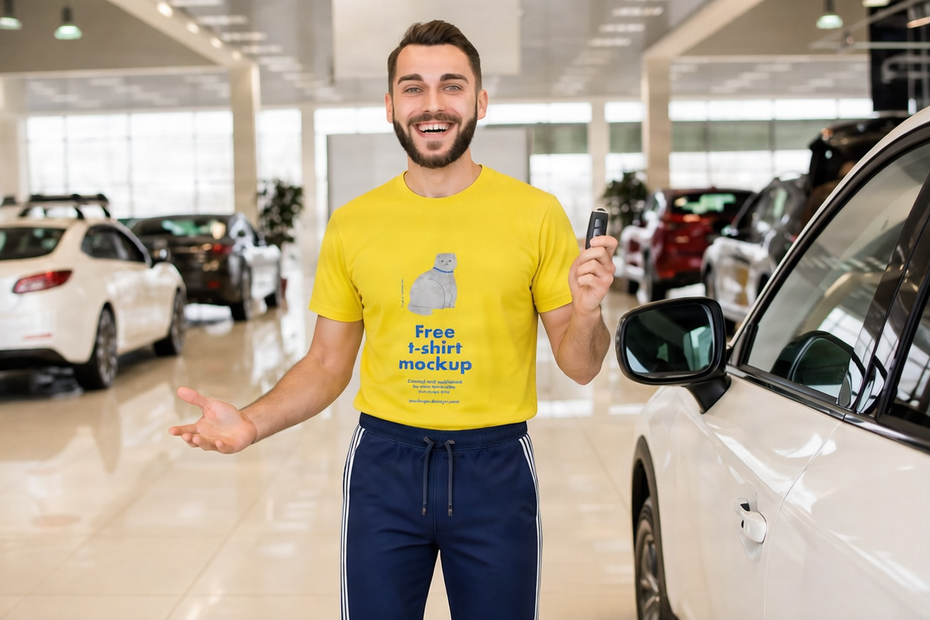
Upload a photo of a person and one to three garment images. The model figures out where each garment goes, redraws the person wearing the new clothes, and keeps their pose, face, and background intact. One image per run, previewed on screen.
Partner node. This workflow calls an external API, so each run uses credits from your API wallet. No API key needed. Floyo handles the connection.
Model
FIBO-Edit 1.5 by Bria AI. A multi-reference image editing model trained on 100% licensed data, purpose-built for virtual try-on and garment visualization.
HOW IT WORKS
Step 1. Upload a person photo
A photo of the person you want to dress. Full or half body, well-lit. The clearer the pose, the better the fit.
Works great with: full-body shots · half-body portraits · model photos
Step 2. Upload your garment
The main clothing item. A flat-lay or product photo on a clean background works best.
Works great with: flat-lays · product shots · clean backgrounds
Step 3. Add more garments (optional)
Add up to two more items, like a jacket, accessory, or second layer. Leave these empty for a single-garment swap.
Step 4. Write an instruction (optional)
Tell the model which garments to replace or keep. "Change the top" or "keep the pants, swap the jacket." Leave it blank and the model applies the garments on its own.
Step 5. Hit run and download
The model dresses the person and returns a single image. Preview it on screen, then download.
Ready for: Shopify · Photoshop · Figma · any e-commerce platform
First time? Leave every setting as-is. The defaults (auto aspect ratio, random seed) are the right starting point for almost everyone.
RECOMMENDED SETTINGS
Quick-start guide. Find the goal that matches yours and copy the settings.
Standard try-on (most people) — 1 garment · auto aspect ratio · random seed. Upload a person, upload a garment, hit run.
Full outfit change — Upload all three garment slots with a top, bottom, and jacket or accessory. Use the instruction field to tell the model the order: "replace the shirt, add the jacket, keep the shoes."
Reproduce a result you liked — Set the seed to a specific number. This locks the randomness so you get the same output every time.
Force a specific output shape — Switch aspect ratio from auto to the ratio you need. Auto preserves the person image shape, which is right most of the time.
Garment landing in the wrong place — Try a cleaner garment photo first. Flat-lays on a plain white background give the model the most to work with.
Model swapping the wrong item — Use the instruction field. "Change the top only" or "keep the pants, swap the jacket" tells the model what to leave alone.
Prompt: The instruction field is optional and short. Tell the model what to swap and what to keep. "Replace the dress, keep the accessories" is clearer than "make it look different." If you use only one garment and no instruction, the model figures it out on its own.
LEARN
📹 Videos
ComfyUI 101 Free Course ft. Sebastian Kamph
Floyo 101 for Team Collaboration
✨ Quick links
USE CASES
🛍️ E-Commerce & Product Listings
Dress a model in every color and variant of a product without shooting each one. Upload a flat-lay of the garment and get a styled listing photo in seconds.
👗 Fashion Design & Lookbooks
Preview how a new design looks on a body before producing a sample. Swap garments across a single model shoot to build a full lookbook from one session.
🛒 Virtual Fitting Rooms
Let customers see how clothes look on a person before buying. Feed person and garment photos in and return a try-on preview for your storefront.
📱 Social Commerce & Content
Create styled outfit posts for social media or influencer campaigns without a full photo shoot. Swap pieces in and out to test combinations.
🏢 Catalog Production
Generate seasonal catalogs at scale. One person photo, dozens of garments, each rendered as a separate try-on. No reshoots, no studio time.
WHAT WORKS BEST / WHAT TO AVOID
✅ Works great
Full or half-body person photos with clear poses
Flat-lay garment images on plain backgrounds
Single-garment swaps (one item at a time)
Well-lit, front-facing person shots
⚠️ May produce softer results
Unusual or heavily occluded poses
Garments that need complex layering (multiple wraps, draping)
Busy or cluttered garment photos with patterned backgrounds
Tight crops that cut off the person at an awkward point
FAQ
What is Bria Virtual Try-On and how does it work?
Bria Virtual Try-On uses the FIBO-Edit 1.5 model to place garments from reference images onto a person in a photo. You upload a person photo and one to three garment images. The model figures out where each item goes, then redraws the person wearing the new clothes while keeping their face, pose, and background.
Can I try on multiple garments in one run?
Yes. The workflow accepts up to three garment images per run. Upload a top, a bottom, and a jacket or accessory, and the model applies all of them at once. For more than three items, run again with the next set.
Is Bria Virtual Try-On safe for commercial use?
Bria's models are trained on 100% licensed data from partners including Getty Images. Commercial use is available through their API, which is what this workflow calls. Outputs generated through the API carry commercial rights under Bria's terms. The open-source model weights on Hugging Face are non-commercial only.
What kind of garment photos work best for AI virtual try-on?
Flat-lay or product photos on a clean, plain background give the best results. The model needs to see the garment shape clearly. Avoid photos where the garment is wrinkled, folded, or shot on a busy background. A standard e-commerce product image is the ideal input.
How is Bria Virtual Try-On different from other AI try-on tools like IDM-VTON or OOTDiffusion?
Most open-source try-on models handle one garment at a time and require you to manage segmentation masks or category labels. Bria FIBO-Edit 1.5 takes up to three garments in a single pass, uses a text instruction to control what gets swapped, and does not need masks. It is also trained on licensed data, which matters for commercial production work.
Does the output preserve the person's face and body shape?
Yes. The model keeps the person's face, pose, body proportions, and background from the original photo. It redraws the clothing region to show the new garments, while leaving everything else intact.
How to run Bria Virtual Try-On online?
You can run Bria Virtual Try-On online through Floyo. No installation, no setup, no API key to wire up. Open the workflow in your browser, upload your inputs, and hit run. Free to try.
WHY FLOYO?
Floyo is the only platform with team collaboration for ComfyUI in the browser. You run workflows with no install. You share run history, assets, and models across your team. You pay only when you generate. Floyo supports open-source and closed-source models.
A designer runs an edit and likes the result. A teammate opens that exact run from shared history and keeps going. No file handoffs. No version confusion.
For studios and enterprise teams, Floyo adds private workspaces, pooled resources, and a team usage dashboard. Other ComfyUI cloud tools run for one person at a time. Floyo runs for the whole team, with transparent per-generation costs.
Ready to try it?
Upload a person photo, add a garment, and run it. The settings are already set.
Questions? Watch the free course or check the FAQ above.
Read more

_1786518453053.png?width=400&height=300&quality=80&resize=cover)