Musubi Tuner - Wan LoRA Trainer
Train Wan LoRAs directly on Floyo with this simple all-in-one custom node.
LoRA
Musubi Tuner
Training
Wan
4
487

Musubi Wan LoRA Trainer
Created by Floyo, powered by Kohya Musubi Tuner
Train Wan 2.2 LoRAs directly inside ComfyUI. No CLI, no external tools, no context switching. Just connect your models, point to your dataset, and press Queue.
NOTICE: Progress bar does not currently show in training node. Training on a dataset of 60 images or less should take approximately 1-2 hours depending on epoch count and settings.
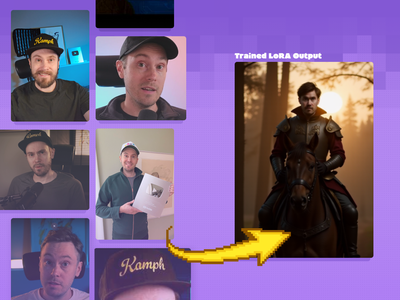
What if every video you generate could match a specific person, product, or style? That's exactly what training a LoRA does, and this workflow makes it as simple as possible.
Unlike other LoRA trainers that require dozens of nodes and complex wiring, the Musubi Wan Trainer handles the entire training loop in a single node. Three loader nodes feed in the DiT model, VAE, and text encoder, and the trainer takes care of the rest. All the defaults are already tuned for Wan 2.2, so most users only need to do two things: set your dataset path and name your LoRA.
Setting Your Dataset Path
Upload your dataset images into a folder inside your
#inputsdirectory using the Floyo file browser (click the middle folder button on the left side of your canvas).Right-click or use the three-dot menu on your dataset folder and select "Copy Path".
Paste the path directly into the
data_pathfield on the Musubi Wan Trainer node.
For example, if your dataset folder is inside #inputs, the path will look like:
#inputs/my_dataset
Note: If your dataset is stored in a non-input folder (like
#outputsor#models), use "Copy path as input" instead, which adds the(as-input)prefix automatically:(as-input)#outputs/my_datasetFiles inside
#inputsdon't need this prefix since they're already accessible as inputs.
Dataset Best Practices
The quality of your dataset is the single biggest factor in your LoRA quality. A small, well-curated set will always outperform a large, sloppy one.
How Many Images?
15 to 25 images is the sweet spot for character and subject LoRAs.
As few as 9 images can work if they're high quality and varied.
For style LoRAs, aim for 30 to 50 images to capture the full range of the style.
More is not always better. Adding low-quality images actively hurts your results.
What Makes a Good Training Image?
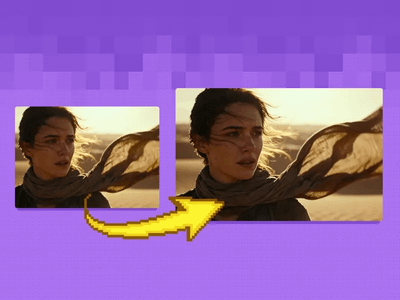
High resolution - 1024x1024 or larger is ideal. The node handles bucketing automatically, but higher-quality source images give better results.
Sharp and clean - no blur, no compression artifacts, no noise.
No watermarks or text overlays - the model will learn these as part of the concept.
Single clear subject - avoid cluttered frames with multiple people or objects competing for attention.
Consistent exposure and white balance - if half your images are dark and warm, the LoRA will bake that in.
Diversity Is Key
Vary your angles: front, side, three-quarter, from above, from below.
Vary your lighting: natural light, studio light, warm, cool, dramatic, soft.
Vary poses and expressions: don't just use the same headshot 20 times.
Include non-portrait shots: environmental shots, hands, partial body. This prevents the model from locking into one composition.
Mix your backgrounds: if every image has the same backdrop, the model will associate your subject with that specific setting.
What to Avoid
Blurry or out-of-focus images
Heavy filters, HDR processing, or AI-upscaled artifacts
Near-duplicate images (slight crop variations of the same photo)
Extreme distortion or unusual lens effects
Mixing wildly different styles in one dataset (e.g., photos + illustrations)
Captioning Your Images
Each training image can have an optional caption stored in a .txt file with the same filename:
my_dataset/
  image01.png
  image01.txt
  image02.png
  image02.txt
Don't want to caption manually? Use the Detailed Auto Caption workflow to generate captions for your entire dataset automatically.
Caption Tips
For character LoRAs: Start simple. You may not need captions at all. Wan often learns identity well without heavy captioning. Add captions only if you need more control over what the model learns.
If you do caption, keep it descriptive and factual:
zxqperson, woman with long dark hair, blue denim jacket, standing in park, natural lightingUse a unique trigger word - a short nonsense token like
zxqpersonorfloyocharworks best. Avoid real words that might collide with the model's existing vocabulary.Don't over-describe mood or aesthetics - words like "moody," "cinematic," "cozy," or "ethereal" get amplified by the model and become hard to escape at inference time.
Stay consistent - use the same caption structure across all images so the model has a clear pattern to learn from.
Workflow Layout
This workflow uses three loader nodes connected to the Musubi Wan Trainer:
Musubi DiT Loader - loads the Wan 2.2 DiT model (
wan2.2_t2v_low_noise_14B)Musubi VAE Loader - loads the Wan 2.1 VAE (
wan_2.1_vae.safetensors)Musubi Text Encoder Loader - loads the T5 text encoder (
t5_umt5-xxl-enc-bf16.pth)
All three connect into the trainer node, which handles everything else. The models are preloaded on Floyo, so no downloads or manual setup needed.
Supported Task Types
The Musubi Wan Trainer supports multiple training tasks across Wan 2.1 and Wan 2.2. The task setting on the trainer node determines which type of training is performed, and each task requires specific models to be loaded.
All tasks require the T5 text encoder (umt5-xxl-enc) and the Wan 2.1 VAE (wan_2.1_vae.safetensors). The DiT model and whether CLIP is needed depends on the task.
Wan 2.1 Tasks
t2v-1.3B- Text to video (1.3B). Useswan2.1_t2v_1.3BDiT. No CLIP needed.t2v-14B- Text to video (14B). Useswan2.1_t2v_14BDiT. No CLIP needed.i2v-14B- Image to video (14B). Useswan2.1_i2v_14BDiT. Requires CLIP vision encoder (open-clip-xlm-roberta-large-vit-huge-14).t2i-14B- Text to image (14B). Useswan2.1_t2i_14BDiT. No CLIP needed.
Wan 2.2 Tasks
t2v-A14B- Text to video (14B active, MoE). Useswan2.2_t2v_low_noise_14BDiT, with optionalhigh_noisemodel. No CLIP needed.i2v-A14B- Image to video (14B active, MoE). Useswan2.2_i2v_low_noise_14BDiT, with optionalhigh_noisemodel. No CLIP needed.
Important: I2V tasks (
i2v-14Bandi2v-A14B) require video clip datasets, not standalone images. The I2V training pipeline uses the first frame of each clip as a conditioning image, so a plain image dataset will fail with alatents_imageerror. If you're training with images, use a T2V task instead. T2V LoRAs generally work well for both T2V and I2V inference.
Note on Wan 2.2 Dual-Model Training: Wan 2.2 uses a Mixture-of-Experts architecture with separate high-noise and low-noise DiT models. You can train on just the low-noise model (which is the default and recommended starting point), or train both models using the same dataset. When training only the low-noise model, the resulting LoRA will still work at inference time, the high-noise model just won't have learned your concept.
A Note on Video Datasets
While the Musubi Wan Trainer supports video clip datasets in addition to images, we strongly recommend starting with image datasets. Image-based training is faster, more cost-effective, and produces excellent results for character and style LoRAs, even though the output model generates video.
Video dataset training requires significantly more compute time and FloTime. A training run that takes 1-2 hours with images can take many hours or even days with video clips, depending on clip count, resolution, and frame length. The costs scale accordingly, and longer training runs leave less room for the iteration that good LoRA training usually requires. Most users find that 2-4 training attempts are needed to dial in the right settings, and that's much more practical at image training speeds and costs.
If you do train with video clips, keep them short (9-25 frames), use a small dataset, and save checkpoints frequently so you can evaluate progress without committing to a full run.
Node Settings
The defaults are already optimized for Wan 2.2 LoRA training. Here's what each setting does if you want to fine-tune:
task(default:t2v-A14B) - Training task type. Leave this as default for Wan 2.2 text-to-video.data_path(no default) - Path to your dataset folder (the only required change).output_dir(default:#models/loras) - Where your trained LoRA is saved.output_name(default:floyo_wan_lora) - Name of your output file (change this!).resolution(default:848,480) - Training resolution.batch_size(default:1) - Images processed per training step.max_train_epochs(default:16) - Number of full passes through your dataset.save_every_n_epochs(default:0) - Save intermediate checkpoints (0 = only save final).learning_rate(default:0.00010) - How fast the model learns. Lower is more stable.network_dim(default:16) - LoRA rank. Higher captures more detail but creates a larger file.discrete_flow_shift(default:0.0) - Flow matching shift value. Leave at default unless you know what you're doing.gradient_checkpointing(default:false) - Trades speed for lower memory usage.fp8_base(default:false) - Use fp8 precision for the base model.blocks_to_swap(default:0) - Offload transformer blocks to CPU to save GPU memory.target_frames(default:81) - Number of frames the model targets per training sample.frame_extraction(default:head) - How frames are extracted from training data.
Quick Tuning Tips
Want more detail? Try
network_dimat32instead of16. File size increases but the LoRA can capture finer features.Training too fast / overfitting? Lower the
learning_rateto0.00005or reduce epochs.Want to compare checkpoints? Set
save_every_n_epochsto1so you can test each epoch's output and pick the best one.Running out of memory? Enable
gradient_checkpointingand try settingblocks_to_swapto offload some transformer blocks to CPU.
Running the Workflow
Set your dataset path in the
data_pathfield.Name your LoRA in the
output_namefield.Press Queue and let it train.
That's it. Your trained LoRA will be saved to #models/loras/ and is ready to use immediately with any Wan 2.2 generation workflow.
Using Your Trained LoRA
Once training is complete, load your LoRA using a LoRA Loader node in any Wan 2.2 workflow. If you used a trigger word in your captions, include it in your prompt to activate the learned concept.
Start with a LoRA strength of 0.7 to 0.8 and adjust from there. If the output looks too locked in to your training data, reduce the strength. If the concept isn't showing up enough, increase it.
Read more